Last updated on
Discover the transformative power of painting gloss kitchen cabinets as we guide you through a step-by-step process to achieve a stunning and durable finish.
Are you tired of the outdated look of your kitchen cabinets? Do you want to give them a fresh new look without breaking the bank? Painting your kitchen cabinets may just be the solution you’re looking for. But what if your cabinets are made of glossy material? Can you still paint them? In this article, we’ll explore whether or not it’s possible to paint gloss kitchen cabinets and provide tips on how to achieve a professional-looking finish.
So, let’s get started!
What's Inside
Types of Gloss Paint for Cabinets
When it comes to painting gloss kitchen cabinets, choosing the right type of paint is crucial for achieving a durable and long-lasting finish. There are two main types of gloss paint: oil-based and water-based.
Oil-based paints have been traditionally used for painting cabinets due to their durability and resistance to wear and tear. They also provide a high-gloss finish that can make your cabinets look brand new.
However, they tend to take longer to dry than water-based paints, emit strong fumes during application, require mineral spirits or turpentine for cleanup, and may yellow over time.
Water-based or latex paints are becoming increasingly popular as an alternative option due to their quick drying time (usually within 24 hours), low odor during application, easy cleanup with soap and water, non-yellowing properties over time compared with oil based-paints. Water-Based Gloss Paints come in different sheens such as High-Gloss which provides the most shine but shows imperfections more easily; Semi-Gloss which has less shine but still reflects light well; Satin Finish which offers subtle sheen while hiding minor flaws better than higher-gloss finishes.
Pros and Cons of Gloss Kitchen Cabinets
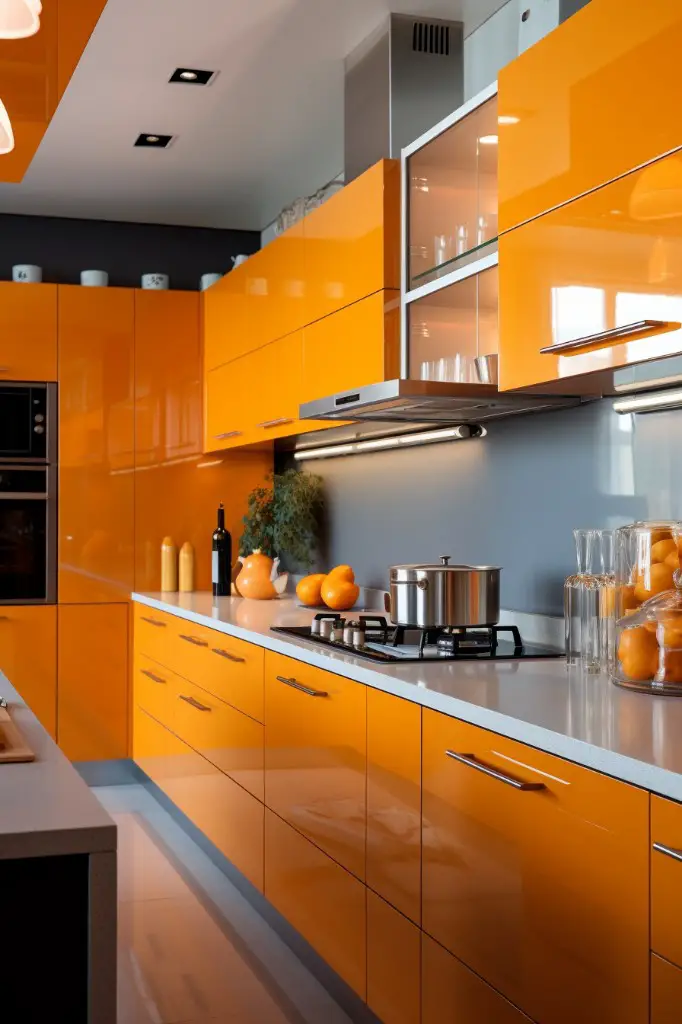
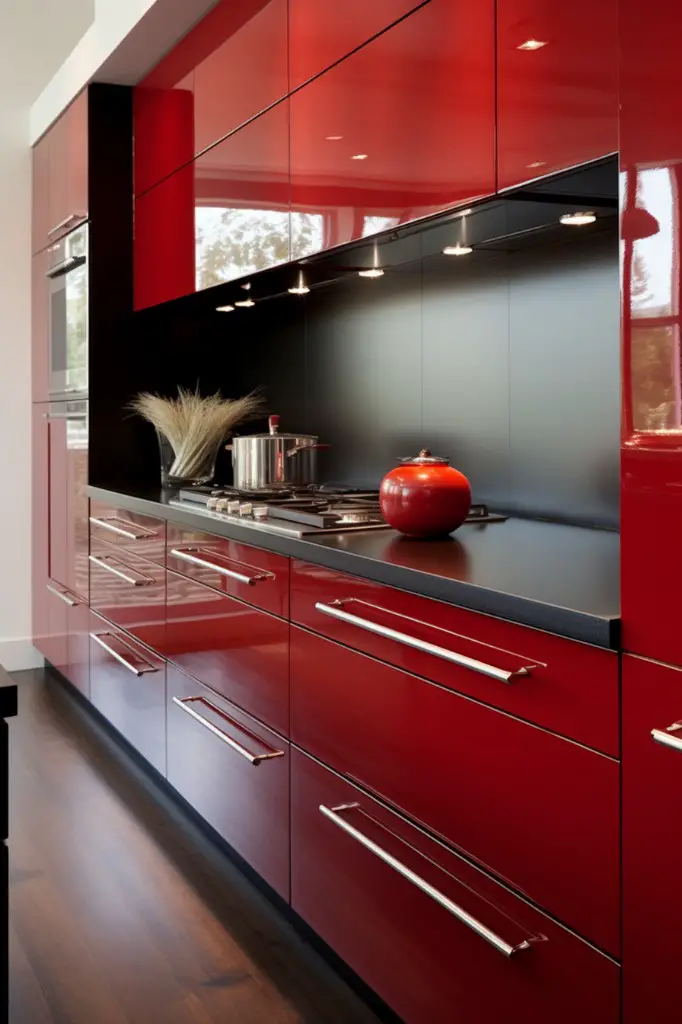
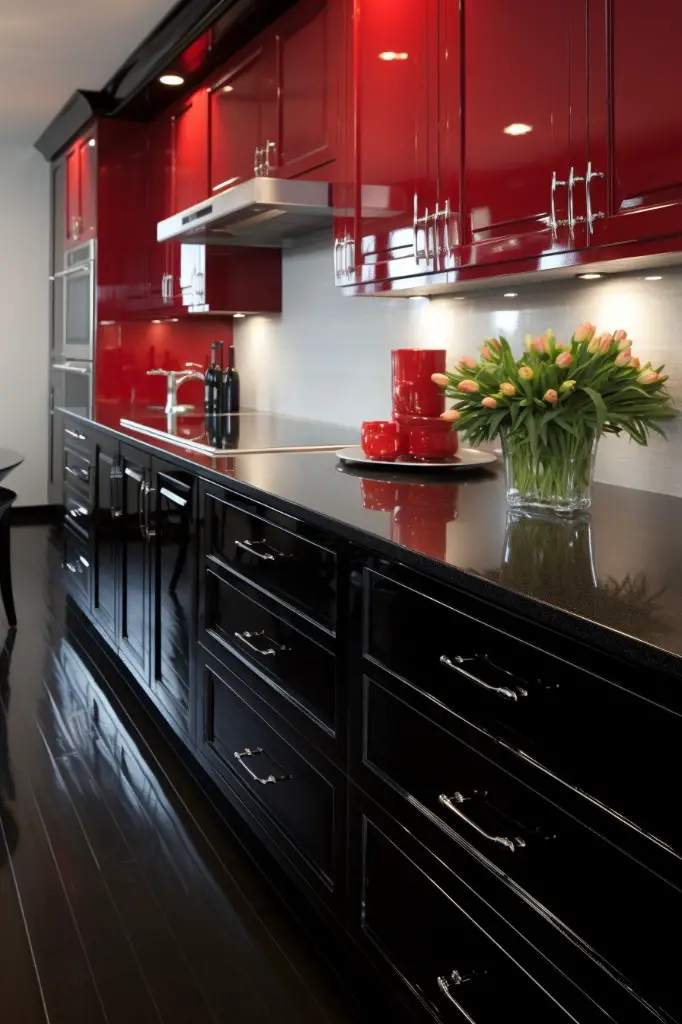
Glossy finishes have become increasingly popular in recent years due to their sleek and modern appearance. However, before you decide whether or not gloss kitchen cabinets are right for you, it’s important to consider the pros and cons.
Pros:
- Reflective surface: Glossy surfaces reflect light better than matte surfaces which can make your space appear brighter.
- Easy cleaning: The smooth surface of gloss cabinets makes them easier to clean as dirt and grime don’t stick as easily.
- Durable finish: High-gloss paint is more durable than other types of paint because it contains more resins that help protect against scratches and stains.
Cons:
- Scratches show up easily: While high-gloss paints are generally more durable, they do tend to show scratches much easier than other types of paint finishes.
- Fingerprints visible: Because glossy surfaces reflect light so well fingerprints can be very noticeable on these types of cabinet doors
- More expensive option: High-quality glossy paints tend to be pricier compared with other options like satin or eggshell finish
Preparing Cabinets for Painting
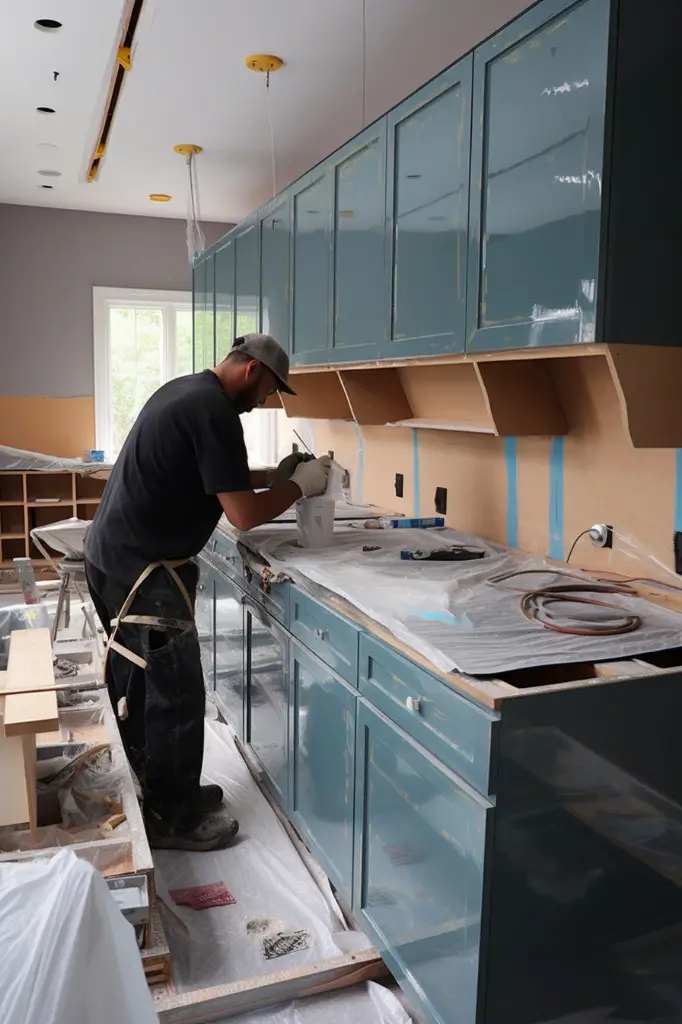
This will ensure that the paint adheres well and lasts for a long time. The first step is to remove all cabinet doors and hardware such as handles, knobs, hinges, etc.
Place them in a safe place where they won’t get lost or damaged.
Next, clean the surfaces of your cabinets thoroughly with warm soapy water or a degreaser solution to remove any dirt or grease buildup that may have accumulated over time. Be sure to rinse off any cleaning residue with clean water and let dry completely before proceeding.
Once your cabinets are dry, sanding is necessary if there are existing finishes on the surface of the woodwork like varnish or lacquer which can prevent new paint from sticking properly. Use fine-grit sandpaper (120-220 grit) for this purpose until you achieve an even surface texture throughout all areas being painted.
After sanding comes priming; apply primer evenly using either spray cans (if available) or brushes/rollers depending on preference while ensuring complete coverage without leaving brush marks behind – this helps create an adhesive layer between old finish & new coat of paint thereby improving adhesion & durability.
Choosing the Right Gloss Paint
There are several types of gloss paints available, each with its own unique properties and benefits.
When selecting a gloss paint for your cabinets, consider the level of sheen you want to achieve. High-gloss paints offer maximum shine and reflectivity but can also highlight imperfections in the surface.
Semi-gloss or satin finishes provide a more subtle shine while still being durable enough for high-traffic areas like kitchens.
Another important factor to consider when choosing a gloss paint is its durability and resistance to wear and tear. Look for paints that are specifically formulated for use on cabinetry as they will be more resistant to chipping, peeling, fading or yellowing over time.
Take into account any environmental concerns you may have when selecting your paint brand – some brands offer low VOC (volatile organic compound) options which emit fewer harmful chemicals during application than traditional oil-based products.
Tools and Materials Needed
Here’s what you’ll need:
1. Paintbrushes: Choose high-quality brushes that are suitable for the type of paint you’re using.
2. Rollers: A foam roller is ideal for painting flat surfaces, while a microfiber roller works well on textured or uneven surfaces.
3. Sandpaper: You’ll need sandpaper in various grits to smooth out any rough spots on your cabinets before painting.
4. Primer: Use a primer specifically designed for glossy surfaces to ensure proper adhesion and durability of the topcoat.
5. Gloss Paint: Choose an oil-based or water-based gloss paint depending on personal preference and budget constraints.
6. Painter’s Tape: This will help protect areas around the cabinet that should not be painted such as walls, countertops, handles etc.
7. Cleaning Supplies: Degreaser, TSP (Trisodium Phosphate) solution , rags etc.
Removing Cabinet Doors and Hardware
This will make the painting process much easier and ensure that you achieve a smooth finish. To remove the doors, use a screwdriver to loosen the screws on each hinge.
Once all of the screws have been removed, gently lift off each door and set them aside in a safe place.
Next, take off any knobs or handles using either a screwdriver or drill depending on how they are attached. Be sure to keep all of these small pieces together in one location so that they don’t get lost during this process.
Removing cabinet doors and hardware may seem like an unnecessary step but trust us when we say it will save you time in the long run! By taking this extra step before starting your project, you’ll be able to paint every inch of your cabinets without worrying about getting paint on hinges or doorknobs.
Cleaning and Degreasing Cabinets
Over time, grease and grime can build up on the surface of your cabinets, making it difficult for paint to adhere properly. To ensure a smooth finish that lasts longer, follow these steps:
- Remove all cabinet doors and hardware.
- Mix warm water with a mild detergent or dish soap in a bucket.
- Dip a sponge or cloth into the soapy water solution and wring out excess liquid.
- Wipe down all surfaces of each cabinet door thoroughly with the damp sponge/cloth until they are free from dirt and grease buildup.
- Rinse off any remaining soap residue using clean water
- Dry each door completely before moving onto sanding.
Sanding and Priming Surfaces
Sanding and priming are crucial steps that will ensure a smooth and long-lasting finish. First, remove all cabinet doors and hardware so you can work on a flat surface without any obstructions.
Next, use sandpaper or an electric sander to roughen up the glossy surface of your cabinets. This step is essential because it allows the primer to adhere better to the surface.
Be sure not to oversand as this can damage or weaken your cabinets.
After sanding, wipe down all surfaces with a clean cloth or tack cloth to remove any dust particles left behind by sanding.
Now it’s time for priming! Choose a high-quality primer that is specifically designed for glossy surfaces like enamel paint or oil-based primer. Apply one coat of primer using either a brush or roller depending on which method works best for you.
Allow ample drying time before applying paint over the topcoat of dried prime layer; otherwise, there may be issues with adhesion between layers leading towards peeling off in future times.
Primer Selection and Application Tips
Primer helps the paint adhere better and provides a smooth surface for painting. When selecting a primer, choose one that is specifically designed for glossy surfaces and can block stains and tannins from bleeding through the topcoat.
When applying primer, use a high-quality brush or roller that is appropriate for the type of primer you’re using. Apply thin coats in even strokes, making sure not to leave any drips or bubbles behind.
Allow each coat of primer to dry completely before adding another layer.
It’s important not to rush this step as proper priming will ensure an even finish on your cabinets once painted with gloss paint.
Applying Gloss Paint to Cabinets
Before applying the paint, make sure that you have a clean and dust-free workspace. You can use a drop cloth or old newspapers to protect your floors from any drips or spills.
When applying gloss paint to cabinets, it’s important to work in thin layers rather than one thick coat. This will help prevent drips and ensure an even finish.
Use a high-quality brush or roller designed for glossy surfaces for best results.
Start by painting the edges of each cabinet door before moving on to larger areas like panels and flat surfaces. Work in long strokes following the grain of the wood if applicable.
Allow each layer of paint ample drying time before adding another coat – this is usually indicated on your specific type of gloss paint but typically ranges between 2-4 hours per coat depending on humidity levels etc.
Should I Spray Paint Gloss Kitchen Cabinets?
Spray painting can give a smooth and even finish, but it requires more preparation and equipment than traditional brush or roller methods. If you have experience with spray painting or are willing to learn, then this method may be worth considering.
However, if you’re new to DIY projects or don’t want the hassle of setting up a spray booth and cleaning up overspray afterward, then stick with brushing or rolling on your paint. It’s also important to note that spraying requires more ventilation due to fumes from the aerosol cans.
Ultimately, whether you choose spraying as your method of application will depend on personal preference and skill level.
What Type of Roller Should I Use?
The type of roller you use will depend on the size and shape of your cabinets, as well as personal preference.
For larger flat surfaces such as cabinet doors or drawer fronts, a foam roller is recommended because it leaves fewer streaks than other types of rollers. Foam rollers also tend to hold more paint which means less dipping into the tray.
On smaller areas like trim or edges where precision is key, opt for a mini-roller with synthetic fibers that can reach tight spaces without leaving brush marks.
It’s important to note that using cheap or low-quality rollers may result in an uneven finish with bubbles and drips. Investing in high-quality tools will save you time and money in the long run by ensuring professional-looking results.
Drying Time and Reassembly
Drying times can vary depending on factors such as humidity and temperature, but generally speaking, it takes about 24-48 hours for gloss paint to fully cure.
During this time, avoid touching or using the cabinets in any way that could damage the finish. Once they’re dry and cured, you can reattach cabinet doors and hardware.
When reassembling your newly painted kitchen cabinets, take care not to scratch or chip the fresh paint. Use a soft cloth or towel when handling cabinet doors and hardware during installation.
It’s also important not to rush through this process – take your time with each step so that you don’t accidentally damage any part of your new glossy finish.
Tips for a Smooth and Durable Finish
Here are some tips:
- Avoid touching or using the cabinets for at least 24 hours after painting.
- Use high-quality brushes or rollers designed for gloss paints.
- Apply thin coats of paint rather than one thick coat.
- Sand lightly between each coat of paint with fine-grit sandpaper (220 grit).
- Allow each coat of paint to dry completely before applying another layer.
- Consider adding a clear topcoat over the final layer of gloss paint for added protection and shine.
Comparing Gloss to Other Paint Finishes
Gloss is just one of them. Other popular options include satin, semi-gloss, and matte finishes.
Satin finish has a slight sheen that’s less shiny than gloss but still reflects light well. It’s a good choice for those who want some shine without going overboard.
Semi-gloss finish is shinier than satin but not as reflective as gloss. It provides a smooth and durable surface that resists moisture and stains well.
Matte finish has no shine at all and absorbs light instead of reflecting it like the other finishes do. This makes it ideal for hiding imperfections on surfaces such as walls or ceilings.
Compared to these other paint finishes, gloss offers the highest level of reflectivity which can make your cabinets stand out in any room lighting condition while also being easy-to-clean due to its hard-wearing nature. However, keep in mind that high-gloss surfaces tend to show scratches more easily compared with lower-sheen alternatives like satin or matte.
Maintaining Gloss Kitchen Cabinets
Here are some tips on how to care for your newly painted cabinets:
1. Avoid harsh chemicals: Abrasive cleaners and solvents can damage the finish of your gloss cabinets over time.
Instead, use a mild soap and water solution or a specialized cabinet cleaner.
2. Wipe spills immediately: Gloss paint is durable but not impervious to stains or scratches caused by acidic substances like vinegar or lemon juice.
3. Use soft cloths: When cleaning the surface of your glossy kitchen cabinets, avoid using abrasive sponges that could scratch the surface; instead opt for microfiber cloths which are gentle yet effective at removing dirt and grime.
4. Don’t slam doors shut: Slamming cabinet doors can cause chips in the paint finish over time so be sure always close them gently.
5. Regular Cleaning Schedule: Regularly clean dust from surfaces with a dry cloth as well as wiping down with warm soapy water every few weeks will keep them looking their best.
Potential Problems and Solutions
One common issue is paint peeling or chipping off after application. This can happen if the surface was not properly cleaned and prepared before painting or if low-quality paint was used.
Another problem you may encounter is brush marks or uneven coverage on your cabinets. To avoid this, make sure you use high-quality brushes and rollers designed for gloss paints and apply thin coats with even strokes.
If you notice bubbles forming in the paint as it dries, this could indicate that there is moisture trapped underneath. In this case, allow more time for surfaces to dry completely before applying additional coats of paint.
Some homeowners have reported discoloration over time when using certain types of gloss paints on their cabinets. To prevent this from happening, choose a high-quality brand with UV protection properties specifically formulated for use on cabinetry.
Caring for Your Newly Painted Gloss Cabinets
Here are some tips for caring for your newly painted cabinets:
1. Avoid harsh chemicals: Abrasive cleaners and solvents can damage the paint on your cabinets, so it’s best to avoid using them altogether.
2. Clean regularly: Regular cleaning with a soft cloth or sponge and mild soap will help keep dirt and grime from building up on the surface of your cabinets.
3. Use coasters: To prevent water rings or other stains from forming on cabinet surfaces, use coasters under glasses and cups.
4. Handle with care: Be gentle when opening and closing cabinet doors as rough handling can cause scratches or chips in the paint over time.
5. Touch-up as needed: If you do notice any nicks or scratches in the paint over time, touch them up promptly with matching paint to prevent further damage.
By following these simple steps, you’ll be able to enjoy your newly painted gloss kitchen cabinets for years to come!
FAQ
Can I paint over gloss cabinets?
Yes, you can paint over gloss cabinets, updating them with a new matt or satin finish for a refreshed look.
Can you paint high gloss laminate kitchen cabinets?
Yes, you can paint high gloss laminate kitchen cabinets using self-priming, self-levelling, and self-sealing paint, which provides excellent coverage and a robust finish.
How do you remove gloss from kitchen cabinets?
To remove gloss from kitchen cabinets, use a hairdryer on the hottest setting to melt the laminate adhesive and start peeling the laminate off from a corner.
What type of primer is best for preparing gloss kitchen cabinets for painting?
The best type of primer for preparing gloss kitchen cabinets for painting is an oil-based or water-based bonding primer.
How can I ensure a smooth finish when painting over gloss kitchen cabinets?
To ensure a smooth finish when painting over gloss kitchen cabinets, lightly sand the surface, apply a high-quality primer, and use a foam roller for even paint application.
What are the recommended paint types and techniques for painting gloss kitchen cabinets?
Recommended paint types and techniques for gloss kitchen cabinets include using high-quality acrylic paint and applying it with a foam roller or fine bristle brush for a smooth finish.


