Last updated on
Learn how to make a crochet towel topper with this easy step-by-step guide to add a functional and decorative touch to your kitchen towels.
Ever find yourself wishing your kitchen towels had a bit more pizzazz? Welcome to the quirky, delightful world of crochet towel toppers! Imagine seamlessly pairing function with flair as you craft these charming toppers using foolproof materials and stitches. From attaching the towel to adding a hanging loop and even crafting your own button, dive into our easy tutorial that covers everything. Get ready to crochet a splash of personality into your kitchen—no dropped stitches here!
Key takeaways:
- Use cotton yarn for durability.
- Master single and double crochet stitches.
- Secure towel to topper with running stitch.
- Create hanging loop for functionality.
- Add decorative trim for extra flair.
What's Inside
Materials Needed
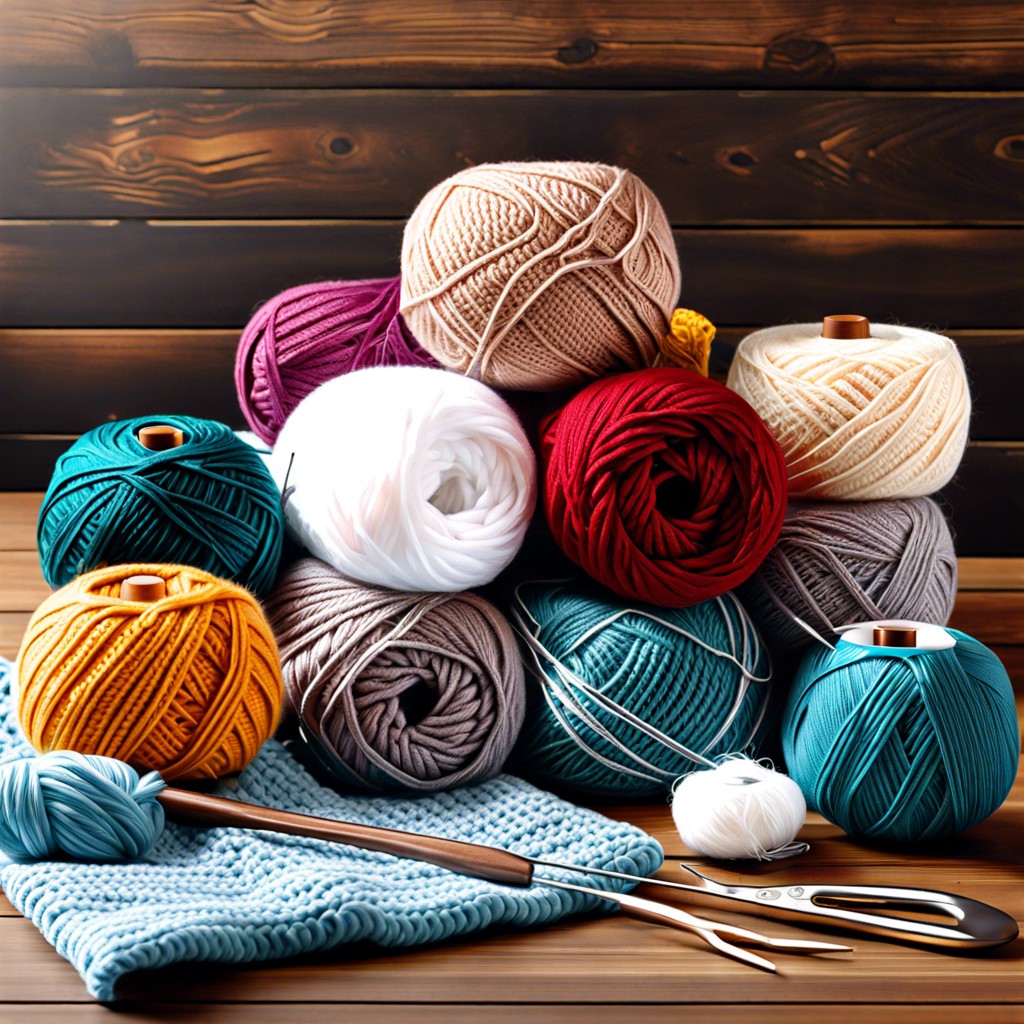
To get started, gather some basic tools and materials. First, you’ll need yarn. Cotton yarn works best because it’s durable and easy to wash. Pick a color that either matches or complements your towel; after all, you want it to be a stylish addition to your kitchen!
Next, grab a crochet hook. For most towel toppers, a 4.0 mm (G) hook should do the trick, but always check your yarn label for recommendations. You’ll also need a yarn needle for weaving in those pesky ends and a pair of scissors to snip them off.
Lastly, get yourself a button. You’ll need it to fasten the towel topper, keeping it neatly in place on your oven handle or hook. And if you’re feeling extra crafty, you can even crochet the button yourself.
That’s it – simple stuff! Ready to dive into the fun part?
Stitches Used
Mastering just a few basic stitches will make the entire process a breeze. The most common ones you’ll need are the single crochet and double crochet. If you can handle these, you’re already halfway there.
– Single Crochet: This is like the reliable friend who shows up and helps you move. Simple, dependable, and absolutely essential.
– Double Crochet: Think of this as the taller cousin of the single crochet. It adds height and drama to your work, kind of like wearing heels but for yarn.
– Slip Stitch: This is the sneaky ninja of stitches. It’s almost invisible but perfect for joining rounds or finishing off your work neatly.
With these fundamentals, you’re set to start adding flair to your plain kitchen towels and making them the pride of your kitchen.
Easy Crochet Towel Topper Tutorial
First things first, grab your crochet hook and yarn. Pick a yarn that’s not too thick but sturdy enough to hold up to kitchen chaos. Cotton yarn is a great option.
Start by creating a foundation chain. This will be the base of your topper and should be as wide as the towel. A good rule of thumb: usually about 20-25 stitches will do.
Once the chain is ready, work single crochets into each chain stitch. This forms the body. Do a few rows of single crochets until it’s around 4-6 inches long.
Now for the fun part – decreasing! To taper the top, start decreasing stitches every other row. This gives it that narrow top which fits snugly.
Remember to keep your tension even. No one likes a wonky towel topper, right? Adjust your stitches if things start looking a bit off.
Finally, crochet a sturdy loop for hanging. Simple chains and slip stitches work perfectly for this. And voila, you’re halfway there!
Don’t stress if it’s not perfect. It’s a towel topper, not the Mona Lisa. Keep it fun and practical.
Attaching the Towel
Ready to attach your towel? Let’s make sure it stays put through all the spills and thrills of kitchen life!
First, fold the top edge of your towel to fit snugly within the base of your crocheted topper. No weird towel bulges allowed!
Next, use a yarn needle and the same yarn you used for the topper to secure the towel. Sew through both the towel and the crocheted topper, ensuring the stitches are even. Think Goldilocks: not too tight, not too loose.
Pro tip: Use a running stitch for a neat, sturdy finish. It’s like the track star of stitches. Quick and reliable.
When you’ve made it to the end, knot the yarn securely but discreetly. We’re going for strong and stylish here, folks!
Finally, give the towel a gentle tug to ensure it’s firmly in place. No one wants a surprise kitchen floor wipe-down.
Adding the Hanging Loop
Now that the topper is attached, it’s time to create the hanging loop. This part is crucial for functionality and can add a decorative touch.
First, choose the spot for your loop. Typically, the center of your topper is best. This provides balance when the towel hangs.
Chain a length that matches your desired loop size. Commonly, 15-25 chains work well, depending on the button size and where it will hang.
Once you’ve made your chain, join it back to the point where you started the chain with a slip stitch. This forms the loop.
Check if the loop fits snugly over the button. If it’s too tight or too loose, adjust the chain length accordingly.
Give the loop a few tugs to ensure it’s secure. You don’t want it coming loose when you least expect it.
Voilà! Your crochet towel topper now has a handy hanging loop.
Making a Button
Use yarn that’s a contrasting color from your towel topper to add a fun twist.
- Start with a magic ring. Chain two, then make eight double crochets into the ring.
- Pull the ring tight to close the circle. Slip stitch into the first double crochet to join.
- Chain two again, then make two double crochets in each stitch around. You should have 16 stitches now.
- Slip stitch to join, fasten off, and leave a long tail for sewing.
Sew your button onto the towel topper using the yarn tail and a yarn needle. Voilà, your perfect button is ready!
Finishing Touches
Let’s add those extra details that make your crochet towel topper both functional and fabulous!
First, weave in any loose ends. This keeps everything tidy and prevents unraveling when you toss the towel in the wash. A yarn needle is perfect for this task. Just thread the ends through stitches on the back.
Consider adding a decorative trim around the edges. A simple scallop stitch can add a delightful touch. Just crochet a series of five double crochets in one stitch, skip a stitch, and single crochet in the next. Repeat around the edge.
If you want to get fancy, sew on some cute buttons, beads, or even tiny felt flowers. These can give your topper a bit of personality and make it stand out in your kitchen.
Finally, give it a good steam blocking. It helps to flatten and smooth out your stitches, giving a polished, professional look. Just hold a steam iron a few inches above your work and let the steam do its magic.
Voilà! Ready to hang and impress.
Troubleshooting Tips
Sometimes things don’t go as planned. Here are a few common issues and quick fixes:
– Uneven Stitches: If your stitches look wonky, it might be tension. Try to maintain a consistent grip on your yarn, not too loose, not too tight. Imagine holding a baby bird, gentle but secure!
– Towel Slips Out: If your towel keeps slipping through the topper, check if your attachment is tight enough. Reinforce it with a few extra stitches if needed. It’s like putting on a good belt, snug and steady.
– Struggling with the Loop: If making the hanging loop feels tricky, try using a bigger crochet hook just for that part. Going jumbo-sized for a bit can make it less fiddly.
– Button Woes: If your buttonhole doesn’t align with your button, measure twice, crochet once! Double-check your placement before cutting yarn. It’s like trying on shoes before buying.
Remember, every great chef burns the toast sometimes. Keep practicing and you’ll get that crochet towel topper just right.
Leave a Reply
Sure, you’ve wrapped up your crochet towel topper, and now you might have thoughts, tips, or questions bubbling up. This space is for you!
Got a crochet hack? Share it here. Found an easier way to attach the towel? Let us know. Facing a stitch dilemma? Ask away, and let the crochet community come to your rescue.
Your insights could help someone else take their project from “meh” to “wow!” Plus, who doesn’t love a good crochet story? Get typing and spread the yarn love!
Read More
 Is World Central Kitchen a Good Charity for Your Donation
 How to Prevent Cuts in the Kitchen: Your Hands Will Thank You
 15 Creative Ways on How to Display Cutting Boards
 How to Remove Kitchen Countertop: A Step-by-Step Guide to Revamp Your Space
 How Much Does It Cost to Rent a Commercial Kitchen: A Guide to Budget-Friendly Cooking Spaces