Last updated on
Discover the simple steps to effectively adjust your kitchen drawers for a well-organized and functional cooking space.
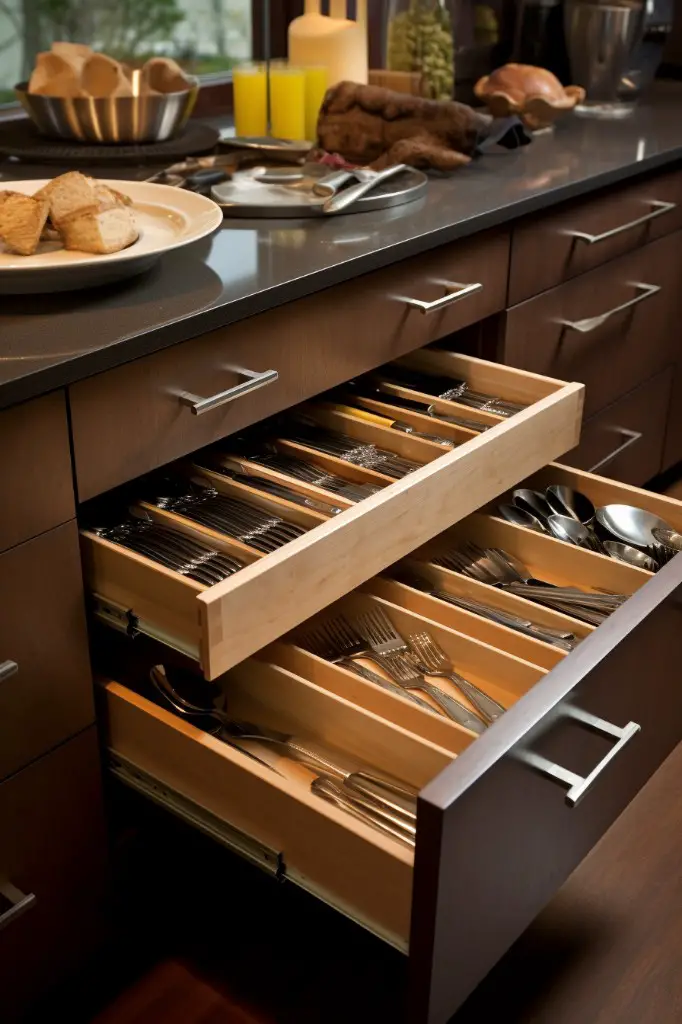
Kitchen drawers are one of the most frequently used components in any kitchen. They hold our utensils, pots and pans, and other cooking essentials.
However, over time, these drawers can become misaligned or stuck, making it difficult to access their contents. If you’re tired of struggling with your kitchen drawers or want to prevent them from getting out of whack in the first place, then you’ve come to the right place! In this article, we’ll show you step-by-step how to adjust your kitchen drawers so that they slide smoothly and efficiently every time.
So let’s get started!
What's Inside
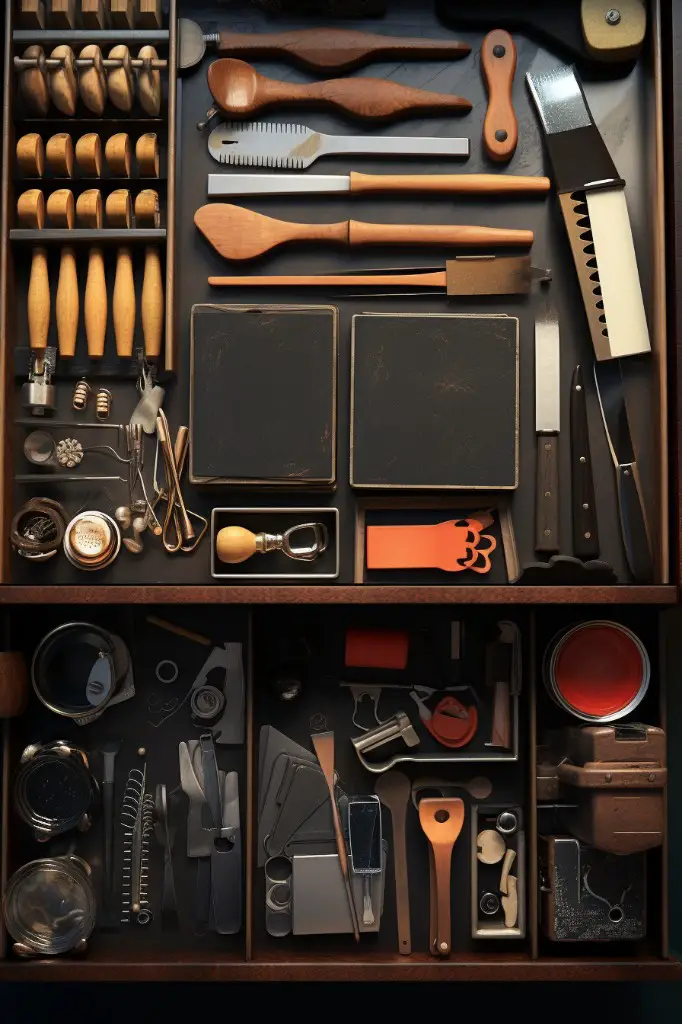
Types of Kitchen Drawers
Before we dive into the nitty-gritty of adjusting kitchen drawers, it’s important to understand the different types of drawers you may encounter in your kitchen. Knowing what type of drawer you have will help you determine which adjustment method is best suited for it.
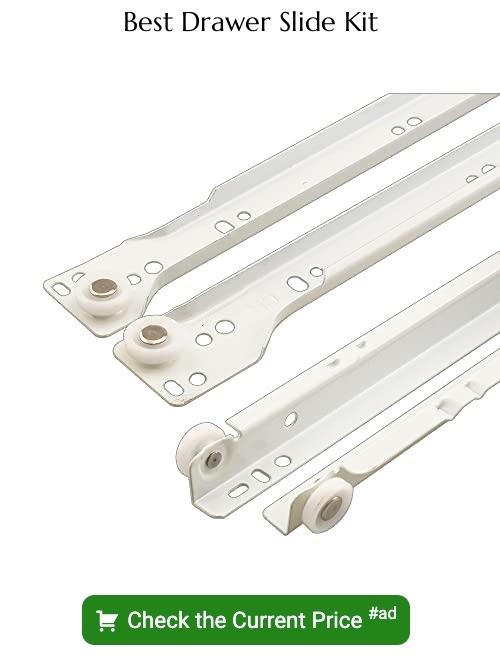
The most common types of kitchen drawers are side-mounted and bottom-mounted. Side-mounted slides attach to the sides or runners on either side of a drawer box, while bottom-mount slides attach underneath the box itself.
Another type is center mount slide where they mount under a central guide installed at mid-height inside each cabinet opening. These guides require more precision during installation but offer smoother operation than other options.
It’s also worth noting that some cabinets come with soft-close mechanisms built into their drawer glides, which prevent them from slamming shut when closed too quickly or forcefully.
Required Tools and Materials
Having everything on hand will make the process smoother and more efficient. Here are some of the items you’ll need:
1. Screwdriver: You’ll need a screwdriver to remove screws from drawer slides or handles.
2. Pliers: Pliers can be used for gripping small parts or bending metal components.
3. Level: A level is essential for ensuring that your drawers are straight and aligned correctly.
4. Lubricant spray: This will help lubricate any sticky drawer slides, making them easier to move in and out smoothly.
5. Replacement parts (if needed): Depending on what issues you find with your kitchen drawers, replacement parts such as new rollers or glide wheels may be required.
Preparing for Adjustment
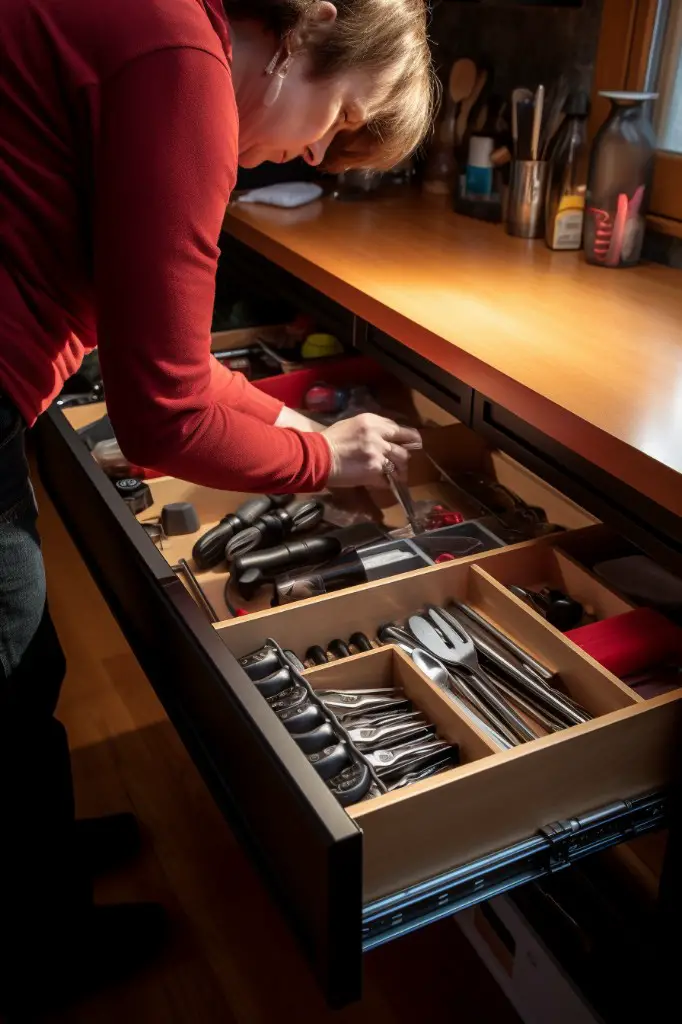
First, clear out all the contents of the drawer that needs adjustment. This will make it easier for you to access and work on the drawer without any obstructions in your way.
Next, gather all necessary tools and materials required for adjusting kitchen drawers such as a screwdriver (flathead or Phillips), pliers, lubricant spray or wax stick (optional), replacement rollers/guides/glides if needed.
It is also essential to ensure that there is enough light in your workspace so that you can see what you’re doing clearly. If possible, try working during daylight hours near a window or under bright lights.
Lastly, take safety precautions before starting any adjustments by wearing gloves and eye protection gear if necessary.
Assessing Drawer Issues

This will help you determine the best course of action and avoid making unnecessary adjustments.
One common issue with kitchen drawers is misalignment. If a drawer is crooked or tilting, it may be due to loose screws or rollers that need tightening or replacing.
Another issue could be a binding drawer that gets stuck when opening and closing, which can result from debris buildup in the tracks.
It’s also essential to check for any damage on the slides or glide wheels as they can cause problems with smooth operation. If your soft-close mechanism isn’t working correctly, this could indicate an issue with its adjustment.
Removing Kitchen Drawers
This step is essential for accessing the drawer slides and making any necessary adjustments. To remove a kitchen drawer, start by pulling it out as far as possible.
Then look for release tabs or levers on each side of the drawer near its glides or runners.
Press these tabs down while gently lifting up on the front of the drawer until it clears its track and comes free from its housing. If there are no visible release mechanisms, check if there are screws holding in place at either end that need removing before attempting to lift out.
Be sure to keep track of any screws or other hardware that come off with your drawers so that they can be easily reinstalled later on during reassembly.
Adjusting Drawer Slides
The first step is to locate the adjustment screws on each slide. These are usually located near the front of each slide and can be adjusted with a screwdriver.
To adjust your drawer slides, start by loosening these screws slightly. Then, move the slide up or down until it’s level with its corresponding partner on either side of your cabinet opening.
Next, tighten both screws back into place while holding onto your newly aligned drawer in position so that it doesn’t shift out of place again during use.
Repeat this process for all drawers that need adjusting until they’re all level and glide smoothly without any resistance or wobbling when opened or closed.
Remember not to overtighten as this could cause damage to both your drawers and their tracks over time.
Aligning Drawer Fronts
Misaligned or crooked drawer fronts can be an eyesore and make your kitchen look unorganized. To align them properly, start by loosening the screws that hold the front panel in place.
Then adjust it until it is level with adjacent drawers or cabinet doors.
Use a spirit level to ensure that you have aligned everything correctly before tightening all of the screws back into place. If you find that one side of your drawer front is higher than another, use shims made from cardboard or wood veneer to even things out.
Remember not to overtighten any screws as this could cause damage and lead to further issues down the line.
Fixing a Drawer That Binds At the Top
To fix this issue, start by removing the drawer from its cabinet and inspecting the glide wheels or slides for any damage. If they appear to be in good condition, then you can try adjusting them.
Firstly, loosen any screws that hold the glides in place and gently move them up or down until they are level with each other. Then re-tighten all of these screws securely.
Next step is to check if there’s enough clearance between both sides of your drawer box and cabinet opening while sliding it back into position after adjustment. If not enough space exists on one side than another side will bind again when closing fully which means more adjustments needed until everything fits perfectly without binding anywhere along its path!
Fixing a Drawer Glide Wheel That Derails
A drawer that falls out of the cabinet unexpectedly can cause injury or damage to your kitchen items. Fortunately, fixing a derailment issue is relatively simple.
To fix a drawer glide wheel that derails, start by removing the affected drawer from its cabinet. Inspect the wheels on both sides of the bottom of the drawer for any signs of wear or damage.
If they appear worn down or damaged in any way, replace them with new ones.
Next, check if there are any obstructions along either side of where each wheel runs on their respective tracks inside the cabinet’s frame; remove anything blocking these paths as necessary.
Fixing a Glide Wheel That Lifts Off the Rail
This can be caused by worn-out or damaged wheels, loose screws or brackets, or an unevenly distributed load in the drawer. To fix this issue and prevent further damage to your drawers and cabinets, follow these steps:
1. Remove the Drawer: Start by removing the affected drawer from its cabinet.
2. Inspect Glide Wheels: Check for any visible signs of wear and tear on both glide wheels.
3. Tighten Screws: If there are no visible damages on either wheel but they still lift off their rails when opening/closing them then tighten all screws holding them in place.
4. Replace Damaged Wheels: If one of more than one glide wheel is damaged beyond repair then replace it/them with new ones that match exactly what was previously installed.
5. Reinstall Drawer: Once you have replaced any broken parts or tightened loose screws/brackets re-install your kitchen drawers back into their respective cabinets making sure everything slides smoothly without lifting off again.
Adjusting Crooked Drawer Fronts
Crooked drawer fronts can occur due to uneven installation or wear and tear over time. To adjust them, start by removing the affected drawers from their slides.
Next, assess the extent of the misalignment and determine which screws need to be adjusted. You may need to loosen some screws while tightening others in order to straighten out the front of your drawers.
Once you have identified which screws need adjusting, use a screwdriver or drill with an appropriate bit size for each screw head type (Phillips or flathead) and turn them clockwise or counterclockwise as needed until they are tightened just enough without stripping any threads.
Adjusting Drawer Tilt
If you notice that your kitchen drawer tilts downward when it’s fully extended, then it’s time for an adjustment.
To fix this problem, start by removing the drawer from its cabinet. Then, inspect the slides on both sides of the drawer for any damage or wear and tear.
If they look good, use a level to check if one side of the slide is higher than the other.
If you find that one side is higher than another, adjust it by loosening screws on either end of each slide with a screwdriver until they are just loose enough to move up or down slightly. Use shims made out of cardboard pieces cut into small squares as needed under each slide until both sides are level again before tightening all screws back in place.
Tightening Loose Handles
Fortunately, tightening them is a quick and easy fix that doesn’t require any special tools or expertise.
To tighten loose handles on your kitchen drawers, start by locating the screws on the inside of the drawer front. Use a screwdriver to turn each screw clockwise until it’s snug against the handle.
If you find that one or more screws won’t tighten properly, try removing them completely and replacing them with slightly longer ones. This will give you more material to work with when threading in new screws.
Once all of your handle screws are tightened securely, test out your newly adjusted drawer for smooth operation. If everything feels good then congratulations! You’ve successfully tightened up those pesky loose handles!
Replacing Drawer Rollers
The rollers are small wheels that help guide the drawer along its tracks. Over time, these wheels can become worn or damaged, causing them to stick or wobble as they move.
To replace a roller, start by removing the drawer from its track and flipping it over so you can access the underside. Locate each roller and remove any screws holding it in place using a screwdriver.
Next, take note of how each roller is positioned on its bracket before removing it completely. This will make reinstallation easier later on.
Once all old rollers have been removed from their brackets underneath your kitchen drawers; install new ones in their place following manufacturer instructions carefully for proper alignment and positioning of hardware components such as washers or spacers if needed during installation process.
Tightening or Replacing Loose Screws
Tightening the screws can help stabilize the drawer and prevent further damage. To do this, remove the drawer from its slide and locate any loose screws on either side of the slide.
Use a screwdriver to tighten them until they are snug but not too tight.
However, if tightening doesn’t work or if you find stripped screws in your drawers’ slides, then replacing them might be necessary. You can purchase replacement parts at most hardware stores or online retailers.
Lubricating Drawer Slides
This is where lubrication comes in handy. Lubricating the drawer slides can help reduce friction and make them glide effortlessly.
To lubricate your drawer slides, start by removing the drawers from their cabinet. Then, clean the tracks with a damp cloth to remove any dirt or debris that may have accumulated over time.
Next, apply a small amount of silicone spray or paraffin wax to each side of the track where it meets with the roller or glide wheel. Be sure not to use too much lubricant as this can attract dust and debris which will eventually cause more problems down the line.
Once you’ve applied enough lubricant on both sides of each track, reinsert your drawers into their respective cabinets and test them out for smoothness.
Fixing Stuck Drawers
Fortunately, fixing stuck drawers is usually a simple process that requires only basic tools and materials. The first step is to remove the drawer from its housing by pulling it out as far as possible and lifting up on the front of the drawer until it clears the track.
Once removed, inspect both sides of each slide for any debris or damage that may be causing friction between them.
If there’s no visible obstruction or damage present but your drawers are still sticking, try applying some lubricant along both slides using either silicone spray or paraffin wax. This will help reduce friction between metal parts and allow for smoother movement.
Another common cause of stuck drawers is an uneven load distribution within them; if one side has more weight than another, this can cause binding when opening or closing the drawer. To fix this issue simply redistribute items in your kitchenware so they’re evenly distributed across all sides of each compartment.
Adjusting Soft-Close Mechanisms
They prevent slamming and ensure that the drawer closes smoothly and quietly. However, if your soft-close mechanism is not adjusted correctly, it can cause problems such as the drawer closing too slowly or not closing at all.
To adjust your soft-close mechanism, start by removing the drawer from its slides. Locate the adjustment screws on either side of the slide assembly near where it attaches to the cabinet frame.
Use a screwdriver to turn these screws clockwise or counterclockwise until you achieve your desired level of resistance when opening and closing.
It’s important to note that adjusting one side more than another can cause uneven movement or binding in operation; therefore, make sure both sides are adjusted equally for optimal performance.
Once you’ve made adjustments on both sides of each slide assembly, reattach them back into their respective positions within their cabinets before testing out how well they work with an empty load first then gradually add weight until fully loaded with utensils etc., ensuring everything works smoothly without any issues before returning items back inside again!
Balancing Loaded Drawers
One common issue that can arise is when a drawer becomes unbalanced due to uneven weight distribution. This can cause the drawer to stick or become difficult to open and close.
To balance loaded drawers, start by removing all items from the drawer. Then, assess how much weight each side of the drawer is carrying by placing your hands on either side of the bottom panel and lifting slightly.
If one side feels heavier than the other, redistribute items until both sides feel evenly weighted.
If you have heavy items in your kitchen drawers such as cast iron pans or large mixing bowls that cannot be easily redistributed for balancing purposes, consider investing in adjustable dividers or organizers designed specifically for heavy loads.
Safety Precautions While Adjusting Drawers
First and foremost, make sure that the drawer is empty before attempting any adjustments. This will prevent any items from falling out or getting damaged during the process.
Wear protective gloves to avoid cuts or scrapes while handling sharp tools and materials such as screwdrivers or pliers. If you’re working with heavy drawers, consider enlisting a helper to assist in lifting them out of their slots.
Be mindful of your posture while working on the floor or under counters for extended periods of time. Take breaks if necessary and stretch regularly to avoid muscle strain.
By following these simple safety guidelines when adjusting your kitchen drawers, you can ensure a smooth and safe experience without risking injury or damage to yourself or others around you.
FAQ
What are the steps to realign a misaligned kitchen drawer?
To realign a misaligned kitchen drawer, remove the drawer, adjust the glide screws or tracks, and reinsert the drawer correctly.
How can you replace old kitchen drawer slides with new ones?
To replace old kitchen drawer slides with new ones, remove the drawer, unscrew and detach the old slides, then attach and screw the new slides into place.
What tools and materials are needed to adjust the soft close mechanisms on kitchen drawers?
To adjust the soft close mechanisms on kitchen drawers, you will need a screwdriver and a measuring tape.


