Last updated on
Masterfully arranging artwork on your walls breathes life into a room, because every painting, photo or print adds a unique dimension to your personal space.
Key takeaways:
- Choose the right wall for your artwork’s focal point.
- Make a plan by visualizing and measuring the layout.
- Hang art at eye level, considering the space and sight lines.
- Consider furniture cohesion and scale when placing artwork.
- Create visual balance by distributing and aligning pieces.
What's Inside
Choose Your Wall
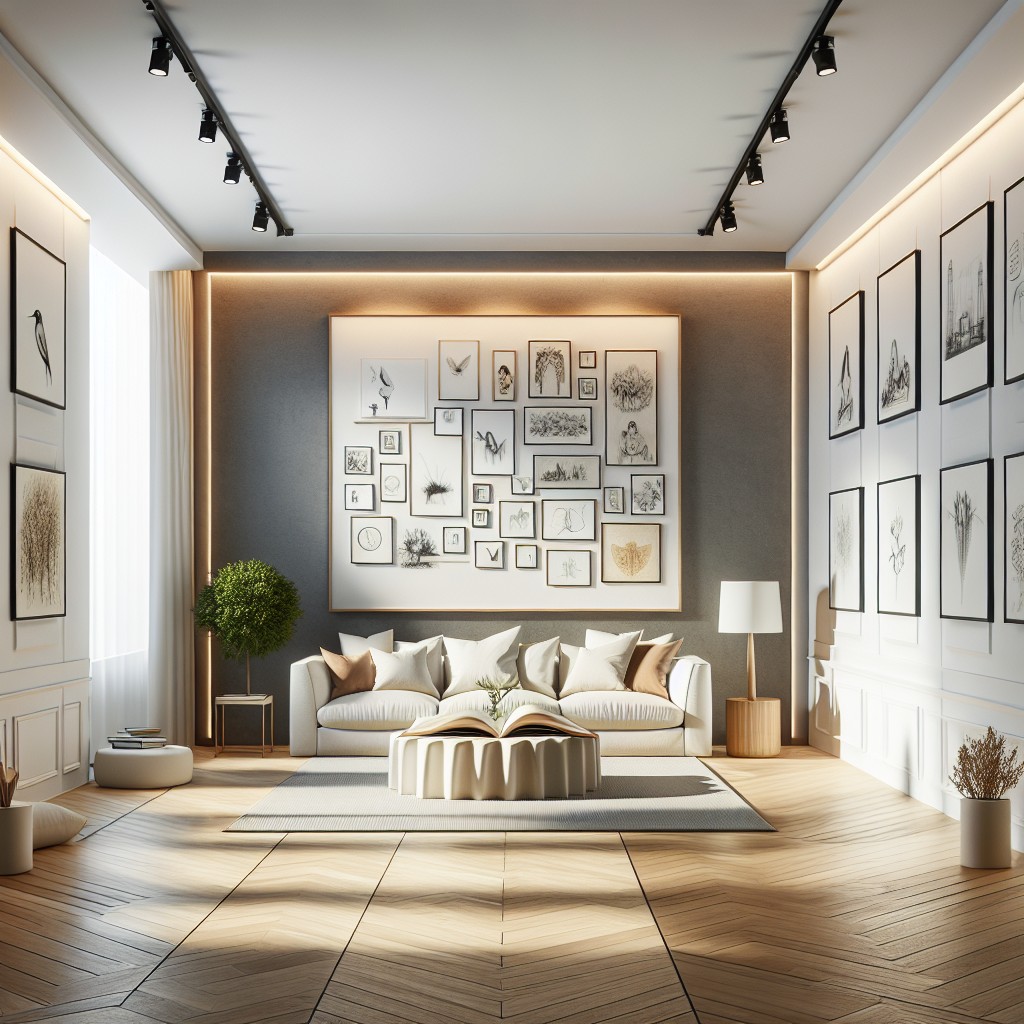
Selecting the right wall for your artwork is critical in creating a visually pleasing arrangement. Look for a spot where the art will be a focal point, such as an empty wall behind a sofa or dining table, or a larger wall that you see when entering a room.
Avoid walls with numerous doors or windows, as these can distract from the display. For smaller pieces, consider areas above side tables or shelves that can benefit from added interest. Walls with minimal architectural features are typically best, as they provide a clean canvas for your artwork.
Remember to choose a location where the artwork will be protected from direct sunlight to prevent fading.
Make a Plan
Before hammering a single nail, visualize the final look. Measure your wall space and the artwork, then map out the arrangement using paper cutouts or painter’s tape. This makes it easy to adjust without leaving unnecessary holes in the wall.
Another effective method is to lay your frames on the floor, rearranging until satisfied with the layout. Photograph your favorite arrangement to serve as a reference when you start the actual hanging process. For those who like to embrace technology, several apps allow you to preview art in your space digitally, giving you a sense of scale and design without physical labor.
Remember, the goal is to create harmony between your art pieces and the living space they’ll inhabit.
Hang Art At Eye Level
For a harmonious viewing experience, aim to position the center of your artwork approximately 57 to 60 inches from the floor, aligning with the average human eye level. This standard ensures the pieces can be enjoyed without the need to crane one’s neck or peer down.
When dealing with multiple pieces, treat them as a single unit. For a collection, find the visual center of the group and apply the same rule. In rooms where people are usually seated, such as dining areas or offices, adjust the eye-level rule to a seated position to align with sight lines.
In spaces with ceilings higher than the standard eight feet, resist the urge to hang pieces too high. Instead, keep artwork centered on the wall space rather than the wall height to maintain the eye-level rule. Remember, the art should connect with the inhabitants of the space, not just the architecture.
Consider the Furniture
When sizing up the perfect spot for your artwork, furniture plays a crucial role. Aim for cohesion—the art should feel like a natural extension or a complement to the pieces you have in the room.
Here are some concrete tips to mesh the two elements seamlessly:
- Above-the-sofa art should be about two-thirds the width of the sofa itself to create harmony without overwhelming the space.
- Allow around 6 to 8 inches between the top of the furniture and the bottom of the art, keeping pieces grounded and integrated.
- For larger items like credenzas or bookcases, consider flanking them with art to draw the eye upwards and add height to the room.
- Think about how the colors and themes in your artworks converse with those of nearby décor and furniture to ensure a cohesive aesthetic across your space.
- Don’t forget about scale; a small piece on a large wall can get lost, while a piece that’s too large can dominate a space and overshadow your furniture.
- Lastly, keep functional space clear—avoid hanging art where it might be obscured or risk being damaged by daily activities, such as behind a chair that’s frequently pulled out.
Aligning your artwork with your furnishings offers a thoughtful touch to your décor and ensures that each room feels balanced and inviting.
Tips for Arranging Wall Art
Consider the following tips to elevate the visual appeal of your wall art display:
- Rule of Thumbs: Keep a thumb’s width distance between frames to maintain uniformity and avoid a cluttered look.
- Level Up: Use a level to ensure your artwork is perfectly horizontal unless intentionally positioning it otherwise for a dynamic effect.
- Reflections on Light: Be aware of lighting and reflection; avoid placing art opposite large windows which might cast glare on glass frames.
- Consistent Themes: Stick to a consistent theme or color scheme within a group of artworks to create cohesion.
- Anchor Pieces: Begin with a central anchor piece and arrange other artworks around it.
- Odd Numbers: Groupings of three or five tend to be more visually appealing than even-numbered groupings.
- Trial Without Error: Test your layout on the floor before hanging to get a feel for the overall composition.
- Paper Templates: Use paper cutouts in the size of your art to find the perfect arrangement without making unnecessary holes.
- Mix and Match: Combine various sizes and orientations for a dynamic and modern look, while ensuring they complement each other.
These tips will help you create a harmonious and engaging art display that can enhance any room’s ambiance.
Symmetrical Vs Asymmetrical Wall Arrangements
Symmetrical arrangements provide a sense of order and formality; they’re perfect when you’re aiming for a structured, calming ambiance. This approach involves mirroring artwork across a central line, often working well above sofas or beds.
In contrast, asymmetrical configurations impart a more dynamic, casual feel to the space. To achieve this, mix different-sized pieces, and don’t worry about evenly spacing or matching art on either side of your imaginary central line. This style thrives on variety and is a great way to incorporate diverse art mediums and frames.
For symmetrical displays, use identical or similar frames and artwork of the same dimensions. Remember to evenly space each piece at a consistent distance, typically about 2-3 inches apart, to maintain that uniform look.
When curating an asymmetrical gallery, let your creativity shine. Combine portraits with landscapes, mix photographs with abstract art, and play around with frame styles and colors. Here, the spatial relation between the pieces can be more flexible, allowing for a natural, organic flow.
Whether adopting a symmetrical or asymmetrical design, always step back to view your arrangement from a distance. This perspective helps to ensure you’ve achieved the desired impact and visual balance before making any holes in the wall.
Creating Visual Balance
Visual balance is pivotal in making your artwork arrangement feel harmonious. Heavier pieces, whether due to size, color, or frame style, will anchor the display and should be placed first. Distribute them evenly throughout the space to avoid a lopsided look. Smaller, lighter pieces can fill in around these anchors.
When dealing with various frame sizes, aligning the tops or bottoms of frames creates a clean, intentional appearance. For wall groupings, treat the entire collection as one unit, striving for balance across the composition rather than between individual pieces.
Remember, symmetry isn’t necessary for balance. A large piece on one side can be offset by several smaller pieces on the other. Similarly, a vibrant, eye-catching work can hold its own against a grouping of more subdued pieces. Use different textures and mediums to add depth and interest, keeping in mind that the overall effect should be cohesive, not chaotic.
Stay attentive to the space between artworks. Consistent spacing can unify disparate pieces, while varying gaps can create dynamic rhythms. However, too much variation might result in visual clutter. Stick to a 2-3 inch standard spacing to maintain a clean look that allows each piece to breathe.
Choosing and Pairing Art Styles for a Gallery Wall
Mixing and matching different art styles can make your gallery wall pop with personality. For a cohesive look, blend various mediums—think paintings with photography, illustrations, or even textile art. Textures add depth, so a sleek, modern print might sit perfectly above a rich, woven tapestry.
When pairing art pieces, consider the color palette. Artworks don’t need to match, but they should complement each other. Pulling a common accent color across different pieces creates a thread that ties the arrangement together.
Play with contrasts; pair a bold, abstract piece with a simple, monochrome sketch. Or set a vintage oil painting next to a contemporary graphic poster. These juxtapositions capture interest and keep the eye moving across your wall.
For those looking to make a statement, thematic connections are key. Aligning pieces around a central idea, whether it’s a subject, era, or a motif, gives the gallery purpose and narrative flow.
Lastly, vary the scale and orientation of the framed works. A big landscape can anchor the arrangement, while smaller pieces fill in the gaps. Rotate between vertical and horizontal orientations to keep the dynamic engaging without feeling cluttered.
Spacing Wall Art
Consistent spacing is key to a harmonious look. Aim for about 2 to 3 inches between smaller pieces. For larger pieces, 3 to 6 inches can work well. Apply this uniformly for a cohesive appearance. When dealing with different sizes, use the smaller frames as your spacing guide, so the arrangement feels more intentional.
To maintain a neat display, consider using painter’s tape to represent the spacing on the wall before placing the hangers. This will help you visualize the gaps and make adjustments without committing to nail holes immediately. If you’re creating a gallery wall, this step becomes crucial, as it allows you to experiment with the overall layout.
For a streamlined process, begin with the largest piece or the centerpiece. Arrange smaller items around it, keeping the spacing constant. This acts as an anchor, giving you a clear starting point and simplifying the arrangement process.
Remember, when in doubt, measure out. Having a tape measure at hand is always a good practice to ensure your spaces are even and proportional, avoiding unnecessary holes and adjustments down the line.
How to Hang Art On Different Surfaces
When dealing with various wall surfaces, it’s crucial to choose the right hanging method:
- Drywall: Use a stud finder to hang heavier pieces securely on studs. For lighter artwork, drywall anchors or picture hooks work well.
- Plaster: It’s more delicate than drywall, so use picture rails if possible to avoid damage. Otherwise, use picture hooks that spread the weight over a larger area.
- Brick: Masonry nails or brick clips can be used to hang art directly on brick without drilling. For a less invasive approach, consider adhesive hooks that are rated for the weight of your piece.
- Concrete: Concrete demands special plugs and screws. Consider a concrete anchor or hardened picture hooks. Alternatively, rent a hammer drill for pre-drilling holes.
- Tile: Adhesive hooks are ideal to avoid drilling through tile. For more permanent placement or heavier art, use a diamond-tipped drill bit to prevent cracking.
- Paneling: Treat paneling like drywall if it’s thin, but ensure that the hanging hardware penetrates into the wall studs for stability.
Always select hardware that can handle the weight of your artwork, and if in doubt, seek advice from a hardware store or a professional installer.
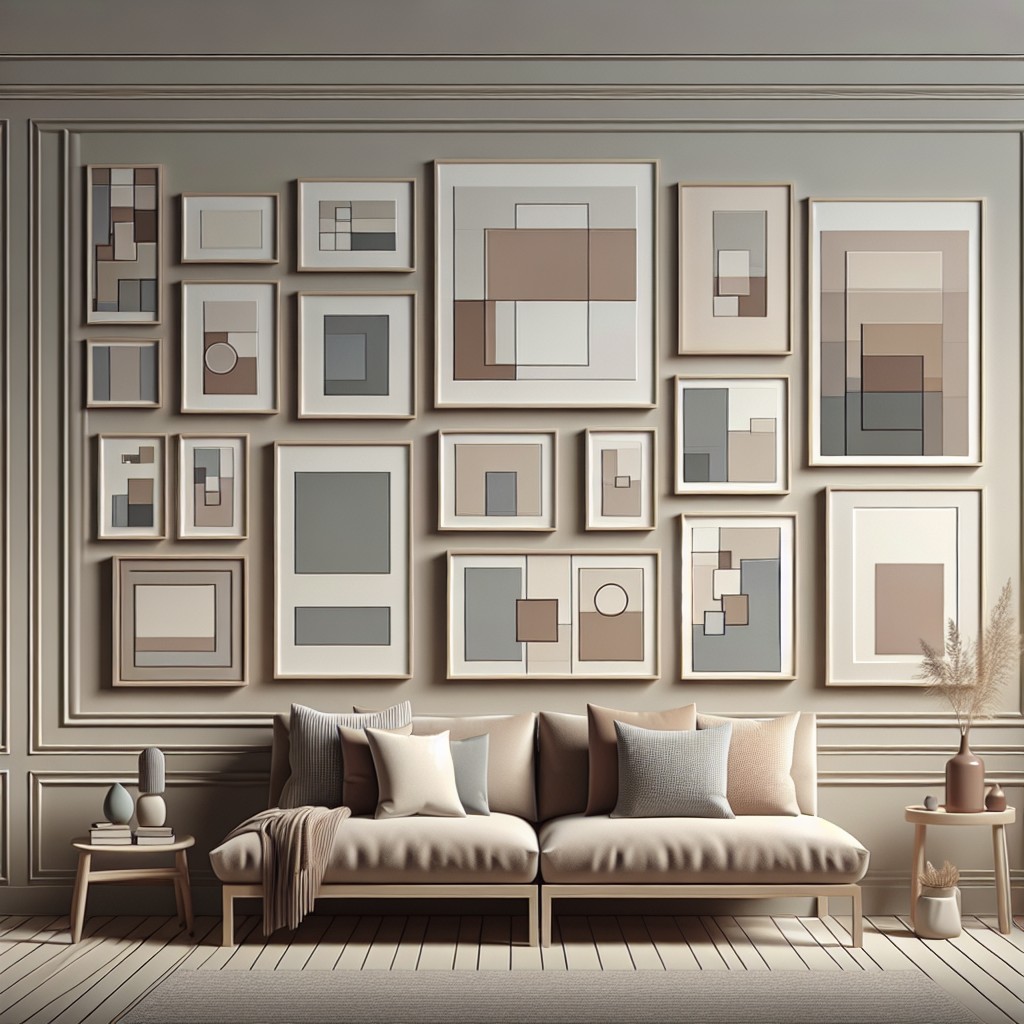
Creating a Gallery Wall
To start your gallery wall, gather a collection of artworks and frames that complement each other in style, color, or theme. Before making any holes, arrange these items on the floor to see how they fit together visually; think of this step as a dress rehearsal.
Use a mix of sizes and orientations to add interest – larger pieces can act as anchors while smaller pieces can fill in the gaps or create a rhythm. As a rule of thumb, maintain a consistent space between frames, usually about 2-3 inches, to create a cohesive display.
Paper templates can be a lifesaver. Trace each frame on paper, cut out the shapes, and use painter’s tape to position these on the wall. This allows you to experiment with placement without the commitment and helps visualize the final outcome.
If you’re looking for a focal point, choose one key piece to center your arrangement around. From there, spiral outwards with additional pieces, maintaining a sense of balance by alternating frame sizes and orientations.
Remember, a gallery wall should reflect your personal style; it’s an opportunity to tell a visual story within your space, so don’t hesitate to showcase artwork that resonates with you.
Art Hanging Hardware
Selecting the right hardware is essential for the stability and look of your artwork. For heavier pieces, use wall anchors or toggle bolts to ensure a secure hold. Picture hooks and nails are sufficient for lighter frames but always check the weight capacity.
For a cleaner look, consider using a gallery hanging system with cables or rods that allows for easy adjustments and is ideal for gallery walls. Adhesive strips are a great alternative for renters, causing minimal damage to walls. If you’re dealing with plaster or brick, use masonry nails or screws with anchors.
Remember that the type of artwork and wall surface will dictate the most appropriate hanging method. Always consult the hardware’s guidelines to prevent damage to your art or wall.
Planning Out Your Gallery Wall
Begin by laying out your art on the floor to experiment with different arrangements. Shifting pieces around on a neutral ground makes it easier to visualize how they’ll look together on the wall. Aim for a cohesive composition where each piece feels connected yet has enough space to breathe.
Use craft paper to trace each artwork and tape these outlines on the wall to serve as placement guides. This helps to perfect your layout without putting unnecessary holes in the wall. When you’re satisfied with the mockup, start hanging your art, keeping the center of the configuration at eye level.
Remember, a gallery wall is a reflection of your style; there’s no single right way to do it, so enjoy the creative process.
Color Is a Factor in Arrangements
Incorporating color into your wall art arrangement can dramatically affect the ambiance of a room. The hues you choose should complement the overall color scheme of the space, creating a cohesive look.
- Use artworks with dominant colors that mirror your room’s accent colors to create harmony.
- Monochromatic arrangements can offer a sleek and sophisticated feel, ideal for modern interiors.
- Consider a pop of contrasting color to add a focal point and draw the eye.
- Grouping art by similar colors or themes can unify disparate pieces, offering a collected-over-time vibe.
- For a dynamic display, mix neutrals with bold colors, ensuring the artwork stands out without overwhelming the space.
- Light-colored frames and mattes can soften the impact of bright artwork, making it blend seamlessly into your decor.
Remember, the colors in your arrangements can influence mood. While cool tones like blues and greens tend to be calming, warmer hues such as reds and oranges can energize a space. Choose your palette strategically to enhance the room’s desired atmosphere.
How to Arrange an Eclectic Group of Pictures
Dive into the mix-and-match world by anchoring your eclectic display with a central piece that sets the tone, be it bold in color or dominant in size. Surround it with varied frames and artworks that complement but don’t overshadow the anchor. Leave breathing room between pieces—a uniform gap isn’t necessary, but avoid cluttering.
Play with contrasts: mix photographic prints with abstract art, pair vintage frames with contemporary pieces, or combine monochromatic works with vibrant pops of color. Remember, the unifying element could also be thematic, such as nature scenes or portraits, amidst different styles and mediums.
Use the floor or a large table to experiment with the layout before committing to nails. Take a photo of your proposed arrangement, view it on a screen, and make adjustments—it helps visualize the group as a whole. Lastly, for an added sense of cohesion in your eclectic gallery, employ consistent hanging hardware or a unifying detail like matting style.
FAQ
What is the best way to arrange art on a wall?
The optimal way to arrange art on a wall is by centering artwork horizontally between two points for balance, adopting a precise grid for a formal look, or grouping pictures within a set square or rectangle for a more casual feel.
How do you stagger art on a wall?
To create a visually engaging art display on a wall, implement a staggered arrangement by hanging artworks asymmetrically, mixing larger and smaller pieces, and adding both vertical and horizontal works into the grouping.
What is the rule for wall art?
The general rule for hanging wall art is to position it so that its midpoint ranges between 57 and 60 inches from the floor, adjusting towards the lower end if the majority of the household members are short, or slightly higher for rooms with ceilings taller than eight feet.
How can one use artwork to create a focal point in a room?
One can use artwork to create a focal point in a room by placing a statement piece in the center of the wall space, ensuring it captures attention and sets the tone for the rest of the décor.
What are some techniques for aligning multiple pieces of wall art?
When aligning multiple pieces of wall art, techniques include using a template for layout, maintaining consistent spacing between artworks, using a level for horizontal alignment, and grouping artworks by style, size, or theme.
Can the placement of art influence the perceived size of a room?
Yes, the placement of art can significantly influence the perceived size of a room.
Read More
 15 Kitchen Garden Ideas for a Fresh and Fun Home Cooking Experience
 Kitchen Table Poly: Understanding Non-Hierarchical Relationships
 What Color Paint Goes with Brown Granite: Matching Tips for Your Home Décor
 Watch Cutthroat Kitchen Online Free: A Basic Guide to Free Streaming Platforms
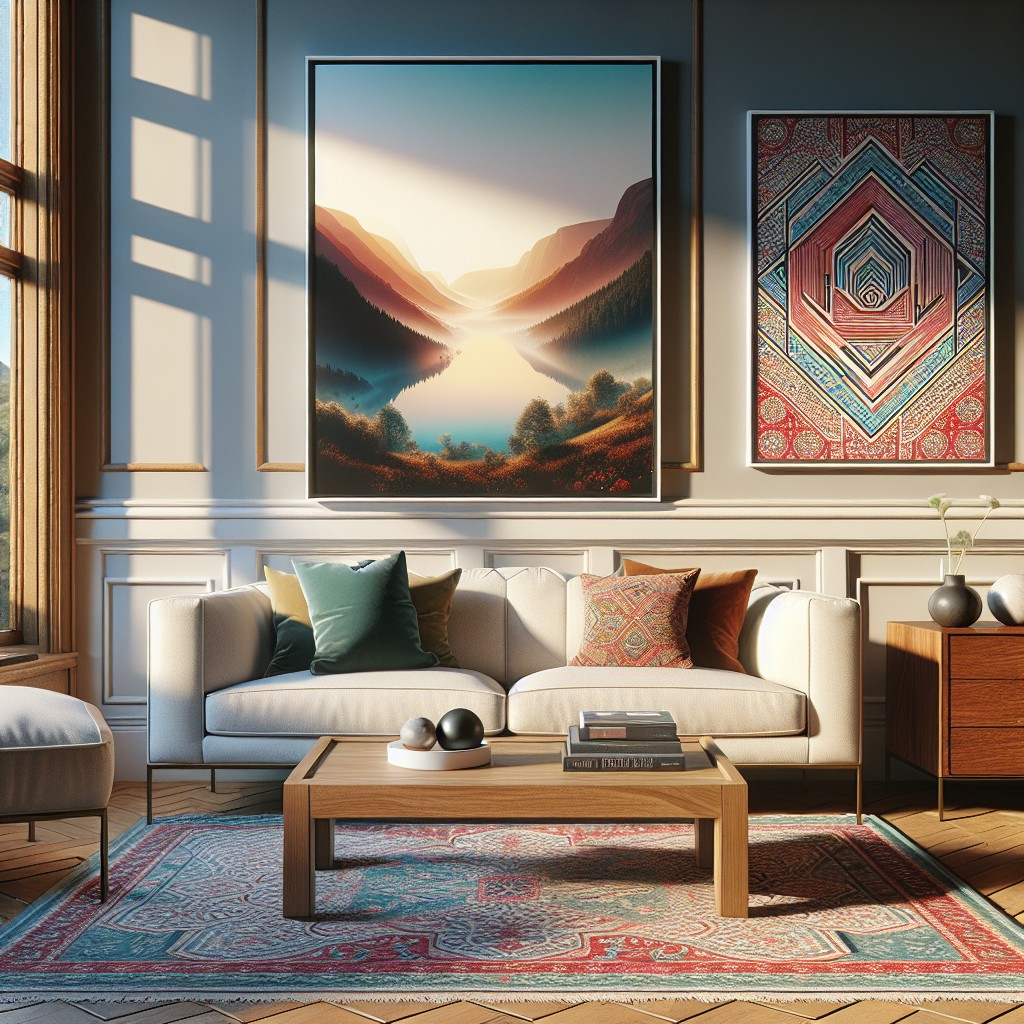 8×12 Prints Size: Understanding and Utilizing in Interior Design