Last updated on
Build an outdoor kitchen on a budget with these practical tips and creative ideas.
Key takeaways:
- Build an outdoor kitchen on a budget with modular kits
- Create a stone covered grill island for a rustic vibe
- Add a pergola for shade and style in your outdoor kitchen
- Use concrete and corrugated steel for a rugged and stylish look
- Upcycle wood and bricks for a charming and eclectic outdoor kitchen
What's Inside
DIY Outdoor Deck Kitchen
Imagine having all the amenities of your indoor kitchen, but with the beauty of open air! Start with a simple wooden deck—pressure-treated wood works wonders and won’t break the bank. Opt for a modular outdoor kitchen kit that you can assemble yourself. These kits often come with pre-fab countertops, built-in grills, and storage solutions.
Use weather-resistant materials to keep everything in top shape. Stainless steel appliances might seem pricey, but they’re worth it for longevity and easy cleaning. Repurpose pallets for extra shelving or even a rustic kitchen table. Don’t forget seating—think comfy yet durable patio furniture. For lighting, solar-powered string lights add a magical ambiance without increasing your energy bill.
Integrate a small herb garden in planters or hanging pots. Fresh herbs are just an arm’s reach away, and they double as delightful décor. Lastly, make sure there’s plenty of prep space. An old countertop or a sturdy table can serve as the heart of your cooking setup, allowing you to chop, mix, and season under the open sky. Feeling inspired yet?
DIY Stone Covered Grill Island
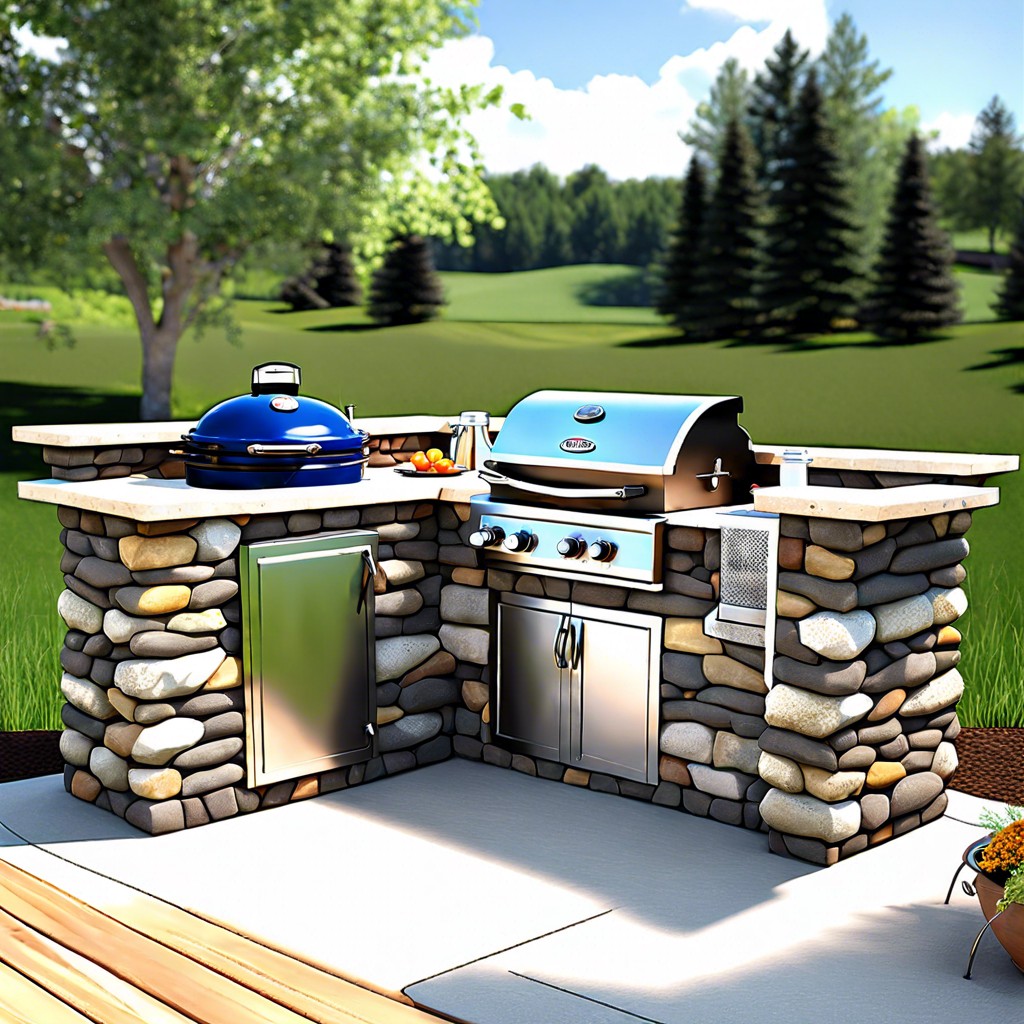
Grab some natural stone veneer and a weekend, and let’s get building. This project pairs sophistication with a rustic vibe, making your grill island both practical and stunning.
Start by framing the structure with pressure-treated wood. Think of it as building a sturdy skeleton for your grilling masterpiece. Make sure it’s robust enough to support the weight of the stone.
Next up, install cement backer board around the wood frame to provide a solid base for the stone veneer. It’s like dressing your island in armor, ready for the stylish stone battle ahead.
Apply a thin layer of mortar onto the backer board. Think of it as peanut butter on stone sandwich bread – not too much, not too little.
Carefully press each stone veneer piece into the mortar. This is your chance to show off your jigsaw puzzle skills. Mix up the stone sizes and shapes for a more natural look. It’s like creating a backyard Stonehenge, minus the ancient mystery.
Finish it off by sealing the stone veneer to protect it from the elements. You don’t want your masterpiece to turn into mush when it rains.
Hook up your grill, take a step back, and marvel at the artisanal grilling wonder you’ve just crafted. You might even want to invite the neighbors—for sheer bragging rights, of course.
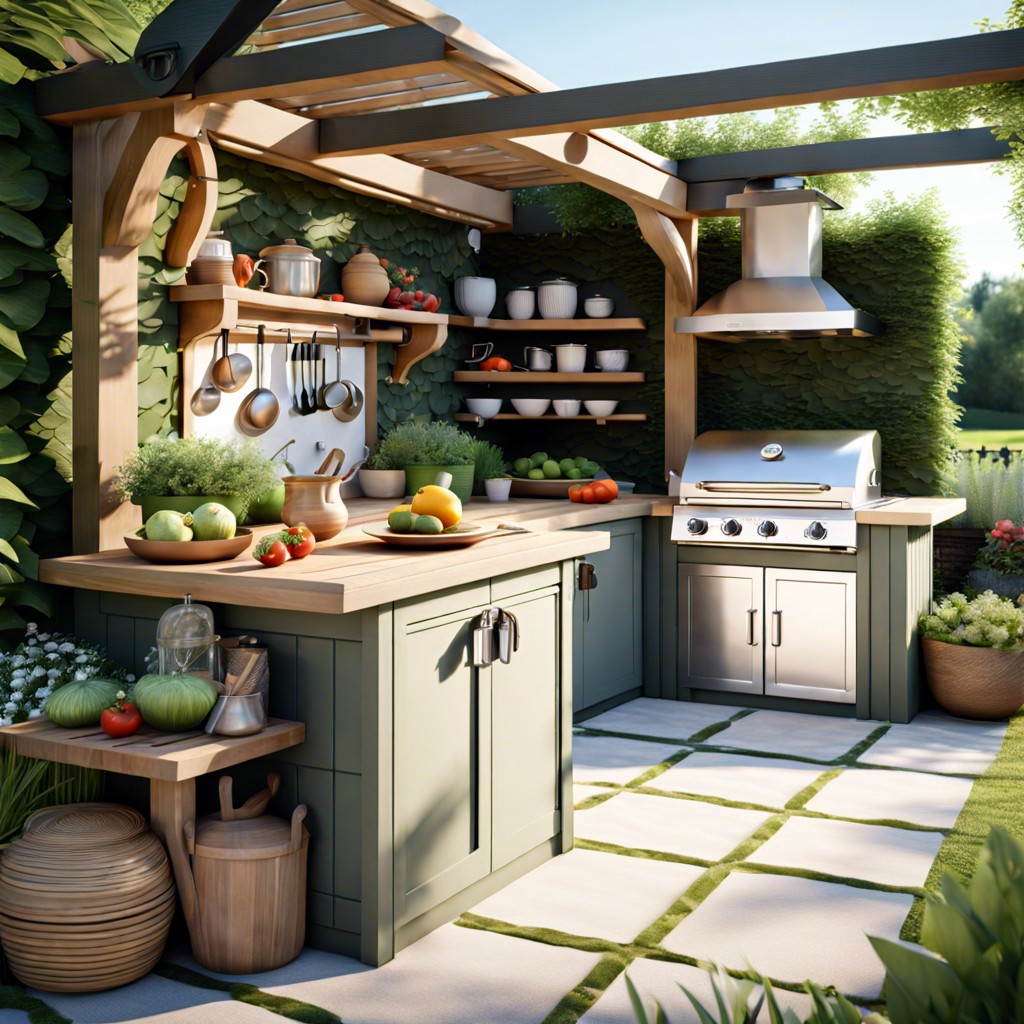
Outdoor Kitchen Bar With Pergola
Shade and style all in one? Yes, please! A pergola over your outdoor kitchen bar not only looks fantastic but also provides much-needed shade during those sunny BBQ sessions.
First things first, choose a budget-friendly material for your pergola. Pressure-treated wood is a great option – it’s affordable and durable. If you’re feeling fancy, go for cedar; it adds a lovely rustic charm.
You can keep the structure simple. Four posts and some cross beams do the trick. Don’t worry about intricate designs unless you’ve got your inner carpenter on speed dial.
Second, consider the placement. You want the bar and pergola combo to be the star of the show. Ideally, set it near the cooking area to make serving up those grilled goodies a breeze.
Next, why not get creative with the seating? Repurpose some old bar stools or even sturdy wooden crates for a cool, laid-back vibe that won’t break the bank.
Lastly, add some string lights or lanterns. Not only do they enhance the space at night, but they also keep the party going even after the sun sets.
In no time, you’ll have an outdoor kitchen bar area that’s both functional and fabulous!
DIY Concrete And Corrugated Steel Outdoor Kitchen
Concrete and corrugated steel might not sound glamorous, but they can make for a rugged and stylish outdoor kitchen. Here’s how you can create one without breaking the bank.
First, get your hands on some concrete blocks. These will form the base of your kitchen. Arrange them in a U-shape for a functional work area. You’ll need mortar to secure the blocks in place; it’s like making a mini fortress for your culinary endeavors.
Next, consider the countertops. Concrete works well here too. Mix your own for a custom fit or buy pre-made slabs if you’re not feeling too adventurous. These babies can withstand the elements and the occasional meatball mishap with ease.
Now for the fun part: corrugated steel. Use sheets of this to create durable and modern-looking cabinetry. Attach them to the concrete blocks with screws and bolts. Not only is this material budget-friendly, but it also adds a bit of industrial chic. Plus, it’s surprisingly easy to clean – just hose it down. Done and done.
Shelves are up next. Install wooden planks above the steel cabinets to hold your spices and grilling tools. Make sure they’re treated wood to prevent warping from rain or shine. Store your BBQ gadgets like a pro and have everything within reach.
Lighting is crucial for nighttime cooking. String some outdoor fairy lights around your setup. They’re cheap, cheerful, and give off a warm, inviting glow. Instant charm on a shoestring.
Remember, the devil is in the details. Add some potted herbs to your kitchen for a splash of green. Not only do they look good, but they’re useful too. Basil at your fingertips? Yes, please.
Upcycled Wood And Brick Outdoor Kitchen
Start by scouting for old pallets and unused bricks; they’re often just lying around or can be sourced cheaply at local yards. These materials can become the bones of your rustic outdoor kitchen.
Stack bricks to form the base and create a solid structure. Use mortar to secure them together for durability. Pallets can be deconstructed to form cabinet doors and countertops. A little sanding and sealing can make a world of difference.
Don’t forget to leave space for your grill and other appliances. The beauty of using wood and brick lets you mix and match elements for a charming, eclectic look. Add some hooks and shelves for extra storage and you’ve got yourself a fully functional outdoor kitchen, almost like magic but without the wand!
Simple DIY Outdoor Grilling Island
Grab a couple of cinder blocks and a sturdy grill top. Boom! You’re halfway there. This project is a fantastic entry-level outdoor kitchen project, and it won’t break the bank either.
Stack cinder blocks in a U-shape on a firm, level surface. Imagine it like playing with adult-sized LEGO bricks. You can leave it at waist height or go taller if you’re feeling fancy. Remember, you want something comfortable for flipping burgers without breaking your back.
Place a solid grill grate on top of your structure. This is the heart of your mini kitchen. Make sure it fits securely on the blocks. You don’t want it toppling over mid-barbeque.
Add a wooden plank across the top of the side blocks for some prep space. Simple, effective, and gives that rustic-chic vibe. If you’re feeling extra DIY-happy, a coat of heat-resistant paint can give those cinder blocks a polished look.
For storage, use basic metal shelving or even second-hand cabinets underneath the cinder block structure. Cheap, efficient, and keeps your utensils and charcoal within arm’s reach.
Lastly, light it up with some solar-powered outdoor lights. Night-time grilling fun without the electricity bill hike!
And there you go. Grill island, simplified. Now, fire it up and enjoy those sizzling steaks!
DIY Tiled Outdoor Kitchen
Tiles add personality and durability to your outdoor kitchen. First, start with a sturdy base. You can use concrete blocks or cinder blocks to form the structure. They’re budget-friendly and easy to work with.
Next, pick your tiles. Go for porcelain or ceramic as they withstand outdoor elements. Plus, you can find them on sale or at discount stores. Bold colors or patterns can spice things up.
Use thin-set mortar to attach the tiles to your surface. Make sure to spread it evenly for a good bond. You don’t want your tiles popping off mid-barbecue.
Grout the tiles after they’re set. Choose a grout color that complements your tiles. For added fun, you can even mix in some glitter grout. Shine bright, kitchen knight.
Seal everything to protect against weather and stains. A bit of elbow grease here goes a long way in keeping your kitchen fabulous.
And there you have it, a tiled masterpiece ready for action. Let’s fire up that grill, maestro.