Last updated on
Discover the simple process of creating stunning and functional floating shelves for your kitchen, transforming storage space with a modern touch.
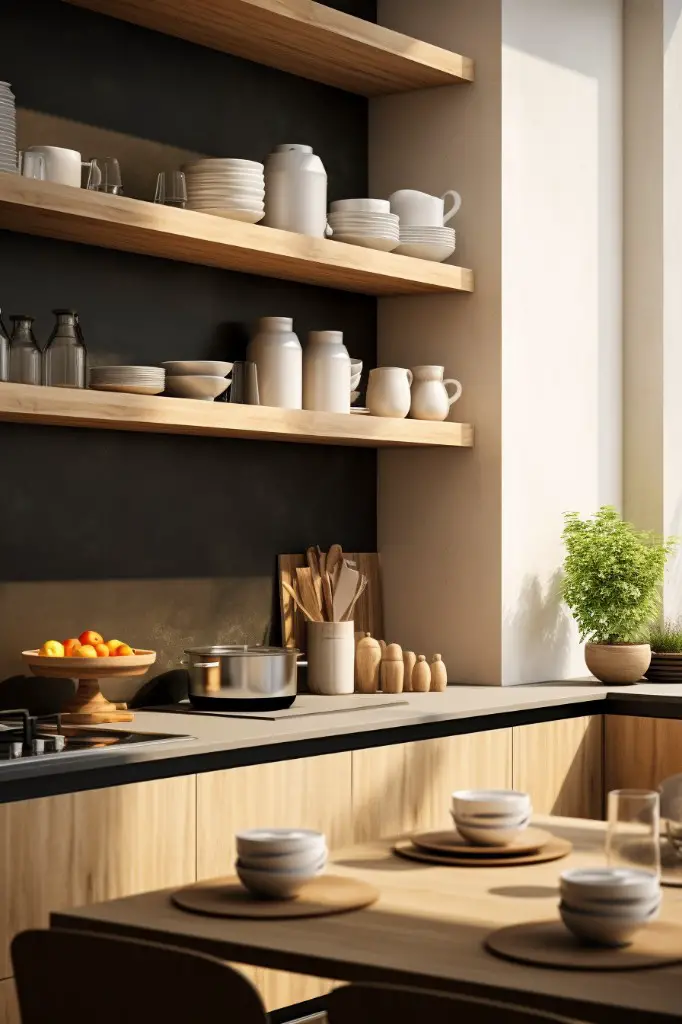
Floating shelves are a great way to add storage and style to any room, especially the kitchen. They not only provide extra space for your favorite cookbooks or decorative items but also give an illusion of a larger and more open area.
Whether you have a small kitchen or just want to upgrade your current one, making floating shelves is an easy DIY project that can transform the look of your space. In this article, we will guide you through the step-by-step process of making floating shelves for your kitchen so that you can showcase your culinary creativity in style!
What's Inside
Choosing the Right Material
The most popular materials used for making floating shelves include wood, metal, and glass. However, wood is the most commonly used material as it is easy to work with and can be stained or painted in any color of your choice.
If you’re looking for a rustic look in your kitchen decor, reclaimed wood can be an excellent option. It’s eco-friendly and adds character to any space while also being durable enough to hold heavy items.
Another popular option is MDF (medium-density fiberboard), which has a smooth surface that makes painting or staining easier than other types of woods. It’s also less expensive than solid hardwoods but still provides good stability when installed correctly.
Ultimately the type of material you choose will depend on personal preference as well as practical considerations such as weight capacity requirements and durability needs.
Selecting the Ideal Location
The perfect spot will depend on various factors such as available space, accessibility, and functionality. You want to choose a location that not only looks great but also serves a practical purpose.
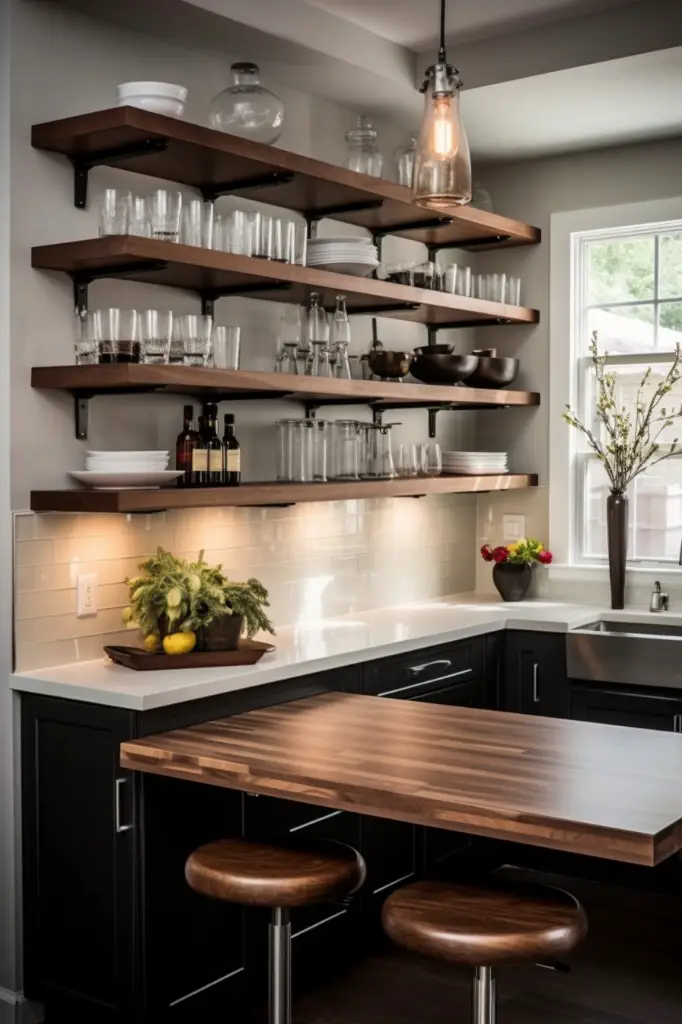
One of the most popular locations for floating shelves in kitchens is above countertops or near cooking areas. This placement provides easy access to frequently used items like spices and utensils while freeing up counter space.
Another option is placing them above your sink area or under cabinets where they can hold dishes or glasses within reach when washing up.
Consider how much weight you plan on storing on each shelf before deciding where they should go. Heavier items like pots and pans may require more support than lighter decorative pieces.
Finding the Right Shelf Placement
The location of your shelves will depend on several factors such as available space, accessibility, and aesthetic appeal. You want to make sure that they are not only functional but also visually appealing.
One important consideration when finding the right shelf placement is determining what items you plan on storing on them. For example, if you want to display decorative items or cookbooks, then placing them at eye level would be ideal for easy access and visibility.
Another factor that can influence where you place your floating shelves is their weight capacity. It’s essential to ensure that they are mounted securely onto a sturdy wall with proper brackets so that they can hold up under pressure without sagging or falling off.
Consider how much clearance space there should be between each shelf so that larger items like pots and pans can fit comfortably without touching one another.
Measuring and Planning
Measuring accurately is crucial to ensure that your shelves fit perfectly in the space and are level. Start by measuring the length of the wall where you want to install your shelf, then decide on how many shelves you want and their height.
Next, use a stud finder or tap on the wall with a hammer until you hear a solid sound indicating there is wood behind it. Mark these spots as they will be where you attach your brackets for extra stability.
It’s also important to consider any obstacles such as light switches or outlets that may interfere with shelf placement. Take note of their position so that they don’t get in the way when installing or using your new floating shelves.
Gathering Tools and Supplies
Before starting any DIY project, it’s essential to ensure that you have everything required on hand. This will save you time and prevent unnecessary trips to the hardware store.
For this project, some of the essential tools include a drill with various bits (including a spade bit), saws (jigsaw or circular saw), clamps, sandpaper or an electric sander, measuring tape or ruler square leveler tool for accuracy in measurements.
In addition to these basic tools mentioned above; other materials needed are wood glue adhesive suitable for plywood panels such as Titebond III Ultimate Wood Glue which is waterproof when dry; screws appropriate size depending on thickness of wood used- 2-inch screws work well with most types but check manufacturer recommendations before purchasing them. You’ll also need brackets designed specifically for floating shelves – these can be found at most home improvement stores like Home Depot or Lowe’s.
Cutting and Preparing the Wood
The first step is to measure and mark where you will make your cuts on a piece of lumber or plywood. Use a straight edge or square to ensure that all lines are straight, then use a saw (circular saw, jigsaw or handsaw) to cut along those lines.
It’s important that each shelf has two pieces of wood: one for the top surface and another for underneath support. Cut both pieces at once so they match perfectly in length.
After cutting all necessary parts, sand them down with fine-grit sandpaper until smooth edges are achieved. This will prevent any splinters from forming when handling them later on during assembly.
Assembling the Floating Shelf Frame
Start by cutting your wood pieces according to your measurements. Then, use a drill and screws to attach two of the shorter boards perpendicularly at each end of one longer board, creating an L-shape.
Next, attach another long board parallel to the first one using screws and a drill. Repeat this process with another set of perpendicular short boards on top of that second long board.
You should now have two L-shaped frames that will serve as brackets for your shelves. Place them against each other so they form a rectangle shape with four corners touching.
Connect these brackets together using more long boards screwed in place between them horizontally along their length until you achieve desired width for your shelf.
Cutting and Beveling Plywood Panels
This step is crucial as it will determine how your shelves look and function. Plywood is a great material for floating shelves because of its strength, durability, and affordability.
To begin with this step, measure the dimensions of your frame carefully so that you can cut your plywood panels accordingly. Use a circular saw or table saw to make straight cuts along the length of each panel.
Next up is beveling – cutting an angle on one edge of each panel that will fit snugly against the wall when mounted. Beveling also adds an aesthetic touch by creating a sleeker appearance for your shelves.
To achieve this effect, adjust your saw blade to 45 degrees and run each panel through at least twice until both edges are angled correctly. Make sure not to overcut or undercut any part as this may affect how well they fit together later on.
Gluing and Clamping Plywood Panels
Apply a generous amount of wood glue along the edges of one panel and press it firmly against the other panel. Make sure that they are aligned correctly before clamping them together.
Use at least two clamps to hold both panels tightly in place while drying. Place a scrap piece of wood between each clamp and your shelf surface to prevent any damage or marks on your shelves.
Leave the glued panels for at least 24 hours until completely dry before removing the clamps. Once dry, use sandpaper or an electric sander to smooth out any rough edges or excess glue residue from your floating shelves.
Sanding, Staining, and Sealing the Shelves
Sanding is an essential step in creating a smooth surface for staining or painting. Start with a coarse grit sandpaper (around 80-100) to remove any rough spots or imperfections on the wood surface.
Then move onto finer grits (around 150-220) until you achieve a smooth finish.
Next comes staining – this is where you can add some personality to your shelves! Choose from various shades of wood stains that complement your kitchen decor style. Apply one coat of stain using a brush or cloth and let it dry completely before applying another coat if needed.
Sealing protects your shelves from moisture damage while also enhancing their natural beauty. Use polyurethane sealer for best results as it provides excellent protection against water damage and scratches.
Remember that proper ventilation is crucial when working with these materials so make sure there’s enough airflow in the room during application and drying times.
Installing the Shelf Brackets
The first step is to determine where you want your shelves to be positioned and mark their location on the wall. Use a level and a pencil for accuracy.
Next, attach the brackets onto these marks using screws or anchors depending on your wall type. Make sure they are securely fastened into studs or use toggle bolts if necessary for added support.
It’s important to ensure that each bracket is level with one another so that your shelf sits evenly across them. Double-check this by placing a straight edge across both brackets before mounting them onto the wall.
Slide each shelf panel over its corresponding bracket until it rests snugly against it. You can secure them further by adding screws through pre-drilled holes in each corner of the panels into their respective brackets underneath.
Mounting the Shelf
Before mounting, ensure that you have marked the wall where you want to place your shelves. Use a leveler to make sure that they are straight and even.
To mount the shelves, drill pilot holes into each bracket using a power drill with a small bit. Then insert screws through each hole in the bracket and into corresponding pilot holes in your wall studs or anchors if necessary.
It is important to use appropriate hardware for mounting as this will determine how much weight can be supported by your floating shelves. If unsure about which type of hardware is best suited for your walls or shelving material, consult with an expert at a local home improvement store.
After securing all brackets onto their respective positions on both sides of each shelf unit, carefully slide them onto their supports until they rest securely against them without any wobbling or tilting movements.
Securing the Shelves for Extra Stability
This will prevent any accidents or damage to your kitchen items. One way of securing the shelves is by using L-brackets or corbels underneath them for extra support.
These brackets can be attached to the wall studs with screws and then screwed into the bottom of each shelf.
Another option for added stability is using a French cleat system, which involves attaching a wooden strip with an angled edge on both the shelf and wall side. The two pieces interlock when hung together, providing additional strength.
It’s also essential to make sure that you don’t overload your floating shelves beyond their weight capacity as this could cause them to sag or even collapse over time.
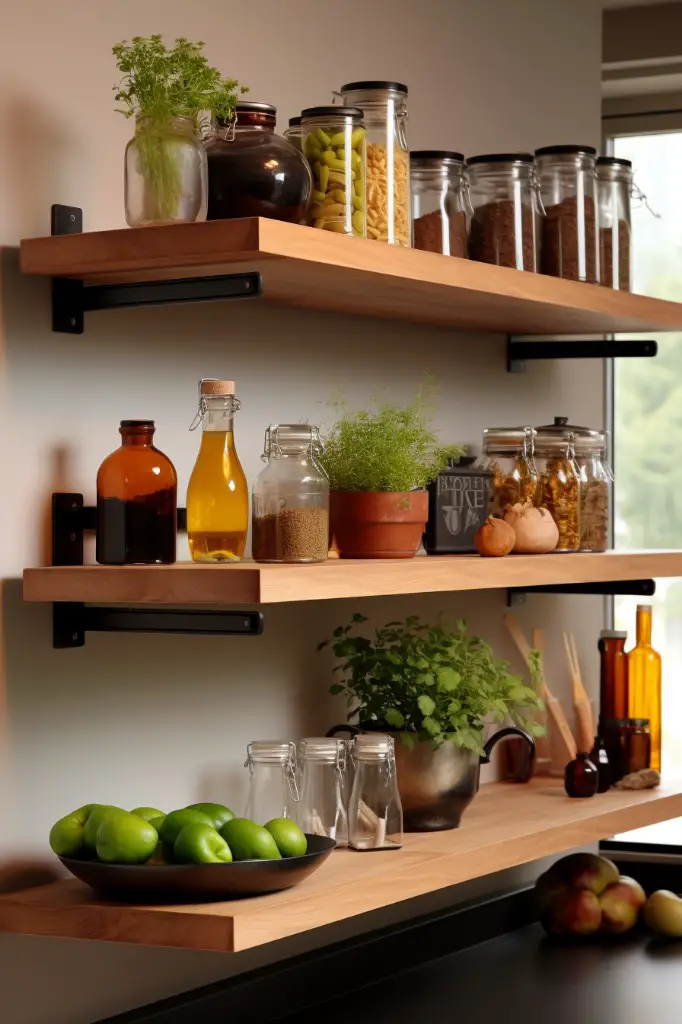
Adding Decorative Touches
The beauty of these shelves is that they can be customized in many ways, depending on your personal style and preferences. Here are a few ideas for adding decorative touches:
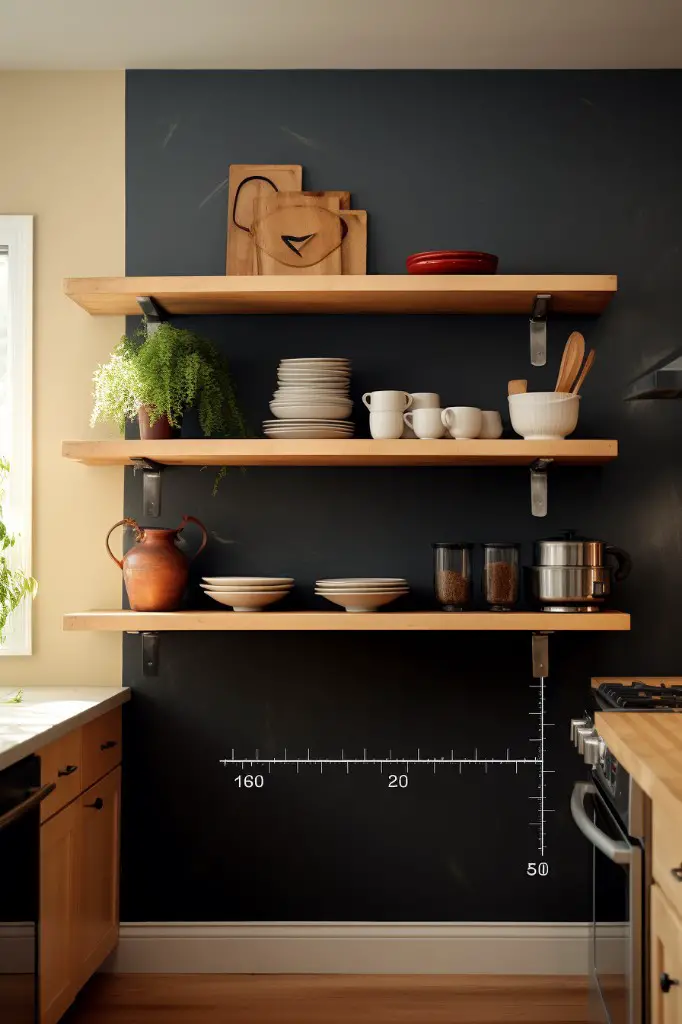
1. Display Your Favorite Items: Use the floating shelves as an opportunity to showcase your favorite kitchen items such as cookbooks, vintage dishes or glassware.
2. Add Greenery: Plants are a great way to bring life into any space and can also help purify the air in your kitchen.
3. Incorporate Lighting: Adding under-shelf lighting or small lamps will not only illuminate the shelf but also create ambiance in the room.
4. Mix Textures and Colors: Experiment with different textures like woven baskets or metal containers for added interest on each shelf level.
5. Create Symmetry: Arrange similar items symmetrically across multiple levels of shelving for an organized look that adds visual appeal.
Maintaining Your Floating Shelves
Here are some tips on how to keep your shelves looking great:
1. Regular Cleaning: Dust and debris can accumulate on the surface of the shelf over time, so it’s essential to clean them regularly with a soft cloth or microfiber duster.
2. Avoid Overloading: While floating shelves are sturdy and durable, they do have weight limits that should be respected.
Be sure not to overload them with heavy items as this could cause damage or even collapse.
3. Check for Damage: Inspect your floating shelves periodically for any signs of wear and tear such as cracks or warping in the wood panels or brackets that may need replacing.
4. Refinishing Your Shelves: If you notice scratches, stains, or other imperfections on your shelf’s surface after prolonged use; refinishing might be necessary using sandpaper followed by staining/sealing products suitable for wooden surfaces.
Safety Tips and Considerations
First of all, make sure that you have the right tools for the job and that they are in good condition. Always wear protective gear such as gloves, goggles, and a dust mask when cutting or sanding wood.
When working with power tools like saws or drills, be extra careful not to cut yourself or damage any nearby objects. Keep children and pets away from your work area at all times.
It’s also essential to choose the right location for your floating shelves so that they don’t interfere with electrical outlets or plumbing fixtures. Make sure there are no hidden pipes behind the wall where you plan on installing them.
Always follow manufacturer instructions when using adhesives or mounting hardware for added stability of your shelf brackets.
Floating Shelf Weight Capacity
You don’t want your beautiful new shelves collapsing under the weight of your favorite cookbooks or kitchen appliances! The amount of weight that a floating shelf can hold depends on several factors, including the type and thickness of wood used, as well as the size and number of brackets supporting it.
To ensure that your floating shelves are strong enough to support all your kitchen essentials, you should always check their maximum load capacity before installing them. This information can usually be found in the manufacturer’s instructions or online product descriptions.
It’s also important to distribute weight evenly across each shelf and avoid overloading them with heavy items. If you’re unsure about how much weight a particular item will add up on one shelf, use a scale or consult an expert for advice.
Single Vs. Corner Shelves
Single shelves are perfect for displaying items in a straight line or creating a focal point on an empty wall. On the other hand, corner shelves can be used to maximize space in tight areas and create visual interest by showcasing decorative pieces from different angles.
If you have limited wall space but still want to add some storage options, then corner floating shelves might be the way to go. They can fit snugly into any unused corners of your kitchen while providing ample room for storing spices, cookbooks or even small appliances.
Single floating shelves work best when you want a clean look with minimal clutter. They’re great for displaying artwork or photographs that need more attention than just being hung on the wall alone.
Ultimately, whether you choose single or corner floating shelving depends on your personal preference and needs as well as the layout of your kitchen area.
Troubleshooting Common Issues
One of the most frequent problems is sagging in the middle of the shelf due to weight overload or incorrect installation. To fix this issue, add extra brackets or support underneath and ensure they are evenly spaced out.
Another problem could be uneven spacing between shelves which can make them look unbalanced and cluttered. To avoid this issue, measure carefully before installing each bracket and use a level to ensure everything is straight.
If you notice any wobbling after mounting your floating shelves on the wall, it could mean that they were not installed correctly or there’s an imbalance in weight distribution. In such cases, check if all screws are tightened properly and adjust accordingly.
Lastly, if you find scratches on your newly installed floating shelf surface during sanding or staining process don’t panic! You can easily fix minor scratches by using wood filler followed by sanding with fine-grit paper until smooth again.
By following these simple troubleshooting tips for common issues with DIY kitchen floating shelves project will help keep them looking great for years to come!
FAQ
Can you put floating shelves in a kitchen?
Yes, you can put floating shelves in a kitchen as they function as both storage and decorative elements, accommodating daily dishes that coordinate with your overall decor style.
How deep should floating shelves be in kitchen?
The recommended depth for floating shelves in a kitchen is at least 10 inches to accommodate dinner plates and wider items.
What type of materials are best suited for kitchen floating shelves?
Wood, metal, and high-quality engineered materials are best suited for kitchen floating shelves.
How can you properly install floating shelves in the kitchen for maximum weight support?
To properly install floating shelves in the kitchen for maximum weight support, ensure that they are securely mounted into wall studs using the appropriate hardware and brackets.
Are there any specific design ideas to enhance a kitchen’s appearance with floating shelves?
Incorporating floating shelves can enhance a kitchen’s appearance by providing additional storage and display space while maintaining a clean, modern aesthetic.


