Last updated on
Discover the effective methods to eliminate unsightly scratches from your glossy kitchen cabinets, restoring their pristine beauty in no time.
Gloss kitchen cabinets are a great addition to any modern home, but unfortunately, they are prone to scratches. These scratches can be unsightly and take away from the beauty of your kitchen.
But fear not! With a few simple steps, you can easily remove these scratches and restore your cabinets to their former glory. In this article, we’ll go over everything you need to know about how to remove scratches from gloss kitchen cabinets.
So grab your tools and let’s get started!
Key takeaways:
- Assess scratch severity: Determine depth and quantity of scratches.
- Clean the surface: Use mild cleaning solution and soft cloth.
- Spot cleaning techniques: Use baking soda, toothpaste, or vinegar solutions.
- Use basic tools: Microfiber cloth, sandpaper, wax filler stick, touch-up paint pen, polishing compound.
- Sanding and filling techniques: Sand and fill shallow scratches, use wood filler for deep scratches.
What's Inside
Assessing Scratch Severity
This will help you determine which method is best suited for your specific situation.
Firstly, take a closer look at the scratch and try to determine its depth. Shallow scratches are those that only affect the surface layer of your cabinet’s finish and can be easily removed with basic cleaning techniques or wax fillers.
On the other hand, deep scratches penetrate through multiple layers of paint or varnish and require more advanced repair methods such as sanding or using specialized scratch repair kits.
It’s also essential to consider how many scratches there are on each cabinet door. If there are only a few minor ones in one area, spot-cleaning may be sufficient.
However, if there are numerous deep gouges across several doors then it might be necessary to refinish all affected areas entirely.
Determine the Depth of Scratches
This will help you decide which method is best for removing the scratch and ensure that you don’t cause any further damage.
To assess the severity of a scratch, run your fingernail over it. If your nail catches in the groove, then it’s likely a deep scratch that requires more attention.
Shallow scratches are those that can barely be felt with your fingernail or are only visible on close inspection.
Once you’ve determined how deep each scratch is, make note of them so that when choosing a repair method later on in this process; You’ll know exactly what needs fixing and where. Remember not all scratches require extensive repairs – some may just need spot cleaning techniques while others might need filling or sanding before applying touch-up paint or wax fillers.
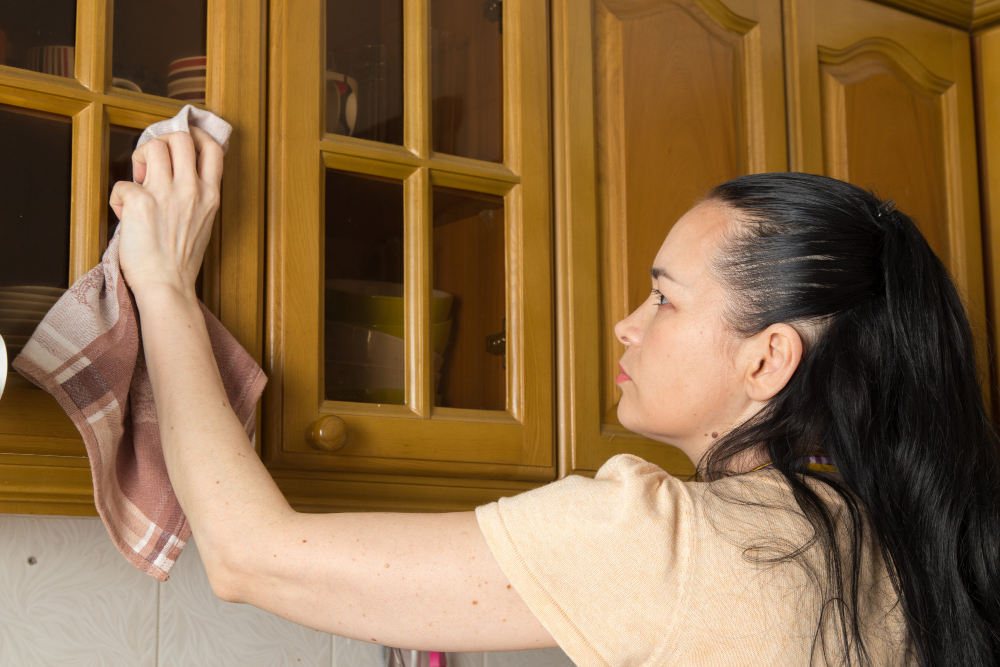
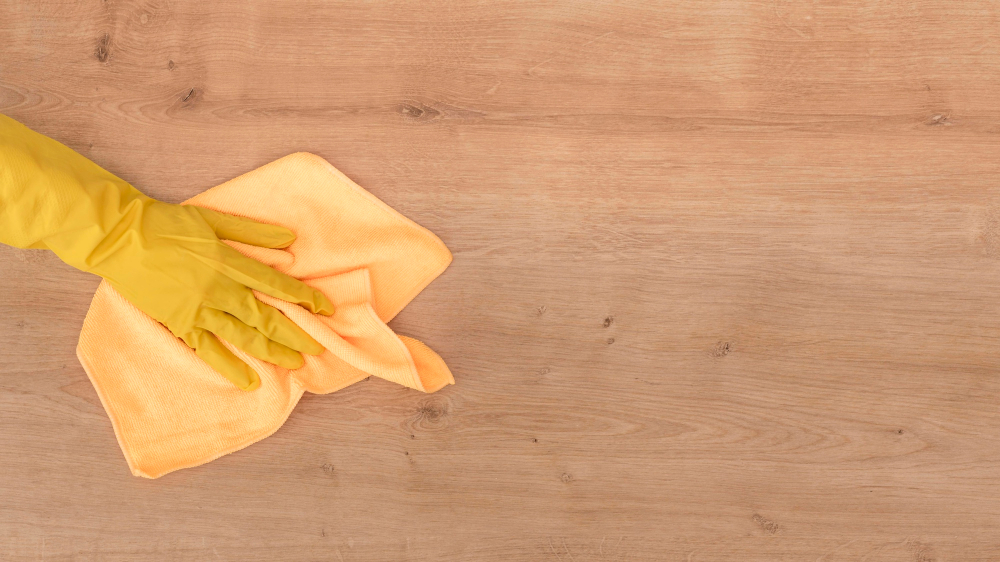
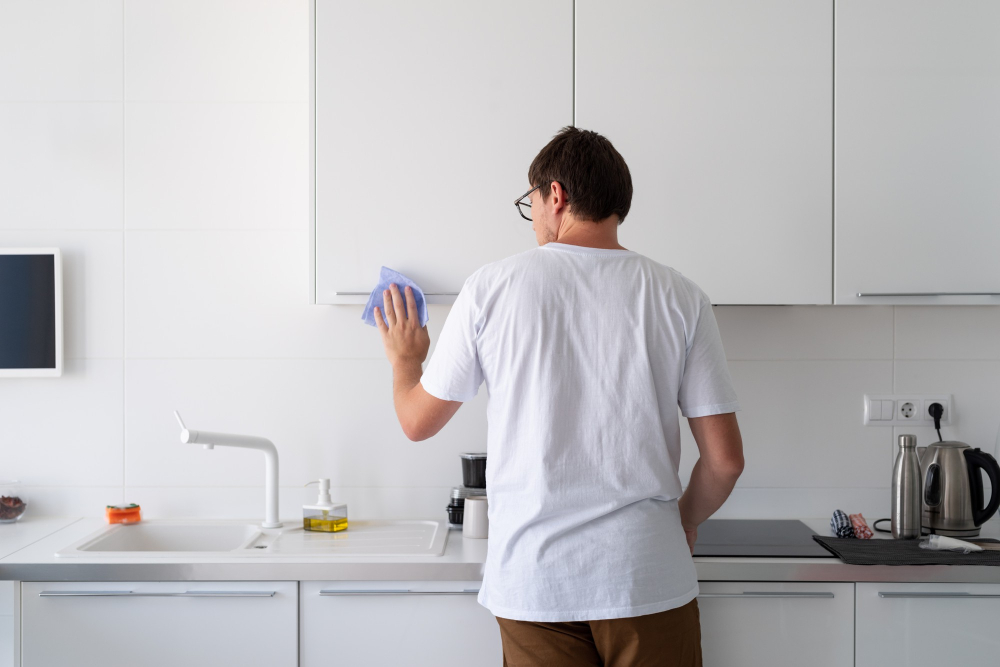
Cleaning the Surface

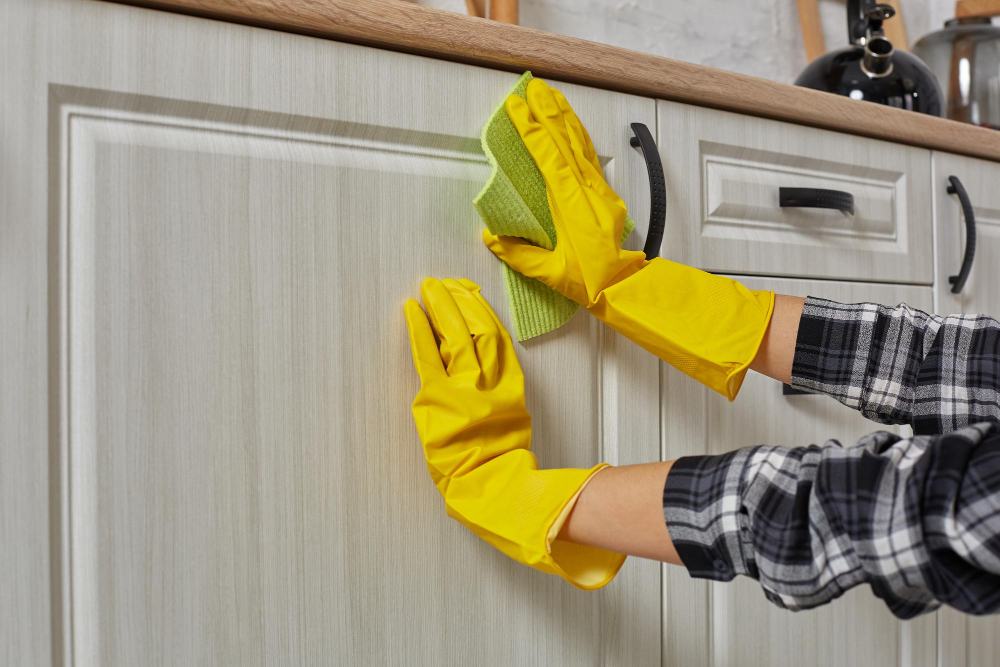
This will ensure that there is no dirt or debris on the surface that could interfere with your scratch removal process. To clean the surface of your cabinets, use a soft cloth and a mild cleaning solution.
Avoid using abrasive cleaners or scrubbers as they can cause further damage to the cabinet’s finish.
Start by wiping down each cabinet door and drawer front with a damp cloth to remove any loose dust or dirt particles. Then apply some mild dish soap onto another damp cloth and gently wipe down each door again until all grime has been removed.
Once you have cleaned all surfaces, rinse them off with warm water using another clean damp cloth before drying them completely with yet another dry towel.
Spot Cleaning Techniques
These methods are ideal for removing minor scratches and scuffs that haven’t penetrated the surface of your cabinets.
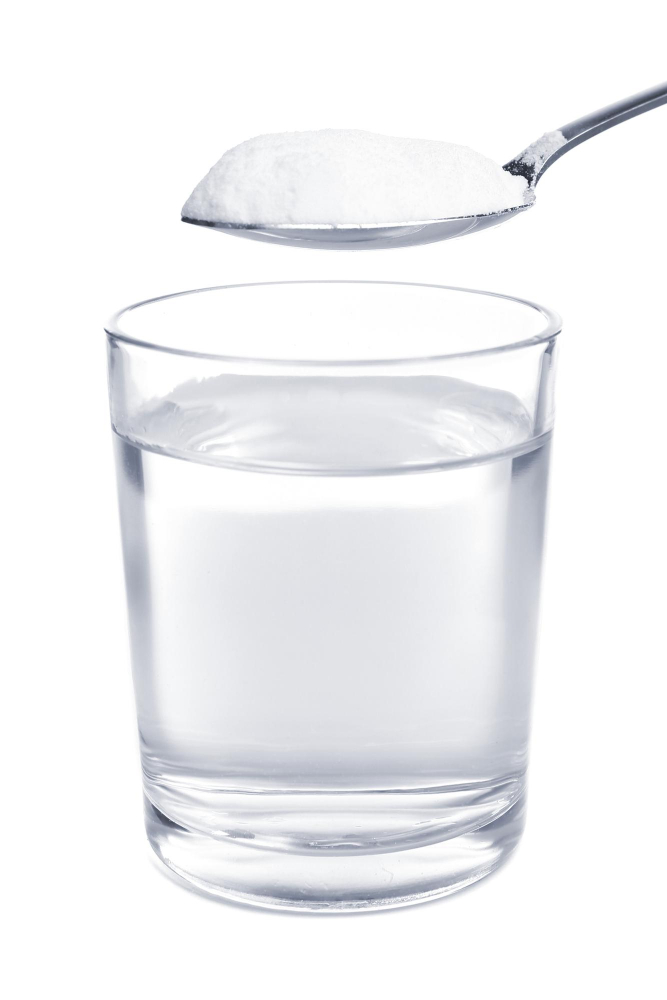
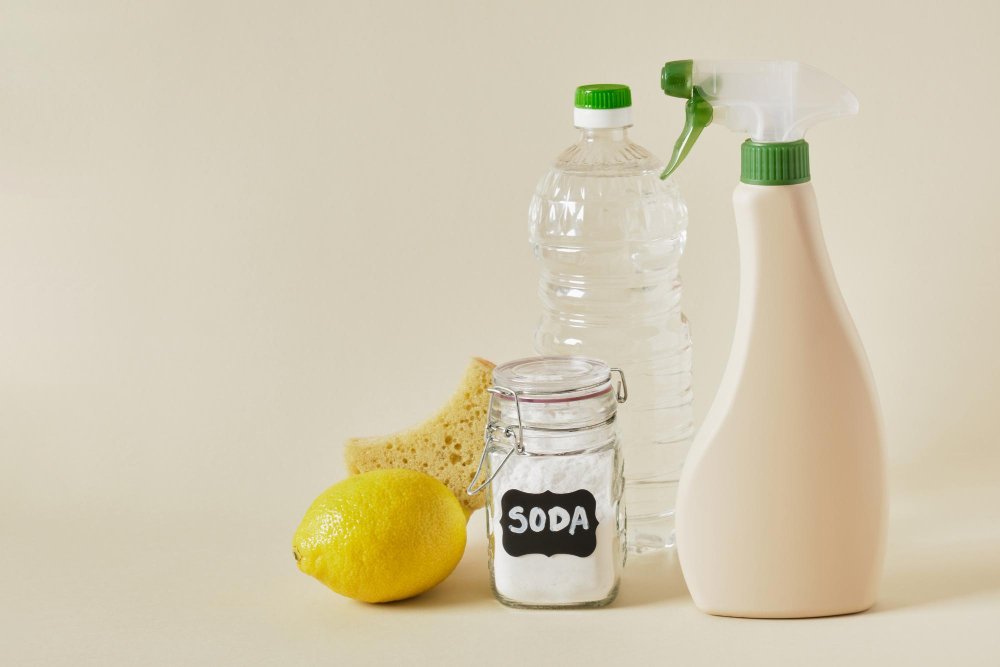
One effective technique is using a mixture of baking soda and water. Mix equal parts baking soda and water in a bowl until you have a paste-like consistency.
Then, apply the paste to the scratched area with a soft cloth or sponge, rubbing gently in circular motions.
Another option is using toothpaste as an abrasive cleaner. Apply toothpaste directly onto the scratch with your finger or a soft cloth, then rub gently in circular motions for several minutes before wiping away any excess residue.
For more stubborn stains or marks on glossy surfaces like kitchen cabinets, try using vinegar mixed with warm water solution instead of harsh chemicals that can damage their finish over time.
Basic Tools for Scratch Removal
Here are some basic tools you’ll need:
1. Microfiber cloth: This is a soft and gentle cloth that won’t scratch or damage your cabinet surface.
2. Sandpaper: You’ll need sandpaper with varying grits depending on the depth of the scratch.
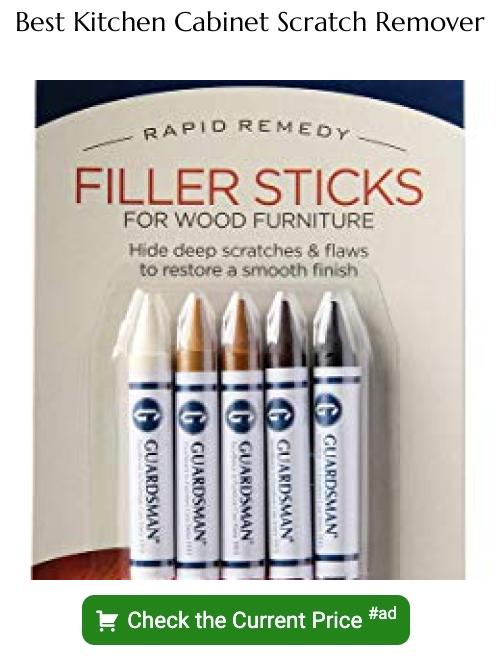
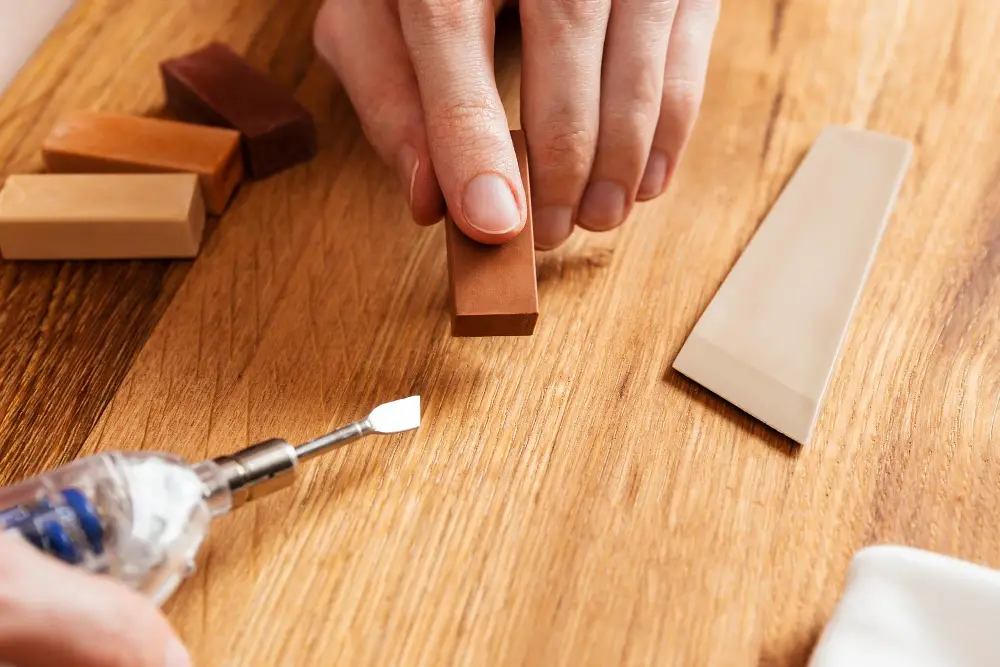
3. Wax filler stick: A wax filler stick can be used to fill in shallow scratches and restore color to damaged areas.
4. Touch-up paint pen: If you have deeper scratches, a touch-up paint pen can help match your cabinet’s color and cover up any blemishes.
5. Polishing compound: Once you’ve removed all visible scratches, use polishing compound to buff out any remaining imperfections and restore shine back into your cabinets.
Filling Shallow Scratches
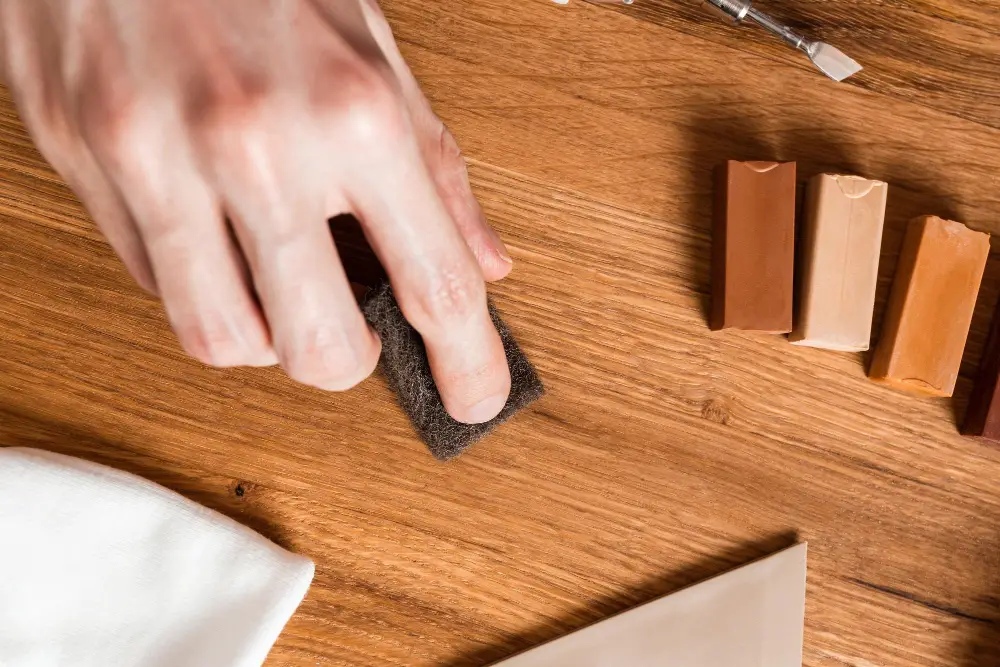
Wax fillers come in different colors to match the color of your cabinet and are easy to apply. To use a wax filler, start by cleaning the surface around the scratch with warm soapy water and drying it thoroughly.
Next, take a small amount of wax filler on your finger or an applicator tool and gently rub it into the scratch until it is level with surrounding areas. Be sure not to overfill as this will create more work for you later when sanding down excess material.
Once filled, allow time for drying according to manufacturer instructions before buffing off any excess using a soft cloth or sponge. This technique works best for minor scratches that do not penetrate through multiple layers of paint or finish.
Fixing Deep Scratches
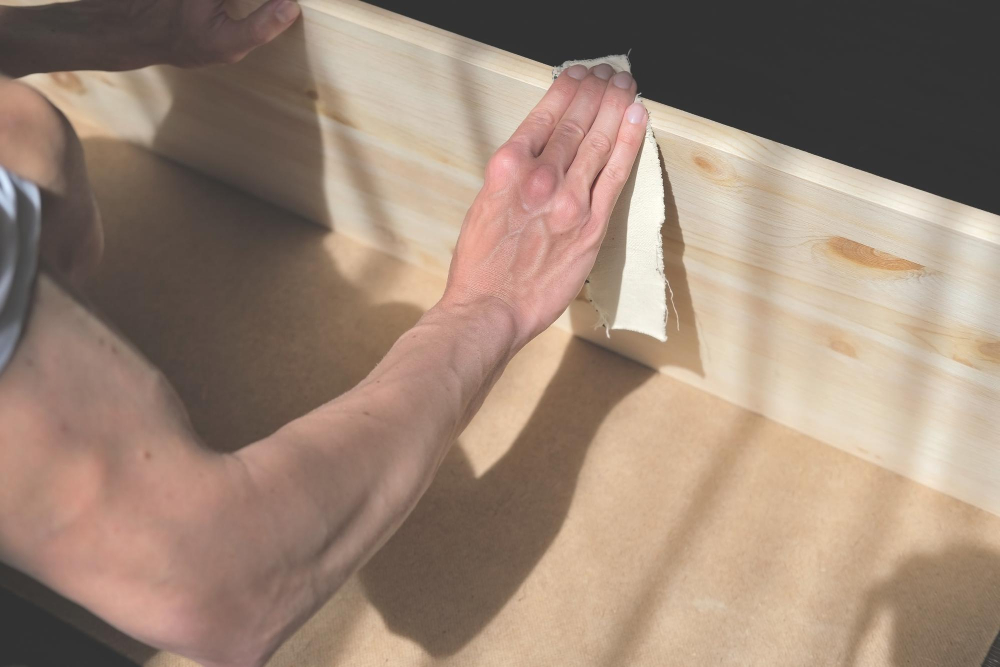
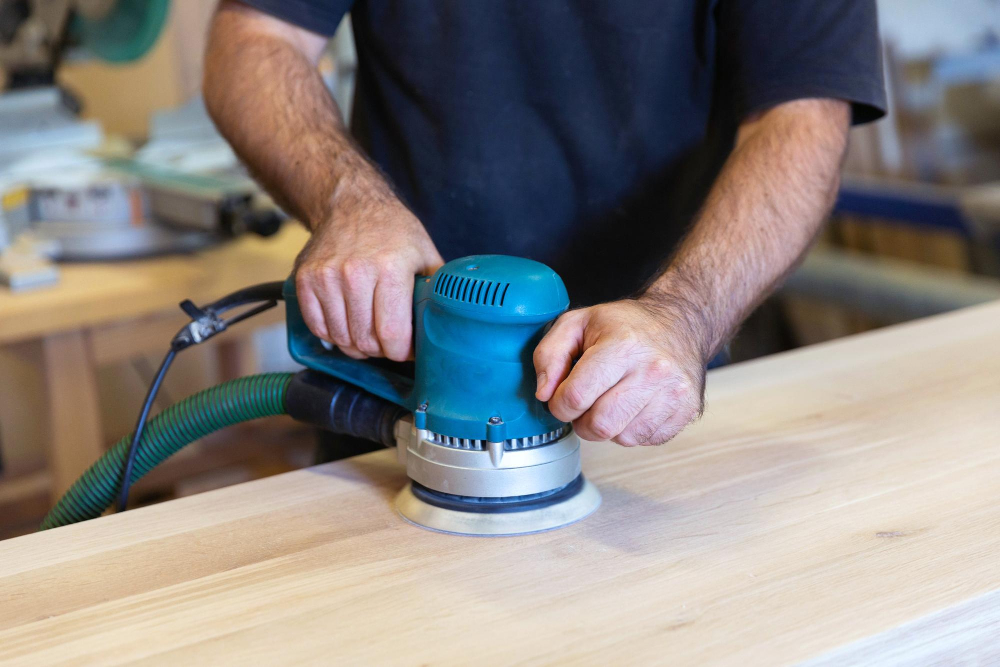
Deep scratches can be unsightly and may even expose the wood underneath, making it vulnerable to moisture damage. To fix deep scratches, start by sanding down the affected area with fine-grit sandpaper until it’s smooth and level with the surrounding surface.
Next, apply a wood filler that matches your cabinet’s color using a putty knife or spatula. Make sure you fill in all of the scratch marks completely and let it dry according to manufacturer instructions.
Once dry, use fine-grit sandpaper again to smooth out any bumps or excess filler material until flush with surrounding surfaces. Finish off by applying touch-up paint that matches your cabinet color over filled areas for an even finish.
Using Wax Fillers
Wax fillers are easy to use and can help hide minor scratches, making them less noticeable. To use a wax filler, start by cleaning the surface of the cabinet with a soft cloth and mild detergent.
Then take a small amount of wax filler on your finger or putty knife and apply it to the scratch in circular motions until it is filled completely.
Once you’ve applied the filler, let it dry for several hours before buffing away any excess with a clean cloth. If necessary, repeat this process until all scratches are filled in properly.
It’s important to note that while using wax fillers may temporarily fix minor scratches on your gloss kitchen cabinets; they won’t work for deeper ones as they don’t provide enough coverage or durability over time compared to other methods like sanding techniques or scratch repair kits.
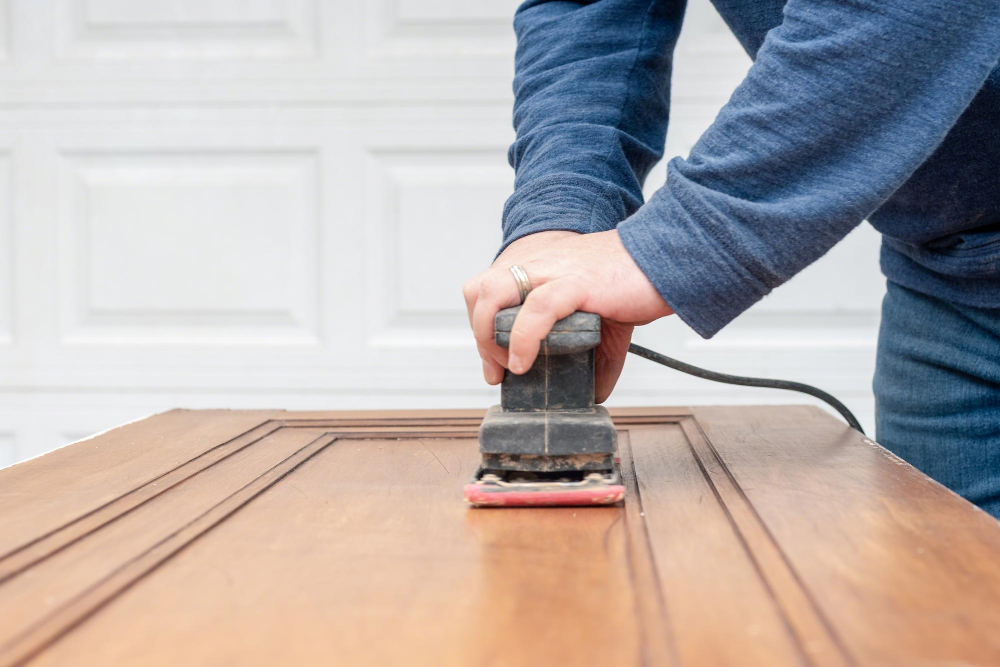
Sanding Techniques
Sanding is a technique that involves using abrasive materials to smooth out rough surfaces and remove layers of material. Before you start sanding, make sure you have assessed the severity of the scratches and determined their depth.
To begin with, use fine-grit sandpaper (around 220 grit) for shallow scratches or medium-grit (around 120 grit) for deeper ones. Start by lightly rubbing over the scratched area in circular motions until it becomes smoother.
Be careful not to apply too much pressure as this can cause further damage.
Once you’ve sanded down enough material from around each scratch so that they’re no longer visible or feel rough when touched with fingertips – switch up your paper’s coarseness accordingly: move onto finer grades like 320-400 grits before finishing off at an ultra-fine grade such as 600-800 grits.
Avoiding Abrasives
Abrasive cleaners and tools can cause further damage to the surface of your cabinets, leaving them looking worse than before.
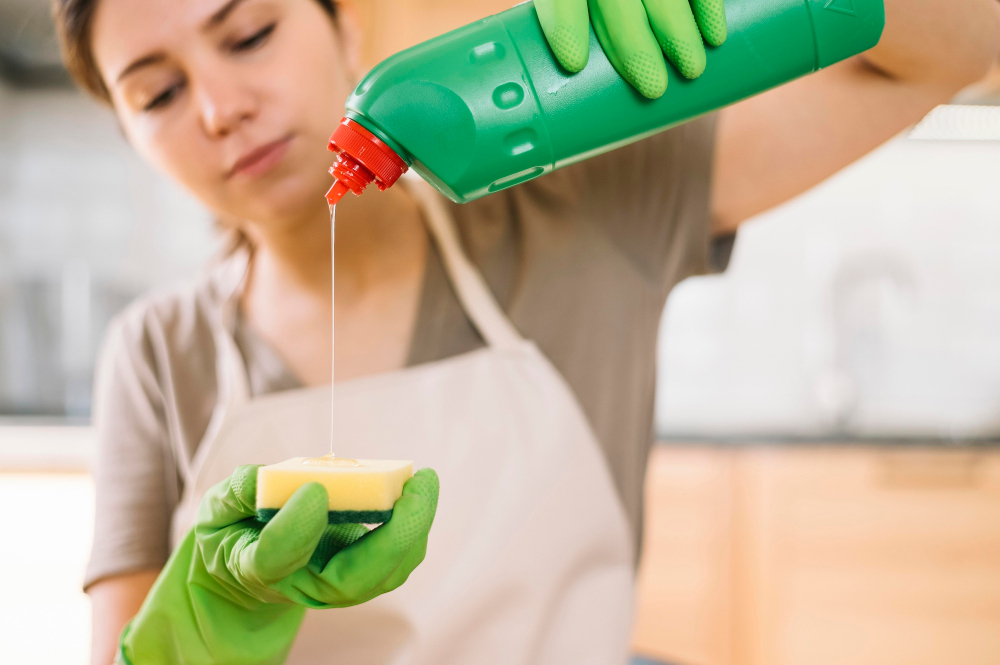
Instead of using harsh abrasives, opt for gentler cleaning solutions and techniques. For example, you can use a soft cloth or sponge with warm water and mild dish soap to clean the surface of your cabinets.
Be sure not to scrub too hard or use any rough materials that could scratch the surface.
If you do need something stronger than dish soap for tougher stains or grime buildup on your cabinet surfaces, look for non-abrasive cleaners specifically designed for glossy finishes. These products are formulated with gentle ingredients that won’t harm the finish on your cabinets while still effectively removing dirt and grime.
Cleaning Solutions for Scratches
Cleaning is an essential step in scratch removal because it helps remove any dirt or debris that may be hiding in the scratches. This will make it easier to see and treat the damage.
There are several cleaning solutions that you can use for this purpose. One option is a simple mixture of warm water and dish soap.
Dip a soft cloth into this solution and gently rub over the scratched area, being careful not to apply too much pressure.
Another effective cleaning solution is vinegar mixed with baking soda. Mix equal parts white vinegar and baking soda until they form a paste-like consistency, then apply this mixture onto your scratched cabinet surface using a soft cloth or sponge.
For tougher stains or grime buildup around scratches, try using rubbing alcohol instead of water-based cleaners as they tend to evaporate quickly without leaving any residue behind.
Remember always test these solutions on an inconspicuous area first before applying them directly onto your glossy kitchen cabinets’ surfaces.
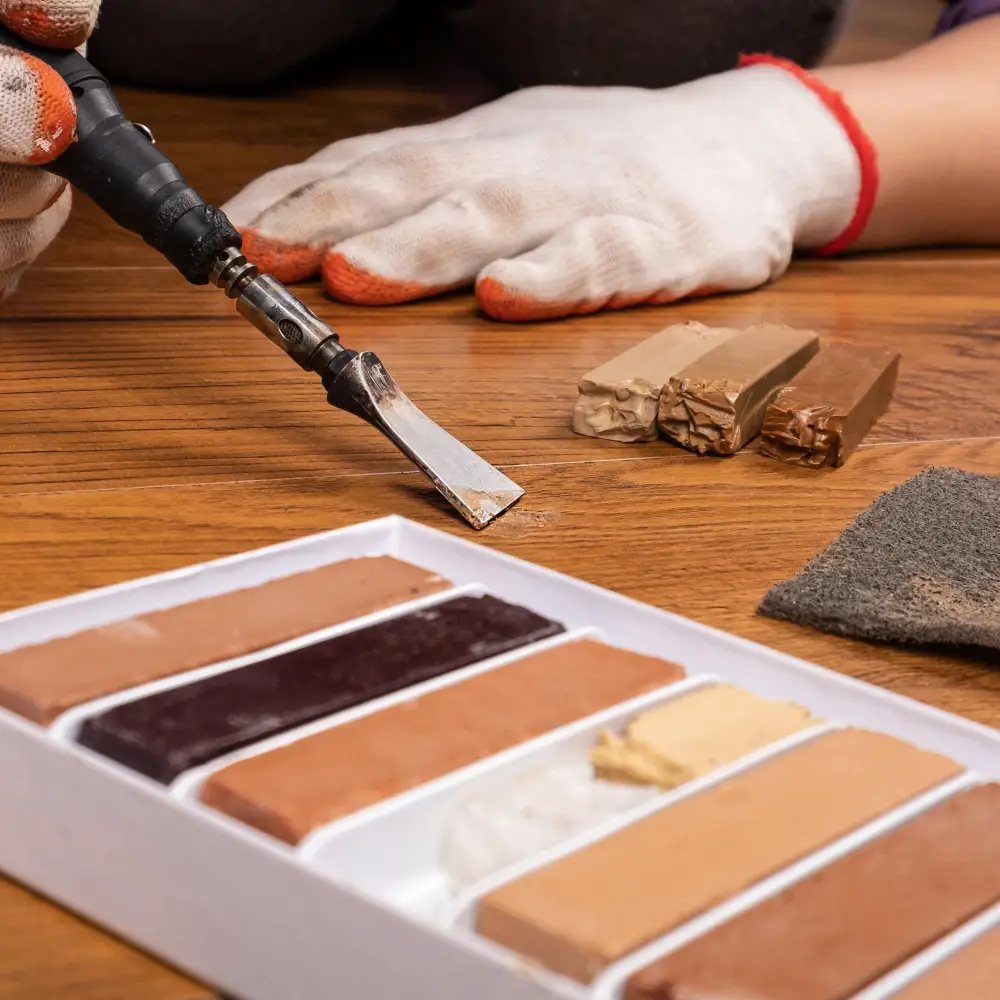
Using Scratch Repair Kits
These kits come with everything you need to remove scratches from gloss kitchen cabinets, including fillers and polishes that match the color of your cabinets.
To use a scratch repair kit, start by cleaning the surface of your cabinet thoroughly. Then apply the filler included in the kit to any shallow scratches using a putty knife or spatula.
Be sure to follow all instructions provided with the kit carefully.
Once you’ve filled any shallow scratches, allow them time to dry completely before moving on. Next, use fine-grit sandpaper included in some kits or buffing pads (if available) for deeper cuts until they are levelled out and smooth.
Polish over repaired areas using non-abrasive polish also found within most scratch repair kits until it matches surrounding surfaces’ shine level.
Scratch Repair Products
These products come in different forms such as pens, markers, and fillers. They are easy to use and require no special skills or tools.
Scratch repair pens work by filling the scratches with a clear coat that matches the color of your cabinet’s finish. Scratch repair markers work similarly but have a felt tip for more precise application on shallow scratches.
For deeper scratches, wax fillers can be used to level out the surface before applying touch-up paint or polish. Some kits also include sandpaper for smoothing out rough edges before applying filler.
When choosing a scratch repair product, make sure it is compatible with your cabinet’s finish and color. Always follow instructions carefully and test on an inconspicuous area first before using it on visible areas.
Color-matching Techniques
If you want to achieve a seamless finish, it’s crucial to match the color of your cabinet perfectly. There are several techniques for color matching that you can use depending on the severity and depth of the scratch.
For minor scratches, using a touch-up pen or marker with a similar shade as your cabinet can do wonders. These pens come in various colors and shades, making it easy to find one that matches your cabinet’s hue.
For deeper scratches or those with more significant damage, consider using wood filler products specifically designed for gloss kitchen cabinets’ repair needs. These fillers come in different colors and shades so that you can choose one closest to your cabinetry’s original tone.
If none of these options work well enough for achieving perfect color matching results on their own – try mixing two different colored fillers together until they create just what’s needed! This technique may take some trial-and-error experimentation but will ultimately lead towards achieving an ideal result when done correctly!
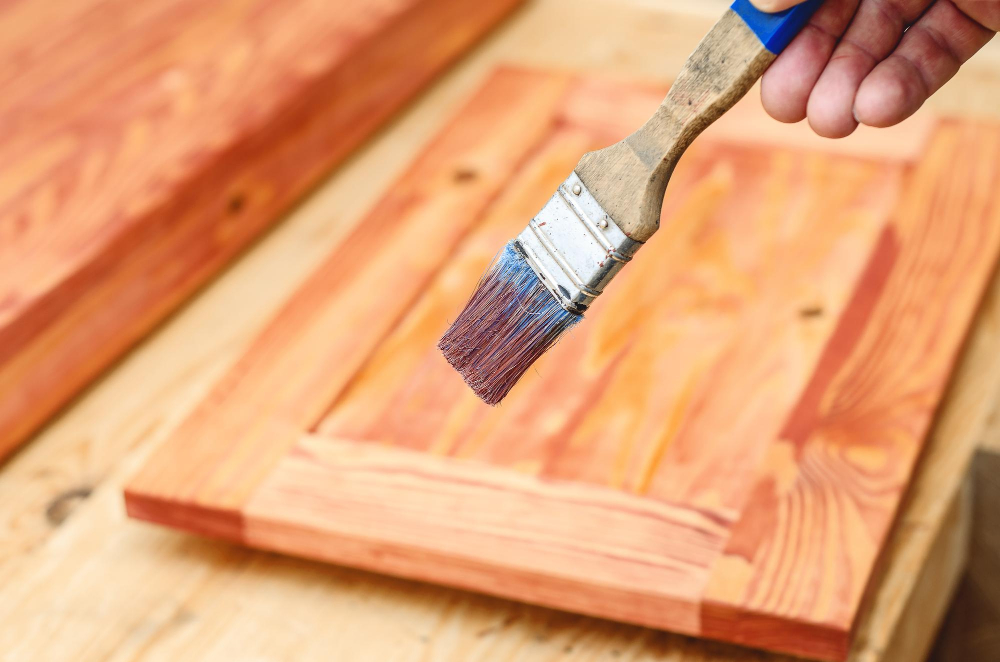
Applying Touch-up Paint
Touch-up paint is a great solution for covering up deeper scratches that have penetrated through the topcoat of your cabinet’s finish.
To apply touch-up paint, start by cleaning the scratched area thoroughly with a mild detergent and water. Once it has dried completely, use fine-grit sandpaper to smooth out any rough edges around the scratch.
Next, shake your touch-up pen or bottle well before applying it directly onto the scratch in thin layers until it matches perfectly with surrounding areas. Be sure to let each layer dry completely before adding another one.
Once you’ve applied enough coats of touch-up paint and allowed them all to dry properly (usually overnight), use non-abrasive polish or wax over these areas for added protection against future damage.
Buffing and Polishing
Once you have filled, sanded, and cleaned the surface of your cabinets, it’s time to restore their shine. Buffing involves using a buffing wheel or pad with a polishing compound to remove any remaining scratches or imperfections on the surface of your cabinet doors.
Polishing is done after buffing to give your cabinets that glossy finish they had when they were new. You can use non-abrasive polish for this step as abrasive polishes may cause more damage than good.
To start buffing and polishing, apply some polish onto a soft cloth or buffer pad then gently rub it onto the scratched area in circular motions until you achieve an even finish. Repeat this process until all visible scratches are removed.
Wipe off any excess polish with another clean cloth before applying wax if desired for extra protection against future scratches.
Using Non-abrasive Polish
Abrasive polishes can be harsh on the surface and may cause further scratches, which is why it’s essential to use a gentle, non-abrasive polish.
To use this method, start by cleaning your cabinets with a mild detergent and warm water. Once they are dry, apply a small amount of non-abrasive polish onto a soft cloth or microfiber towel.
Gently rub the cloth over the scratched area in circular motions until you achieve an even finish.
Non-abrasive polishes come in different types such as liquid or spray-on formulas that are easy to apply and leave no residue behind. They also contain protective agents that help prevent future scratches from occurring.
Remember always to read product labels before using them on your cabinet surfaces as some products may not be suitable for all types of finishes.
Reapplying Gloss Finish
This will help protect your cabinets from future damage and restore their shine. To do this, you’ll need a clear coat of polyurethane or lacquer that matches the original finish of your cabinets.
Before applying any new coating, make sure to clean and dry the surface thoroughly. Then use a fine-grit sandpaper to lightly sand down any rough spots or bumps on the surface.
Next, apply a thin layer of clear coat using a brush or sprayer in long even strokes following manufacturer instructions for drying times between coats if necessary.
Allow each layer to dry completely before adding another one until you achieve an even glossy finish across all surfaces without drips or bubbles forming during application process which can ruin final result if not corrected immediately by smoothing them out with light pressure while still wet using soft cloth dampened with water only (no solvents).
Finally buffing/polishing may be required depending on desired level of shine achieved after last coat has dried completely according manufacturer recommendations as well as personal preference.
FAQ
How do you get scratches out of gloss kitchen cupboards?
To get scratches out of gloss kitchen cupboards, use a soft microfibre anti-scratch cloth for cleaning the doors and units.
Do gloss cabinets scratch easily?
Gloss cabinets, especially acrylic ones, can scratch relatively easily but can also be buffed out with time and effort.
How do you buff out scratches on cabinets?
To buff out scratches on cabinets, rub the surface scratches or use a mixture of mineral oil and pumice, then apply matching shoe polish with a cotton swab to fill in any remaining scratches or cracks.
What are the best products or methods for repairing scratches on high-gloss kitchen cabinets?
The best products or methods for repairing scratches on high-gloss kitchen cabinets include using a high-quality scratch repair kit, touch-up paint, or a fine-grit sandpaper followed by polishing.
Can DIY scratch-removal techniques maintain the original shine of gloss cabinets?
DIY scratch-removal techniques can maintain the original shine of gloss cabinets to some extent, but the results may vary and may not completely restore the surface to its original state.
How can you protect your gloss kitchen cabinets from future scratches and damage?
To protect your gloss kitchen cabinets from future scratches and damage, apply a clear protective film or use soft microfiber cloths for cleaning and avoid abrasive cleaners or cloths.


