Last updated on
Discover a simple step-by-step guide on how to seamlessly replace your kitchen drawers and transform the functionality of your cooking space.
The kitchen is the heart of every home, and it’s where all the magic happens. From baking mouth-watering goodies to preparing savory dishes, it’s essential to have a functional and organized kitchen.
One of the most used parts of the kitchen is drawers, which help you store utensils, cutlery, and other essentials. But what happens when these drawers start to wear out or get damaged? Don’t worry; replacing them isn’t rocket science! In this article, we’ll guide you on how to replace your kitchen drawers like a pro.
So let’s get started!
Key takeaways:
- Identify damaged or worn-out drawers.
- Gather the necessary tools and materials.
- Understand the different types of kitchen drawers.
- Measure for new drawers accurately.
- Choose the right drawer boxes and slides.
What's Inside
Identifying Damaged or Worn-Out Drawers
The first step is to inspect each drawer carefully and look for signs of damage or wear and tear. Check if the drawer slides smoothly or if it gets stuck along the way.
If there are any cracks, chips, or dents on the sides of the drawers, they may be beyond repair.
Another sign that your kitchen drawers need replacement is when they don’t close properly anymore. You might notice that some of them sag down when opened fully due to broken joints at their corners.
If you’re unsure whether a particular drawer needs replacing or not, try removing it from its cabinet box and examining its construction more closely.
Tools and Materials Needed

This will make the process easier and ensure that you get a perfect fit for your new drawers. Here are some of the things you’ll need:
Tools:
- Tape measure
- Screwdriver (Phillips or flathead)
- Drill
- Jigsaw or circular saw
- Clamps
Materials:
- Replacement drawer boxes
- (pre-made or custom-built)
- Drawer slides
- (side-mount, under-mount, center mount)
- Screws
- (for attaching slides to cabinet frame)
It’s important to note that different types of drawer boxes require different construction methods and materials. For instance, solid wood dovetail joints are more durable than particleboard with stapled butt joints.
When choosing replacement parts like drawer slides and screws, be sure they match up with existing hardware in terms of size and weight capacity.
Types of Kitchen Drawers
This knowledge will help you choose a drawer that suits your needs and budget. The most common types of kitchen drawers include standard, pot, pan or dishware organizers, cutlery trays or inserts and spice racks.
Standard Drawers: These are the most basic type of kitchen drawer found in almost every home. They come in various sizes and depths depending on what they’re used for.
Pot/Pan/Dishware Organizers: These are deep drawers designed specifically for storing pots, pans or dishes. They usually have dividers that keep everything organized while preventing scratches on surfaces.
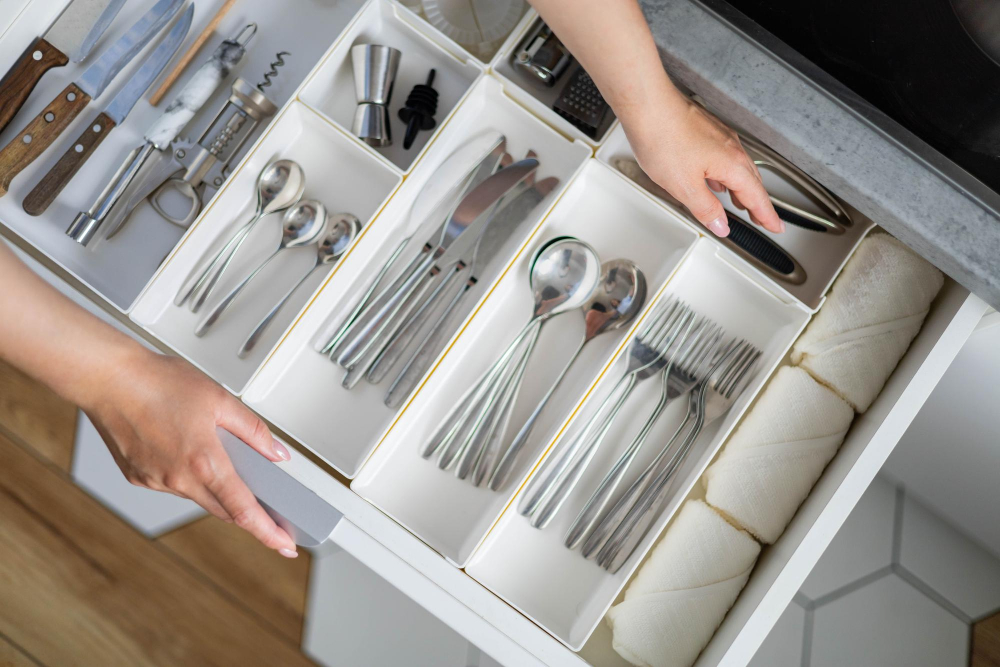
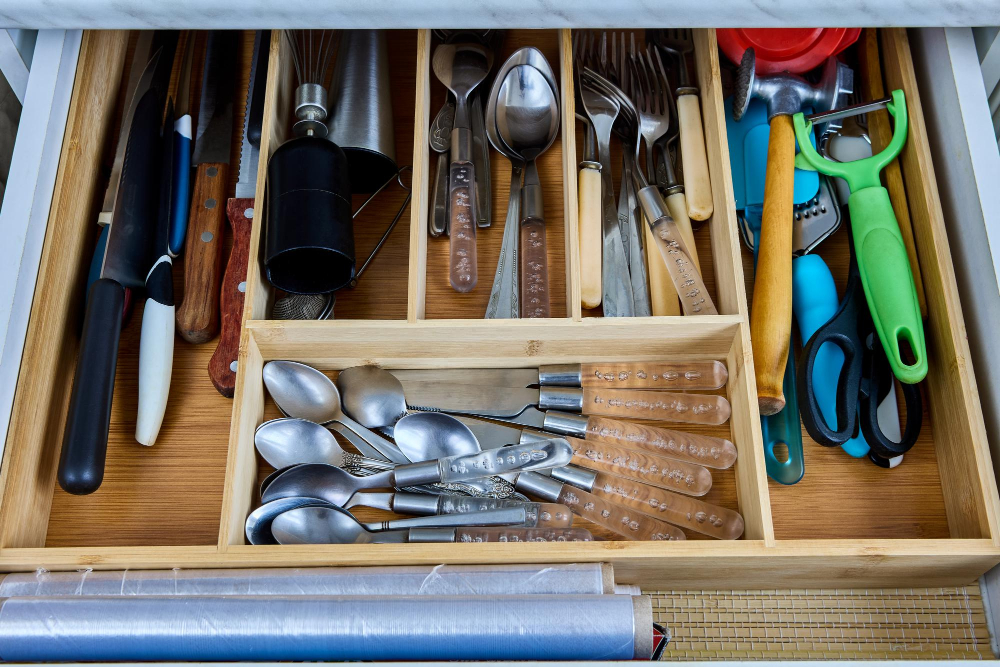
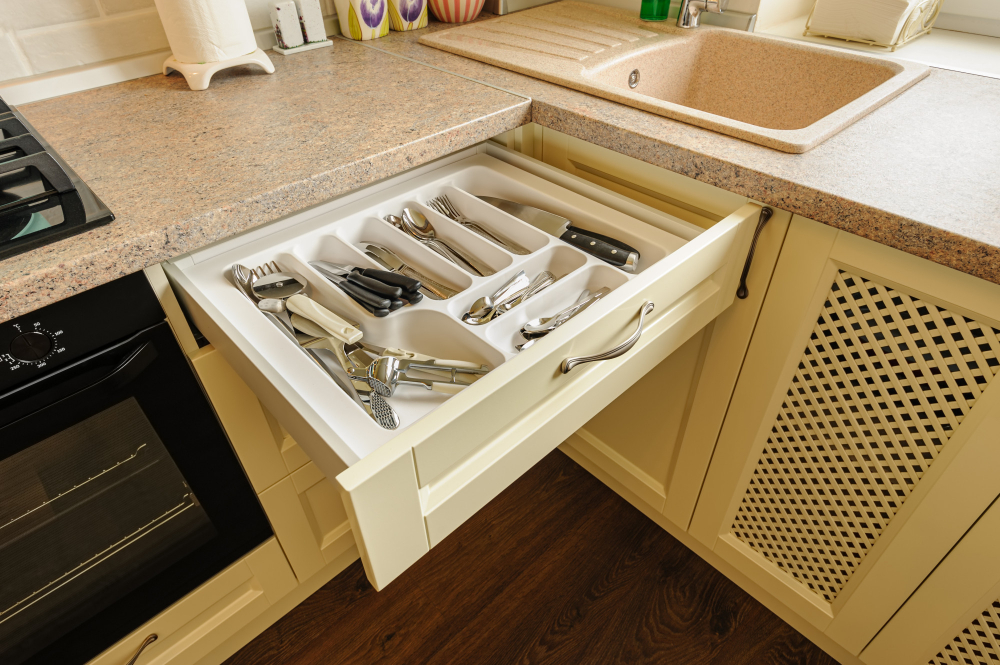
Cutlery Trays/Inserts: Cutlery trays fit inside standard-sized drawers but have compartments designed specifically for knives forks spoons etc., keeping them separated from each other so they don’t get mixed up during use.
Spice Racks: Spice racks can be installed inside cabinets as pull-out shelves or mounted onto cabinet doors with clips/hooks holding jars/bottles upright making it easy to find what you need when cooking.
Measuring for New Drawers

Measuring ensures that you get the right size of drawer boxes and slides that fit perfectly into your cabinets. To do this, remove one of the old drawers from its cabinet and take accurate measurements of its length, width, and depth using a tape measure.
It’s crucial to note that not all kitchen cabinets are created equal; therefore, measuring is critical in ensuring a perfect fit for your replacement drawers. Take multiple measurements at different points along each dimension to ensure accuracy since some areas may be slightly larger or smaller than others.
Once you have taken these measurements correctly, use them as a guide when selecting new drawer boxes or ordering custom-made ones if necessary. Remember also to consider any additional features such as full-extension slides or soft-close mechanisms when choosing replacements.
How to Find the Right Drawer Boxes
The first step is to measure your existing drawers’ dimensions and note down any special features such as notches or cutouts. This information will help you determine which type of drawer box you need.
When searching for replacement drawer boxes, consider factors such as durability, functionality, and style. Look for high-quality materials that can withstand daily use without breaking down quickly.
You can choose from a variety of materials like wood or metal depending on your preference and budget. Wood is an excellent option if you want a classic look while metal offers more durability.
Another important factor to consider when choosing new drawers is their weight capacity; ensure they are strong enough to hold all your kitchen essentials without sagging under pressure.
Materials for Drawer Boxes
The material you choose will determine the durability and longevity of your new drawers. There are several options available in the market, including plywood, MDF (medium-density fiberboard), solid wood, and particleboard.
Plywood is a popular choice because it’s strong and durable. It’s made by gluing together thin layers of wood veneer at alternating angles to create a sturdy panel that resists warping or cracking.
MDF is another option that offers excellent stability but isn’t as strong as plywood. It’s made from compressed sawdust mixed with resin glue under high pressure and temperature conditions.
Solid wood provides an elegant look but can be expensive compared to other materials like MDF or particleboard. However, if you’re looking for long-lasting quality construction with natural beauty that ages well over time – this may be worth considering!
Particleboard is an affordable option commonly used in furniture manufacturing due to its low cost; however, it doesn’t offer much strength compared to other materials mentioned above.
Joint Construction
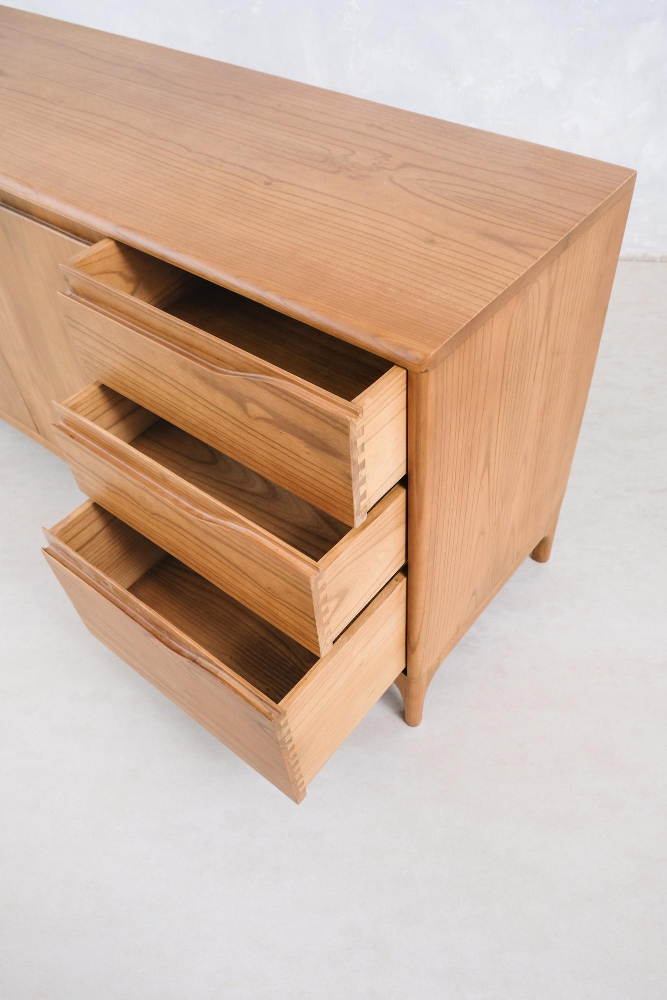
The joints are the parts of the drawer that hold everything together and ensure stability. There are different types of joint constructions, including dovetail joints, dowel joints, and rabbet-and-groove joints.
Dovetail Joints: These are interlocking wedge-shaped cuts on both sides of a drawer’s corner pieces. They provide excellent strength and durability but can be challenging to make.
Dowel Joints: Dowels refer to small wooden pegs inserted into holes drilled in two adjoining pieces of wood. This type of joint is easy to make but may not be as strong as dovetails.
Rabbet-and-Groove Joints: This type involves cutting a groove along one edge piece while creating a rabbet (a notch) on another piece’s end so they fit together like puzzle pieces. It provides good strength for light-duty applications such as kitchen drawers.
Bottom Panel Construction
The bottom panel is an essential part of your kitchen drawers as it supports all the weight inside them. Therefore, you need to ensure that they are sturdy enough to withstand daily use.
When constructing a new drawer box, there are two types of materials commonly used for making bottoms: plywood or hardboard. Plywood is more durable than hardboard and can handle heavier loads without sagging over time.
Hardboard is less expensive but not as strong as plywood.
To construct a sturdy bottom panel using plywood, measure and cut a piece of 1/4-inch-thick material according to your cabinet’s dimensions. Then glue or nail this piece onto the sides of your drawer box frame before attaching any slides or hardware.
If you choose hardboard instead, make sure that it fits snugly into place by cutting it precisely according to measurements taken earlier in step five (Measuring for New Drawers). Once cut correctly, attach this board with glue or nails onto each side edge so that there isn’t any movement when opening/closing drawers later on down-the-line!
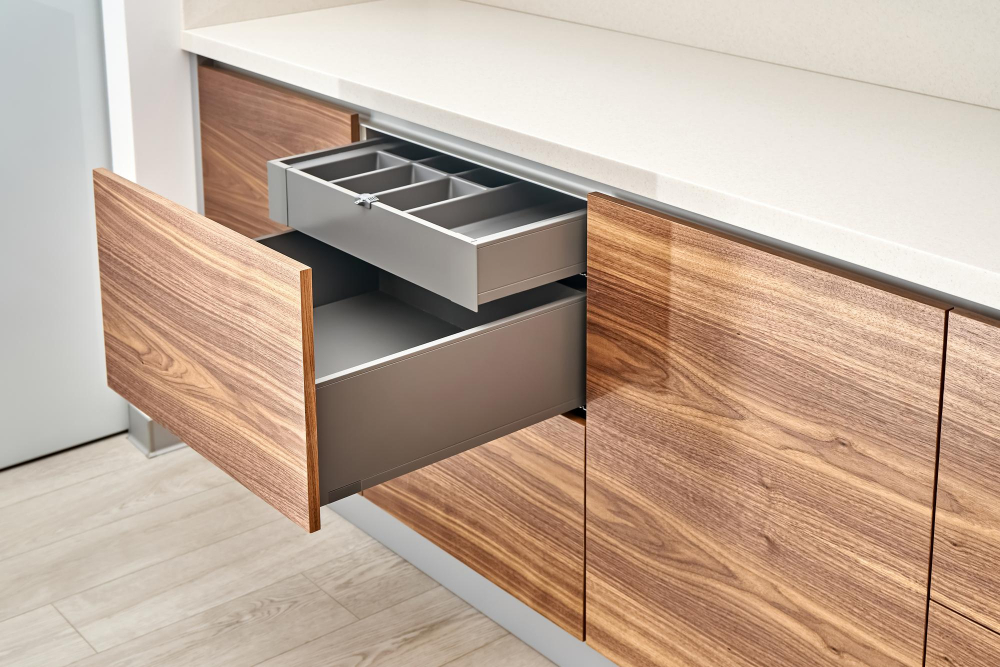
Choosing Drawer Slides
Drawer slides are responsible for the smooth and effortless opening and closing of your drawers. There are two main types of drawer slides: side-mount and undermount.
Side-mount drawer slides attach to the sides of your cabinet’s interior walls, while undermount ones attach underneath them. Undermounts provide a cleaner look since they’re hidden from view but require more precision during installation.
Another factor to consider when selecting a slide is its length or extension capability. Full-extension sliders allow you full access to all parts of your drawers, making it easier for you to reach items at the back without having to dig through everything else in front.
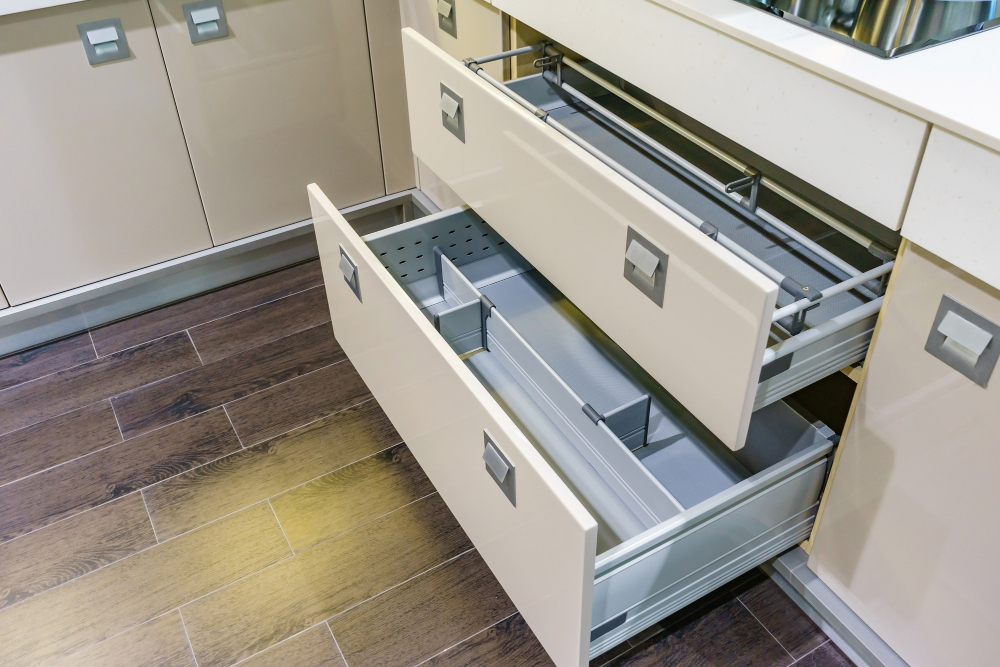
Full Extension Drawers
They offer easy access to the entire drawer, making it easier to store and retrieve items. Unlike traditional drawers that only open partially, full-extension drawers slide out completely from the cabinet box.
When replacing your kitchen drawers, consider upgrading to full-extension slides if you don’t already have them installed. These types of slides come in different sizes and weight capacities depending on your needs.
To install full-extension slides, measure the length of your drawer box and purchase corresponding slide lengths. Attach one side of each slide onto the inside wall of your cabinet using screws or mounting brackets provided with the hardware kit.
Next, attach each corresponding slide onto either side of your drawer box using screws or brackets provided with the hardware kit as well. Once both sides are attached securely in place on both sides (cabinet wall & drawer), test out how smoothly they glide by sliding them back-and-forth several times before attaching any fronts or handles.
Ordering Replacement Drawers

You can either purchase pre-made drawers or custom-made ones to fit your specific measurements. If you’re ordering online, make sure to double-check the dimensions before placing an order.
When ordering replacement drawers, consider factors such as material quality and durability. Solid wood is a popular choice because it’s sturdy and long-lasting.
However, if you’re on a budget or prefer something more lightweight than solid wood options like plywood may be suitable.
It’s also essential to choose drawer boxes with dovetail joints since they are stronger than other types of joints used in furniture construction.
Removing Old Drawers
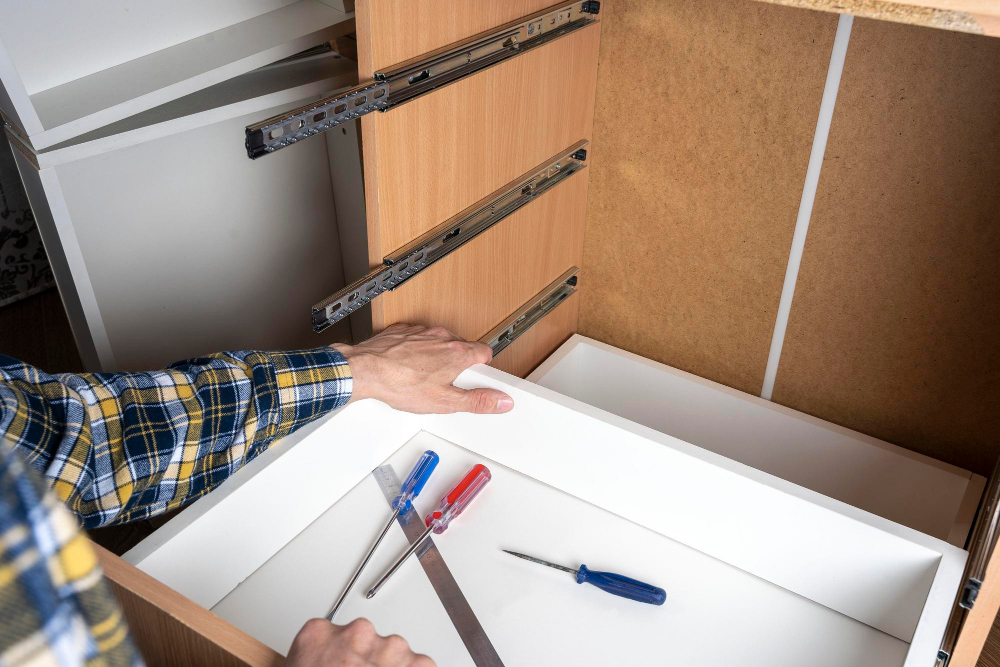
Removing old drawers is a crucial step in replacing your kitchen drawers. It allows you to assess the condition of your cabinets and make any necessary repairs before installing new ones.
To remove old drawers, start by emptying their contents and removing any hardware such as knobs or handles. Next, pull out the drawer until it stops moving forward; this will expose its slides on either side of the cabinet.
Locate the release lever on each slide and push it down while pulling outwards towards yourself simultaneously. This should disengage both sides of each slide from their corresponding tracks inside your cabinet frame.
With both slides removed from their tracks, gently lift up on one end of an individual drawer box until all four corners are free from contact with anything else in its vicinity (including other boxes).
Preparing the Cabinets for Installation

Start by removing any debris or dust from inside the cabinet using a vacuum cleaner or a damp cloth. Check for any protruding nails, screws, or staples that may interfere with drawer installation and remove them.
Next, inspect the cabinet frame to ensure it’s level and square. If you notice any warping on your cabinets’ sides or bottom panels due to water damage over time, use wood shims to level them out before proceeding with installation.
Also, check if there are existing holes in your cabinet frames where you can attach drawer slides; if not present already drill pilot holes for attaching slides according to manufacturer instructions.
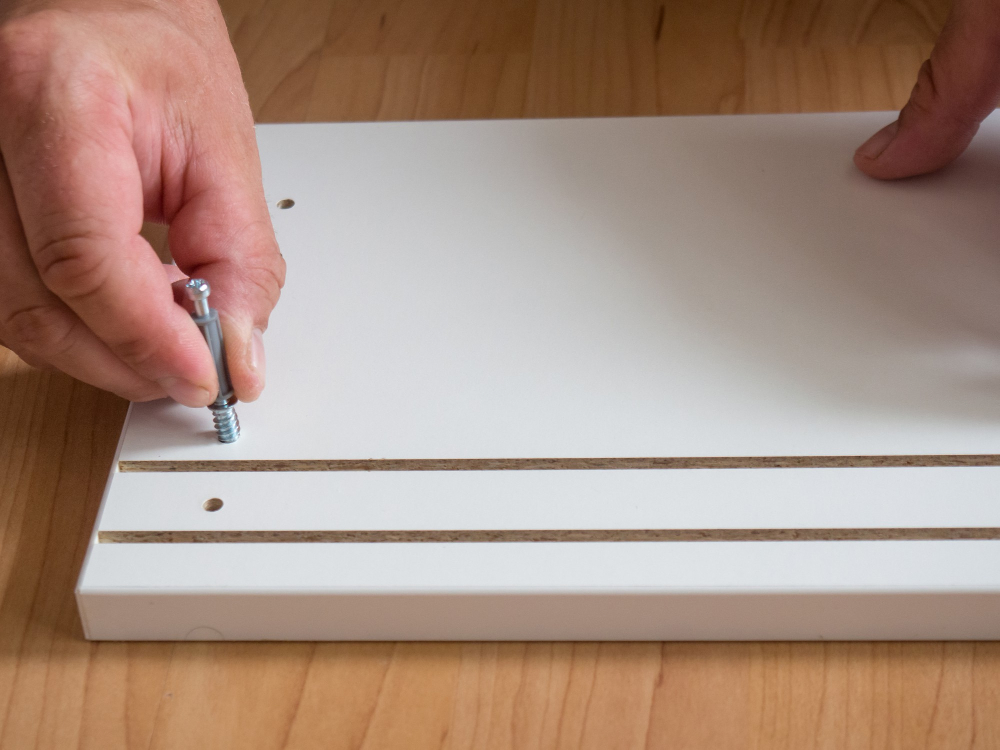
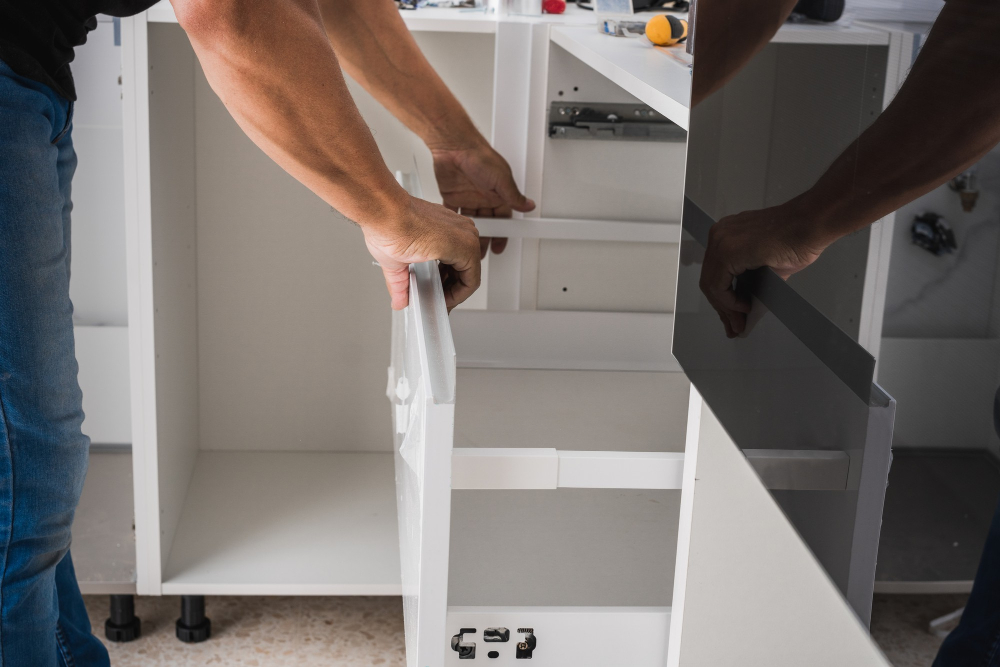
Assembling New Drawers
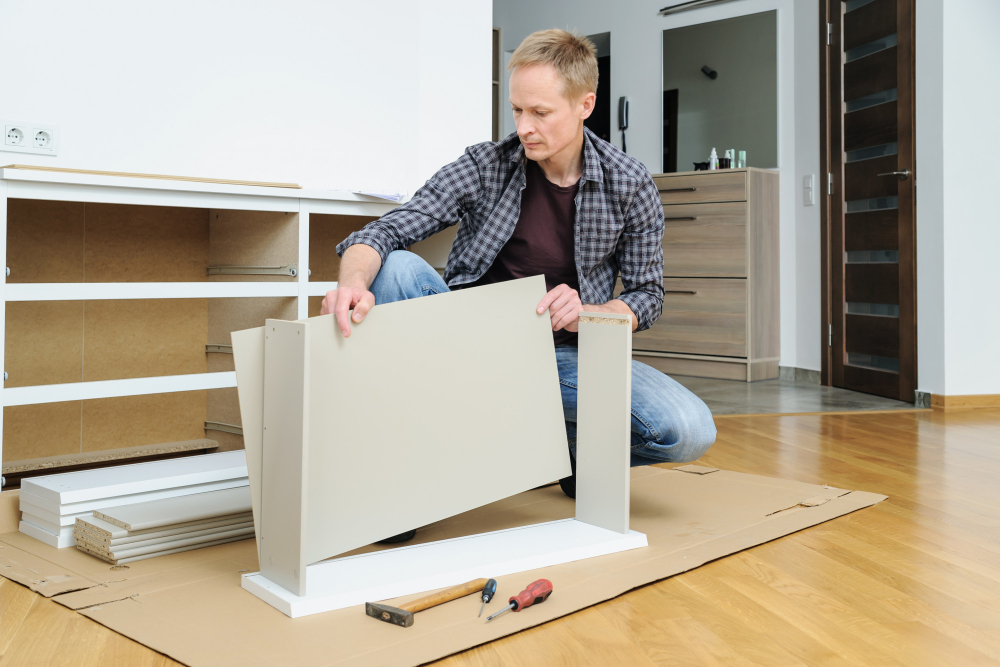
Start by laying out all the pieces on a flat surface. Follow the manufacturer’s instructions carefully to ensure that you assemble them correctly.
Begin by attaching the front and back panels of each drawer box using wood glue or screws. Then attach both sides of each box, making sure they are flush with the front panel.
Next, install any additional support pieces that come with your kit for added stability. These may include corner braces or center supports.
Attach the bottom panel of each drawer box using either glue or screws depending on what is recommended in your kit instructions.
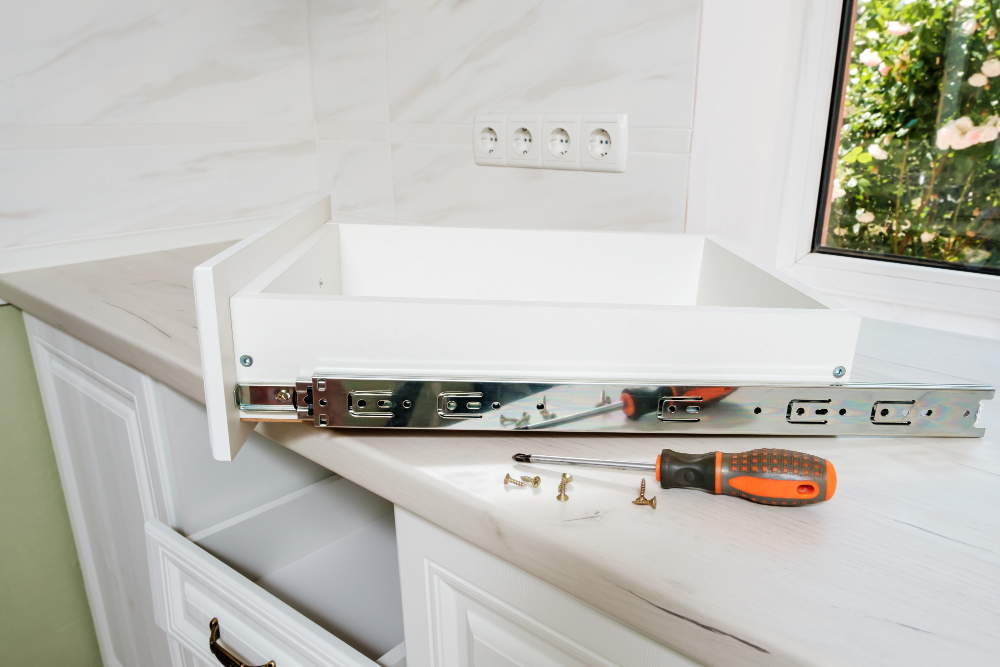
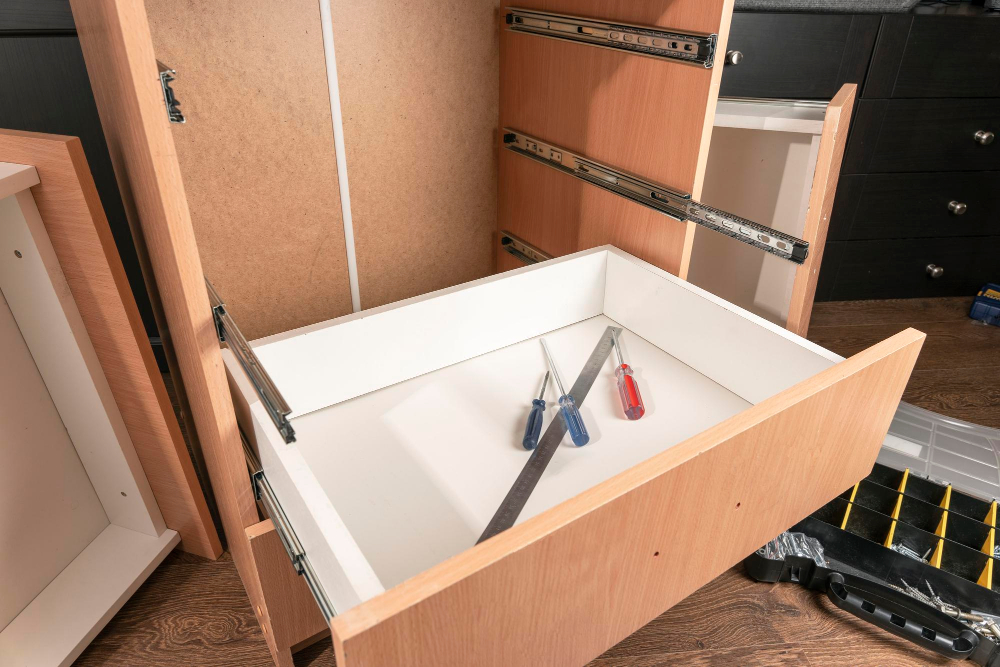
Installing Drawer Slides
Drawer slides are essential components that allow the drawers to slide in and out smoothly. To begin, measure and mark where you want your drawer slides to be installed on both sides of the cabinet box.
Make sure they’re level before attaching them with screws.
Next, attach the other half of each slide onto each side of your new drawer boxes using screws or staples depending on what type of material is used for construction.
It’s important to ensure that both sets of sliders are aligned correctly so that when you insert a drawer into its corresponding slot, it will glide effortlessly without any wobbling or jamming.
Test all newly installed drawers by sliding them in and out several times while checking for smoothness and stability.
Attaching Drawer Fronts
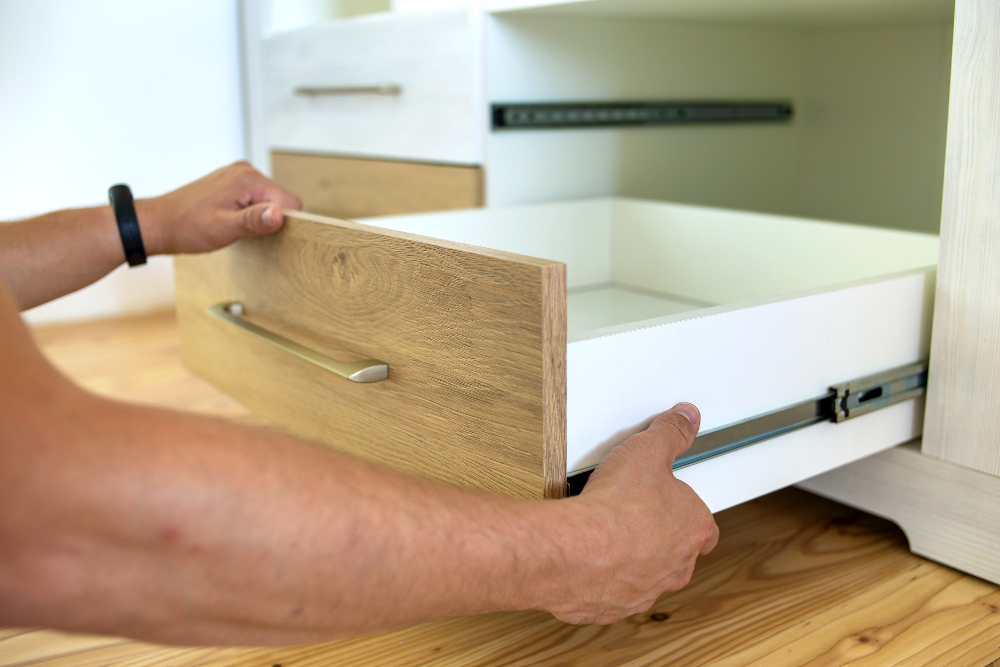
This is where your kitchen starts to take shape! First, place a piece of cardboard or cloth on top of your countertop to prevent any scratches. Then position each front onto its corresponding box and use clamps or masking tape to hold them in place.
Next, drill pilot holes through both sides of each front panel into their respective boxes using a 3/32-inch drill bit. Make sure that you don’t go too deep as this can damage your new drawers.
Screw in two screws per side for smaller drawers and three screws per side for larger ones until they are flush with the wood surface. Repeat this process for all other fronts until everything is securely attached.
Aligning Drawers Properly
Proper alignment ensures that your drawers open and close smoothly without any hitches or wobbling. To achieve this, start by checking if there are any gaps between the cabinet frame and the drawer box on both sides of each slide.
If there are gaps, adjust them accordingly until they’re even on both sides. You can use shims or washers to fill in any spaces between the slide brackets and cabinet frame.
Next, check if all four corners of each drawer box sit flush against their corresponding slides’ rollers or ball bearings. If not, make adjustments by loosening screws holding these components together slightly until everything lines up correctly before tightening them back up again.
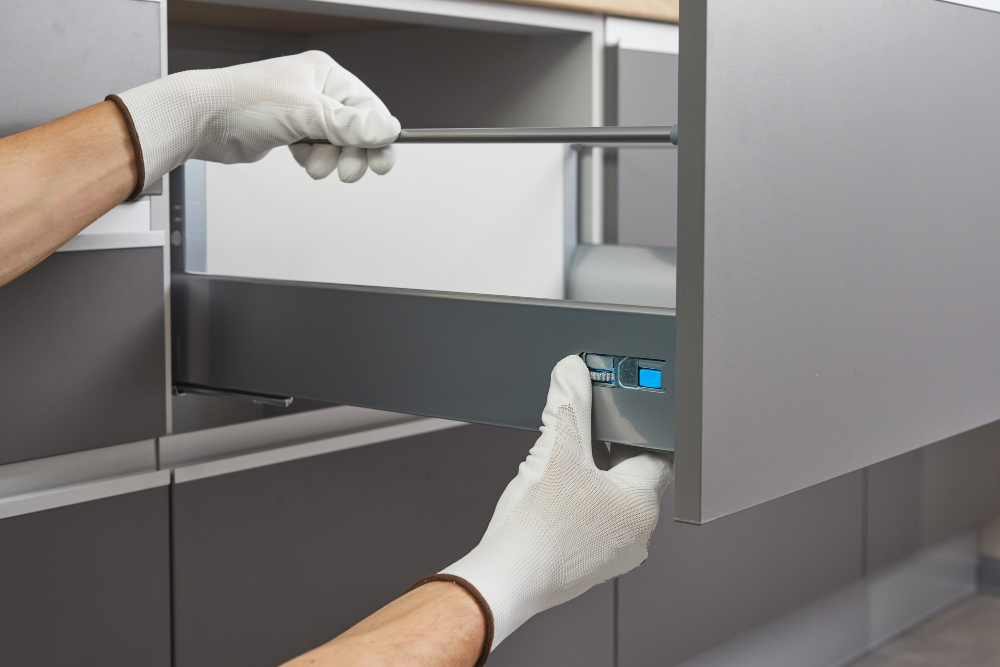
Securing Drawers to Slides

This step is crucial as it ensures that your drawers are stable and won’t fall off when in use. To do this, carefully place each drawer onto its corresponding slide and push them all the way back until they stop moving.
Next, locate the locking mechanism on each slide and engage it by pushing down or flipping a lever depending on your type of slide. The locking mechanism will hold your drawer securely in place while still allowing for easy removal if necessary.
It’s important to ensure that all screws are tightened properly during installation to prevent any wobbling or instability of the drawers once they’re secured onto their slides.
Finishing Touches and Adjustments
First, ensure that all the screws are tightened correctly and that everything is aligned properly. Next, test each drawer by opening and closing it several times to check for smooth operation.
If you notice any issues with the alignment or operation of your new drawers, don’t panic! It’s common for some minor adjustments to be needed after installation. For example, if a drawer isn’t closing smoothly or seems misaligned when closed, try adjusting the slides slightly until it operates correctly.
Another important step in finishing off your newly installed kitchen drawers is adding handles or knobs. These small details can make a big difference in both functionality and aesthetics of your cabinets.
When choosing handles or knobs for your new kitchen drawers consider factors such as style preference (modern vs traditional), material (metal vs wood), size (smaller ones may not work well on larger doors) among others. Replacing old worn-out Kitchen Drawers doesn’t have to be an overwhelming task; with proper guidance like this article provides above coupled with patience & attention-to-detail during installation will give you functional storage space while also improving overall aesthetic appeal of your cooking area!
FAQ
How much does it cost to replace a kitchen drawer?
The cost to replace a kitchen drawer varies depending on the number of soft-close drawers being installed, ranging from approximately $80 to $200 for two drawers, up to $400 to $1,000 for ten drawers.
Can you replace just cabinet drawers?
Yes, you can replace just cabinet drawers, especially if they are significantly damaged or if you prefer not to repair the old ones, by ordering a replacement drawer box.
Can you change kitchen drawers?
Yes, changing kitchen drawers is possible as they can be replaced when old, damaged, or for a new look, making it an affordable option for a kitchen makeover.
What are the best materials for new kitchen drawers?
The best materials for new kitchen drawers are solid wood, plywood, and medium-density fiberboard (MDF) due to their durability, strength, and resistance to wear.
How to choose the right size and style for replacement kitchen drawers?
To choose the right size and style for replacement kitchen drawers, measure the dimensions of the existing drawers and match them with the desired style that complements your kitchen design.
What is the typical process for removing and installing new kitchen drawers?
The typical process for removing and installing new kitchen drawers involves: uninstalling the existing drawers by detaching them from their slides, and then installing the new drawers by attaching them to their respective slides and securing them in place.


