Last updated on
Learn to easily replace a kitchen faucet with a 3-hole setup and bring a fresh look to your kitchen sink area.
Key takeaways:
- Verify the kitchen sink hole count and measurements.
- Shut off the water supply before starting the replacement.
- Uninstall the old faucet by removing mounting nuts and supply lines.
- Select a new faucet based on size, features, and compatibility.
- Mount the new faucet securely, attach supply lines, and check for leaks.
What's Inside
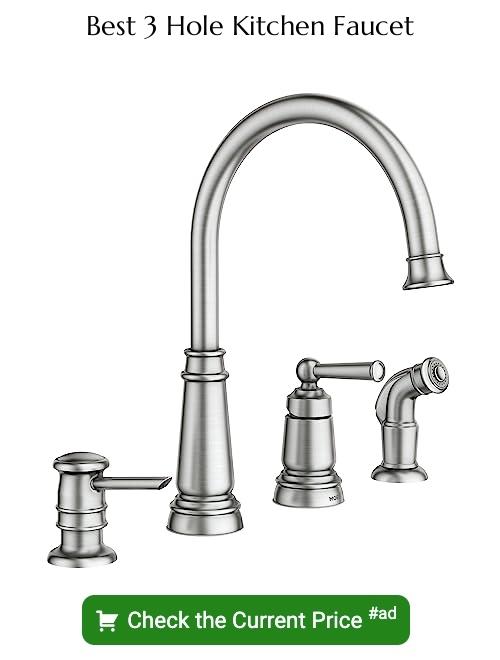
Verify the Kitchen Sink Hole Count
First, take a peek under your sink. Most kitchen sinks have three holes, but it’s always good to double-check. These holes can be in a straight line or in a little triangle formation. Important to know before you start so you can get the right faucet.
Measure the distance between the holes. Standard three-hole sinks usually have holes evenly spaced 4 inches apart, but some might be 8 inches. Precision here will save you a headache later.
Double-check whether your sink has an extra hole for a sprayer or soap dispenser. Knowing your sink’s layout helps you pick a compatible faucet without any return trips to the store. You definitely don’t want to let the store clerk recognize you by name.
Shut the Water Off
First, locate the shut-off valves under the sink. Typically, they’re easy to spot—usually two knobs, one for hot water and one for cold. If these are elusive, you can also turn off the main water supply for the entire house. Just make sure no one’s in the shower when you do it unless you enjoy panicked screams.
Turn these knobs clockwise until they can’t turn anymore. Feel like a DIY superhero yet? Check if the water is off by turning on the faucet. If no water comes out, you’ve done it right. If it’s still flowing, double-check those valves or prepare a towel for an unexpected mini-fountain.
Uninstall the Faucet
Alright, time to get that old faucet out of your life. First, crawl under the sink and locate the mounting nuts holding the faucet in place. These are sneaky little guys and might require a flashlight to spot clearly.
If they’re corroded or stubborn, a basin wrench is your best friend here. A spray of penetrating oil can work wonders too. Just give it a few minutes to do its magic.
Once those nuts are off, don’t forget to disconnect the supply lines. The pipes will probably still have some water in them, so have a towel handy unless you want an impromptu foot bath.
With everything detached, you should be able to lift the old faucet right out. If it feels stuck, a gentle wiggle will do. Sometimes gunk and grime build up and act like super glue. You’ll be amazed, or horrified, by what you find under there.
Find a New Faucet
Picture this: you’re in the faucet aisle, possibly a bit overwhelmed by the choices. Fear not, dear reader! Here’s how to make a smart pick:
First, measure your current sink setup. Match the size and configuration—three holes, remember?
Consider the height and reach of the spout. Can you fill that monstrous pasta pot with ease?
Check the handle type. Two handles or one? Single handles are trendy and easy-peasy.
Look at the finish. Stainless steel hides fingerprints like a pro, but matte black is oh-so-chic.
Contemplate additional features. Pull-down sprayer? Soap dispenser? Why not?
And finally, ensure compatibility with your water supply. Faucet shopping should feel like a fun treasure hunt, not a scavenger hunt from nightmares.
Now you’re armed to find your new kitchen hero!
Mount the Faucet
Alright, the old faucet is out, and now it’s showtime for the new one. Position the new faucet through the sinkholes. Make sure it’s aligned perfectly. This isn’t the Leaning Tower of Pisa!
Note which part is front-facing; you don’t want your handle pointing backward. If there’s a gasket, place it between the faucet and the sink to prevent leaks. No gasket? Use plumber’s putty for the same purpose.
Under the sink, attach the mounting nuts. Tighten them securely but don’t go all Hulk on them. You don’t want to crack anything. A crescent wrench or basin wrench will do the trick. Make sure everything is snug and in the right place.
Remember to keep the faucet steady while securing it, to avoid wobbling later. Test it to make sure nothing shifts. You’re already halfway there!
Attach the Supply Lines
You’re almost there! Time to reconnect those supply lines. This is where things get real.
First, grab the hot and cold supply lines and connect them to the appropriate inlets on your faucet. Hot water typically connects to the left and cold water to the right—think of it like a dance, but with fewer twirls and more tightening nuts.
Use your trusty wrench to make sure the connections are snug but not overly tight. We don’t want to strip any threads. Over-zealous tightening can lead to leaks, which kind of defeats the whole purpose, doesn’t it?
If your new faucet comes with built-in supply lines, your life just got easier! Simply connect them to the shut-off valves under the sink. If not, make sure you’re using the right length to avoid awkward twists in the lines.
Double-check everything! There’s nothing worse than finding out you’ve cross-threaded something after you’ve turned the water back on. Give each connection a small tug to ensure they’re secure.
Now, we wait for the grand finale: turning the water back on and checking for leaks. Next up!
Turn the Water On and Check for Leaks
This is the exciting part! Turn on the water supply under the sink and hold your breath (just for fun). Now, twist the faucet handle to let the water flow.
Use your eyes and fingers to inspect for any sneaky leaks. Feel around the connections and look for drips.
If everything’s dry—high five! If not, tighten the connections gently and try again. Still leaking? It might be a sealing washer issue or worse, a manufacturing defect.
Lastly, check the water pressure and ensure it’s consistent. Ever turn on a faucet and felt like you got misted by a dainty sprinkle? Yeah, not fun. If pressure’s low, an aerator might be clogged. Unscrew the faucet tip and clean it.
And voila! You’re not only a proud faucet installer but also the Sherlock Holmes of kitchen plumbing!


