Last updated on
Learn how to determine the right number of recessed lights needed to brighten up your kitchen effectively.
So you’re thinking about adding some recessed lighting to your kitchen, huh? Smart move! The perfect lighting can highlight your culinary masterpieces and, let’s be honest, save you from those tragic avocado pit mishaps. Whether your kitchen is a cozy nook or a grand hall with ceilings that make Masaccio jealous, the secret sauce is all in the details. From perfect spacing to wattage debates, and yes, even considering those pesky ceiling heights, this guide will light up your path—literally. Get ready to be enlightened and avoid those common kitchen lighting pitfalls. Let’s make your kitchen glow like it’s ready for the cover of “Illuminating Interiors” magazine.
Key takeaways:
- Lighting layout is crucial for functional kitchens.
- Aim for 4 to 6 feet spacing between lights.
- Consider kitchen size and shape for placement.
- Use LED lights for efficiency and lower costs.
- Avoid installing lights like an airport runway!
What's Inside
Importance of Lighting Layout in the Kitchen
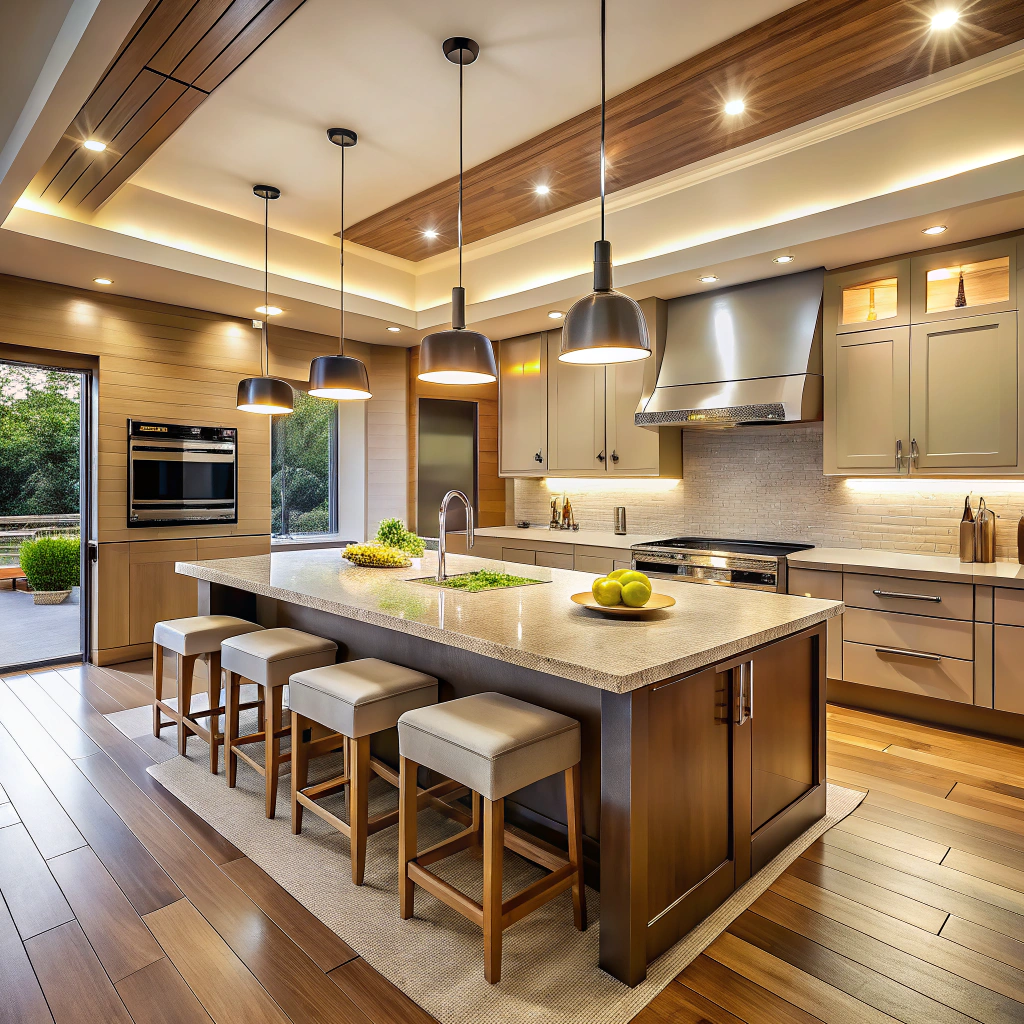
Proper kitchen lighting is like the secret sauce to creating a functional and fabulous culinary space. Get it wrong, and you’ll be chopping veggies in the shadows or setting a romantic mood while searching for the salt.
First off, think of visibility. The right lighting layout ensures all those hazardous kitchen tools are clearly visible, which is critical when your knife skills are a work in progress.
Variety is key. Layers of lighting, from task to ambient, can transform your kitchen from a work zone during the day to a cozy, inviting space in the evening.
Functionality meets style here. Good lighting enhances the aesthetic appeal of your kitchen. Imagine highlighting your beautiful backsplash or those snazzy countertops – all with a few well-placed fixtures.
Energy efficiency gets a boost too. With modern LED options in the right layout, you can cook up a storm without blowing up your energy bill.
Lastly, think resale value. An updated, well-lit kitchen often catches a potential buyer’s eye like a piping hot pie on a windowsill.
In the end, the right layout doesn’t just illuminate your kitchen; it sets the stage for countless delicious memories.
Calculating Light Spacing and Placement
Spacing can make or break your kitchen lighting. It’s like planning a road trip; misguided spacing, and you’ve left the luggage behind.
First off, keep a balance. Each light needs its personal space to shine. Around 4 to 6 feet apart should do the trick. Spacing too close? You’ll feel like you’re onstage at a rock concert. Too far? The dim vibe of a spooky movie set.
Focus on your countertops. That’s where you’ll slice, dice, and maybe even chop some onions metaphorically for that chick flick. Placing lights about 12 to 18 inches from the cabinets ensures your supreme chopping skills aren’t eclipsed by shadows. No chef wants to julienne with a side of gloom.
With high ceilings, aim the lights 2 to 3 feet away from each wall. Your walls will thank you for not resembling a cave tapestry.
Remember, the wrong placement can be as awkward as a first date selfie. Keep it smooth and well-lit, and your kitchen will shine like a star.
Determining Your Kitchen Size and Shape
Not all kitchens are created equal, and that’s what makes lighting them such a bright adventure! Whether your cooking space is a compact square or an expansive rectangle, its size and shape are your first clues in setting up the perfect lighting scheme.
For a square kitchen, imagine the floor as a tic-tac-toe grid. Place a light in the center of each square, ensuring the room is evenly illuminated. In rectangular kitchens, think of placing lights along the length of the room, like a row of bowling pins, spaced evenly apart for balanced brightness.
Open-plan kitchens might feel tricky, like a complicated jigsaw puzzle, but start by lighting up the islands and prep zones. Then, extend your focus to dining and lounge areas with coordinating fixtures.
Get to know your kitchen’s geometry and orchestrate your lights like stars in a nighttime sky, giving your kitchen a glow that’s both functional and fabulous!
Identifying Key Areas Requiring Lighting
Think of your kitchen like a Hollywood set, each area needs its time to shine! Prep zones, where you’re chopping veggies like a culinary ninja, need focused task lighting. Aim for at least one recessed light above each main workstation, like above your countertop or sink. You don’t want to slice an onion and your finger!
For those who enjoy showing off their gourmet gadgets, the kitchen island deserves some love too. Use two or three recessed lights evenly spaced here to keep it well lit.
Stove areas or cooktops? Oh yes, they need lighting too. You’ll want enough light to make sure your soufflé rises perfectly.
Finally, don’t forget cabinets that create shadows darker than a mystery novel. Placing lights strategically here will illuminate your cabinets, making finding that elusive spice jar quicker than a thief in the night.
Remember, each area has its own diva-like needs. Make sure they’re all glowing in their own light without stealing each other’s thunder!
Considering Different Ceiling Heights
Different ceiling heights can play tricks on your recessed lighting plans. Consider these points to make sure your lighting doesn’t leave you in the dark or blind you mid-binge on cooking shows.
Higher ceilings tend to need more light to cover the same area. It’s like trying to keep a cat off a counter – the struggle is never-ending. You might need fixtures with a higher wattage or additional lights to get the job done.
For lower ceilings, avoid creating a UFO landing strip vibe in your kitchen. Choose smaller lights with a wider beam to spread light evenly without overwhelming the space. And remember, you want guests admiring your culinary skills, not squinting at the light above.
If your ceiling is sloped, you’ll need adjustable, gimbal-style fixtures. Otherwise, your beautiful new recessed lights might end up spotlighting the floor instead of your fabulous lasagna. And nobody needs that kind of help seeing their crumbs.
Make sure the lights are positioned to complement the overall kitchen design. No one wants to feel like they’re being interrogated just for digging into the cookie jar.
Factoring in Natural Light Availability
Sunlight can be the ultimate mood booster—like coffee that doesn’t stain your teeth! It’s crucial to consider how much natural light your kitchen basks in because it impacts the need for recessed lighting.
If your kitchen sports massive windows and gets sunlight all day, you might scale back on the number of recessed lights. Your electricity bill will thank you and Mother Nature might just send you a thank-you note on eco-friendly paper.
For kitchens that feel more like cozy caverns, thanks to limited natural light, additional recessed lights can keep things bright and cheerful. Nobody wants to chop onions in the dark after all—that’s not a tear you want to cry!
Remember, seasonal changes affect sunlight. If you’re in a place where winter turns your kitchen into a shadow puppet theater, more lights could help. On the flip side, if you live somewhere with eternal sunshine, you may need fewer fixtures.
Natural light availability shapes how many recessed lights you need, so let your kitchen’s sun exposure be your guiding light.
Evaluating Wattage and Light Output
Not all watts are created equal, much like different shades in a paint store. Understanding wattage and light output is vital for that perfect kitchen glow, avoiding the “am I chopping carrots or my fingers?” scenario.
First, think lumens—fancy for “how bright is this bad boy?” More lumens, more light. It’s like comparing a campfire to a floodlight.
Opt for LED lights. They’re the overachievers with high efficiency and low electricity bills. They’re like that one friend who does yoga, runs marathons, and still remembers your birthday.
Layer the light. Use different wattages for various tasks. Under-cabinet LEDs can illuminate your cooking surfaces, while softer ceiling lights provide ambient lighting.
Consider color temperature to set the mood. Aim for 3000-4000K, which is kitchen-speak for “not too yellow, not too blue.” It’s the Goldilocks zone.
Lastly, test lighting in your space before deciding. No one wants a spotlight interrogation room vibe during dinner prep, after all!
Choosing the Right Beam Angle and Trim Type
Imagine your kitchen as a stage and lighting is your spotlight. Selecting the right beam angle is like deciding whether you want a dramatic solo or an ensemble performance. Narrow beam angles focus light in tighter spots, perfect for highlighting a dreamy kitchen island or illuminating your culinary masterpieces. On the other hand, wider beams spread light more broadly, ideal for general lighting to brighten up the entire space.
Now, onto trim types. Think of trims as the accessories for your lights. Baffle trims are like classic black dresses, minimizing glare and giving a softer look to your space. Meanwhile, reflector trims are the disco balls of the kitchen world, optimizing light output and adding a hint of sparkle. Aim trims can be your spotlight, targeting specific areas like over the sink or your favorite cookbook collection.
Never forget, a little gold trim can make everything feel a bit more glamorous, even if your kitchen wall color is still stuck in the 1980s.
In the end, mix and match until your kitchen feels like the center stage it deserves to be!
Common Mistakes to Avoid
First off, avoid the “runway effect.” Installing lights in a single row down the center may make your kitchen look like an airport runway. Unless you’re expecting a plane to land for dinner, staggered rows provide a more even distribution.
Too few lights can leave you squinting like you’ve misplaced your glasses. But don’t go overboard either; a kitchen brighter than the sun might cause guests to reach for sunglasses before reaching for appetizers.
Forgetting dimmers is a rookie mistake. Dimmers let you control the mood, perfect for both romantic dinners and stressful cookie-baking marathons at midnight.
Don’t ignore the beam angle. A beam that’s too narrow will spotlight just your empty cookie jar. A wider angle provides broader coverage, sparing you from shadowy corners where dust bunnies plot their next move.
Finally, remember height matters. Lower ceilings need more spacing; higher ceilings might need more powerful lights. But remember, we’re not lighting up the Bat-Signal, just dinner prep. Choose wisely!
Professional Advice and Tools for Installation
Getting a professional involved can be the key to a bright and beautifully lit kitchen. Here’s why they can be your kitchen lighting heroes, and some tools that might come in handy:
Electricians have the expertise to calculate the best layout for avoiding dark corners that might act like secret hideouts for your old measuring cups.
They own tools like stud finders, ensuring your lights don’t end up resembling a starlit ceiling in the wrong places.
Voltage testers keep them safe and can prevent your kitchen from becoming an unexpected disco party due to electrical mishaps.
With their knack for measurements, professionals keep ceiling joists from interfering with the perfectly calculated placement of the lights.
Tools like wire strippers and circuit finders help them navigate the electrical maze, ensuring your lighting is as stellar as grandma’s pie recipe.
Installing recessed lights might sound simple, but having someone who knows the ropes ensures all efforts are, quite literally, well-grounded.

