Last updated on
Discover the simple steps to effortlessly connect your hose to a kitchen tap without needing an adaptor, ensuring a hassle-free experience every time.
If you’re looking to connect a hose to your kitchen tap, you might be wondering if it’s possible without an adaptor. The good news is that it is! With a few simple steps and the right tools, you can easily attach a hose to your kitchen tap and start watering your plants or filling up buckets in no time.
In this article, we’ll walk you through the process of attaching a hose to your kitchen tap without an adaptor, so you can enjoy the convenience of having water access right at your fingertips. So let’s get started!
What's Inside
Necessary Tools and Materials
Here are some items you’ll need:
- Pliers or wrench
- Thread tape (also known as Teflon tape)
- Hose clamp (optional)
- Bucket or bowl (if manual attachment method is used)
Make sure that you have these tools and materials on hand before starting the attachment process, as they will make things much easier for you in the long run.
It’s also worth noting that different types of kitchen taps may require specific tools or attachments, so be sure to identify your tap type before proceeding with any further steps.
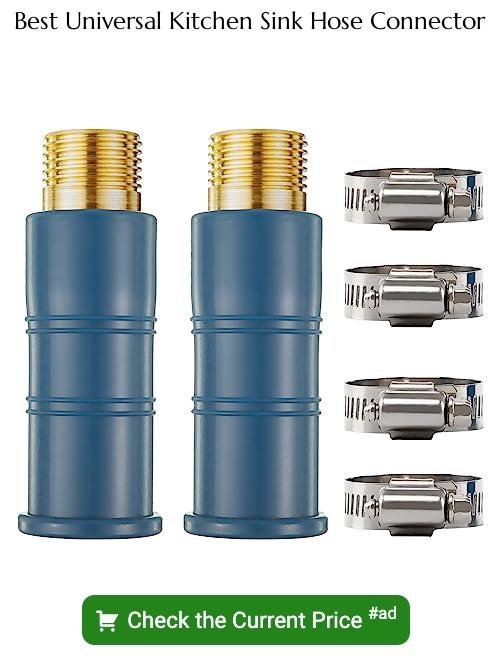
Types of Hose Attachments
There are two main types: threaded and snap-on. Threaded attachments screw onto the end of your tap, while snap-on attachments clip onto the end.
Threaded attachments come in various sizes and shapes, so it’s essential to identify which one is compatible with your kitchen tap before purchasing one. On the other hand, snap-on fittings are more versatile as they can fit most taps regardless of their size or shape.
It’s crucial to choose an attachment that fits securely on your kitchen faucet without any leaks or drips during use. Ensure that you select an attachment made from durable materials such as brass or stainless steel for long-lasting use.
Identifying Your Kitchen Tap Type

There are different types of taps available in the market, and each has its own unique features that determine how easy or difficult it is to attach a hose.
The first step in identifying your kitchen tap type is by checking whether it has an external thread or not. An external thread means that there are visible threads on the outside of the spout where water comes out from.
If your kitchen tap does not have an external thread, then attaching a hose without an adaptor might be challenging as most hoses require this feature for attachment.
However, if your kitchen faucet has an external thread but no aerator (the small mesh screen at the end), then you’re good to go! You can easily connect a garden hose directly onto these types of taps using either manual attachments like rubber washers and clamps or with specialized adapters designed for such faucets.
Faucet Measurements
This will help ensure that you choose the right type of attachment and avoid any leaks or other issues down the line.
To get started, identify your kitchen tap type and take accurate measurements of its diameter. You can do this by using a measuring tape or ruler to determine the width of your faucet’s spout where water comes out.
It’s also essential to consider whether your kitchen tap has an aerator installed as this can affect which hose attachments are compatible with it. An aerator is a small device that screws onto the end of most faucets and helps reduce water flow while adding air into it for better pressure control.
Measuring Your Kitchen Tap
It’s important to get accurate measurements to ensure that the hose attachment fits securely and doesn’t leak. To measure your kitchen tap, you’ll need a measuring tape or ruler.
Start by measuring the diameter of the spout where water comes out. This will help you determine what type of attachment will fit on your tap.
Next, measure the length of the spout from where it connects to the base of your sink or countertop up until where water comes out. This measurement is crucial as it determines how much clearance there is for any attachments added onto it.
Take note if there are any obstructions around or near your faucet such as handles and knobs that may interfere with attaching a hose directly onto its end.
Identifying Hose Compatibility
Not all hoses are created equal, and using an incompatible one can lead to leaks or damage. To identify if a particular hose is compatible with your kitchen tap, you need to check its diameter and thread type.
Firstly, measure the diameter of the faucet spout where you plan on attaching the hose. Most standard faucets have either 3/4 inch or 1-inch diameters; however, some may be smaller or larger than these sizes.
Secondly, determine what kind of thread type your faucet has by checking its manual or contacting its manufacturer for information. The most common types are male threads (which screw into female fittings) and female threads (which receive male fittings).
Once you know both measurements – diameter and thread type – compare them against those of any potential hoses before making a purchase.
Choosing the Right Hose
First and foremost, make sure that the hose is compatible with your tap. Check the diameter of both the tap and hose before making any purchases.
Next, think about what you’ll be using the hose for. If you’re planning on using it primarily for watering plants or washing dishes, a standard garden hose should suffice.
However, if you plan on using it for drinking water or cooking purposes as well, look into getting a food-grade safe drinking water hose.
Another factor to consider is length – make sure that your chosen length will reach all areas where you need access to water without being too long and cumbersome.
Lastly, take into account durability and quality when selecting a suitable option; investing in high-quality hoses can save money in repairs down-the-line while ensuring longevity of use.
Hose Attachment Process
The process may vary slightly depending on your specific tap and hose type, but generally involves a few simple steps.
Firstly, ensure that your kitchen tap is turned off before beginning any work. Next, attach the appropriate connector or adapter onto the end of your hose if needed.
Then carefully screw or slide this attachment onto the faucet spout until it fits snugly in place.
If you’re using a threaded attachment such as a garden hose nozzle or spray gun with male threads at one end and female threads at another end then wrap some thread tape around its male-threaded part before screwing it into place for added security against leaks.
Manual Hose Attachment
This method involves screwing the hose onto the tap manually, without any additional tools or materials.
To do this, start by ensuring that your kitchen tap is turned off and free from any debris or dirt. Then, take your garden hose and unscrew its nozzle if it has one.
Next, hold the threaded end of the hose against your kitchen tap’s spout and turn it clockwise until it fits snugly in place.
Make sure you don’t over-tighten as this can damage both parts. Once you’ve attached them securely together, turn on your water supply slowly to check for leaks around where they join.
Using a Hose Clamp
A hose clamp is designed to hold the connection between your tap and the garden hose firmly in place, preventing any leaks or disconnections.
To use a hose clamp, first connect your garden house adapter onto the end of your kitchen faucet. Then slide on the metal ring of the clamps over both ends of this connection and tighten it with pliers until it’s snugly fit around them.
Make sure that you don’t overtighten as this can cause damage or even breakage.
Securing With Thread Tape
It’s a thin, white tape made of PTFE (polytetrafluoroethylene) that is wrapped around the threads of the tap before attaching the hose. This creates a tight seal and prevents leaks.
To use thread tape, start by wrapping it clockwise around the threads of your kitchen tap. Make sure to wrap it tightly and evenly so there are no gaps or overlaps in between each layer.
Once you’ve wrapped enough layers, usually 2-3 times around should suffice; cut off any excess.
Next, attach your hose as usual by screwing it onto the threaded part of your kitchen faucet until snugly fitted into place against where you applied thread-tape earlier on.
Attaching a Hose With a Bucket or Bowl
You can use a bucket or bowl as an alternative attachment method. Here’s how:
- Fill up the bucket or bowl with water.
- Submerge one end of the hose into the water-filled container.
- Hold onto both ends of the submerged section and wait for all air bubbles to escape from it.
- While holding onto both ends, quickly move them over to your kitchen tap and screw on tightly.
This method works best if you’re using a short length of garden hose that is easy enough for you to hold in place while attaching it manually without any additional tools needed.
DIY Hose Attachments
While this may seem like a daunting task, it’s actually quite simple and can save you money in the long run. To create your own hose attachment, all you need is some PVC piping and fittings that are compatible with both the tap and the hose.
Start by measuring the diameter of your kitchen tap to determine what size PVC pipe will fit over it snugly. Next, cut a piece of PVC pipe to length using a saw or pipe cutter.
Then attach an elbow fitting onto one end of the pipe using glue or thread tape.
Once attached securely, connect another piece of PVC piping to extend from where we have placed our elbow fitting at 90 degrees angle towards down direction so that we can easily attach our garden hose without any hassle.
Tips for a Secure Connection
A loose connection can lead to water leakage and damage your kitchen or garden. Here are some tips for a secure hose attachment:
1. Tighten all connections: Make sure all connections are tightened properly using pliers or a wrench if necessary.
2. Use thread tape: Apply thread tape on the faucet threads before attaching the hose connector for an extra tight seal.
3. Check for leaks: Turn on the water and check for any leaks around the connection points.
4. Avoid over-tightening: Be careful not to over-tighten as this can cause damage to both your tap and hose connector.
5. Store properly after use: After use, disconnect and store your hoses in a dry place away from direct sunlight which may weaken them over time.
Troubleshooting Common Issues
Here are some common issues you might encounter and how to troubleshoot them:
1. Leaks: If you notice water leaking from the connection point between your kitchen tap and hose, it could be due to a loose connection or worn-out washers.
Tighten all connections using pliers or wrenches as necessary, replace any damaged washers.
2. Low Water Pressure: A low flow of water through the hose may indicate that there is an obstruction in either the faucet aerator or at one of its valves; remove any debris from these areas.
3. Hose Compatibility Issues: Some hoses may not fit properly on certain types of taps; ensure that you have identified your kitchen tap type before purchasing a compatible attachment for it.
4. Incorrect Measurements: Using incorrect measurements when selecting attachments can lead to compatibility issues which will cause leaks during use; double-check all measurements before making purchases.
Safety Precautions
First and foremost, make sure that the water supply is turned off before you begin any work on your kitchen tap. This will prevent any accidental flooding or damage.
Be careful when handling tools and materials such as pliers or thread tape. Always wear protective gloves if necessary and keep a first aid kit nearby in case of accidents.
It’s also important to ensure that the hose attachment is secure before turning on the water supply. A loose connection can cause leaks or even lead to injury from high-pressure water spraying out unexpectedly.
Safety Considerations
Before you begin, make sure that the water supply is turned off and that there are no leaks or drips from the tap. This will prevent any accidents or injuries while you’re working on the attachment.
Be careful when handling tools and materials such as pliers or thread tape. Always wear protective gloves if necessary and avoid using excessive force when tightening connections.
It’s also essential to choose a hose with appropriate length for your needs so that it doesn’t create tripping hazards around your kitchen area. Lastly, always follow manufacturer instructions carefully for both faucet attachments and hoses.
Disconnecting the Hose After Use
To do this, turn off the water supply and release any pressure that may have built up in the hose by opening its nozzle. Then, carefully unscrew the attachment from your kitchen tap and drain out any remaining water from both ends of the hose.
It’s also a good idea to store your hose properly after use. Make sure it is completely dry before coiling it up neatly and storing in a cool, dry place away from direct sunlight.
Hose Maintenance Tips
Regular maintenance will not only extend the life of your hose but also ensure that it functions efficiently every time you use it. Here are some tips for maintaining your hose:
1. Store Your Hose Properly: After using the hose, make sure to drain all water from inside and store in a cool dry place away from direct sunlight.
2. Clean Your Hose: Dirt and debris can accumulate on hoses over time which can cause damage or blockages in the nozzle or sprayer head.
3. Check for Leaks: Inspect regularly for leaks at both ends of the hose as well as along its length.
4. Replace Damaged Parts: If any part of your garden house is damaged beyond repair, replace them immediately with new ones before they cause further damage.
By following these simple maintenance tips, you’ll be able to keep your kitchen tap connected garden house functioning smoothly and effectively throughout its lifespan!
FAQ
Can you connect a garden hose to a tap?
Yes, a garden hose can be connected to a tap using a hose tap connector, as long as the connector matches the tap’s thread size, which is determined by measuring the internal diameter.
What are the alternative methods to attach a hose to a kitchen tap without using an adaptor?
Alternative methods to attach a hose to a kitchen tap without using an adaptor include using a universal tap connector or a jubilee clip to secure the hose tightly.
Is it safe to use a non-adaptor attachment for long-term kitchen tap to hose connections?
Using a non-adaptor attachment for long-term kitchen tap to hose connections is not safe.
Which types of taps are the easiest to connect a hose to without an adaptor?
The easiest types of taps to connect a hose to without an adaptor are those with an external thread (also known as a male threaded spout).


