Last updated on
Discover the simple yet essential process of grouting peel and stick tiles to achieve a professional finish in your DIY home renovation projects.
Peel and stick tiles are a popular choice for homeowners who want to give their home a quick and easy makeover without breaking the bank. These tiles are not only affordable but also come in an array of designs that can fit any style preference.
However, the installation process can be tricky, especially when it comes to grouting. Grouting is an essential step in ensuring that your peel and stick tiles stay put and look seamless.
In this article, we will guide you through the process of how to grout peel and stick tile like a pro!
What's Inside
Benefits of Peel and Stick Tile
One of the most significant advantages is that they are incredibly easy to install, even for those with no prior experience in tiling. Unlike traditional tiles, peel and stick tiles do not require any special tools or adhesives; all you need is a clean surface to apply them on.
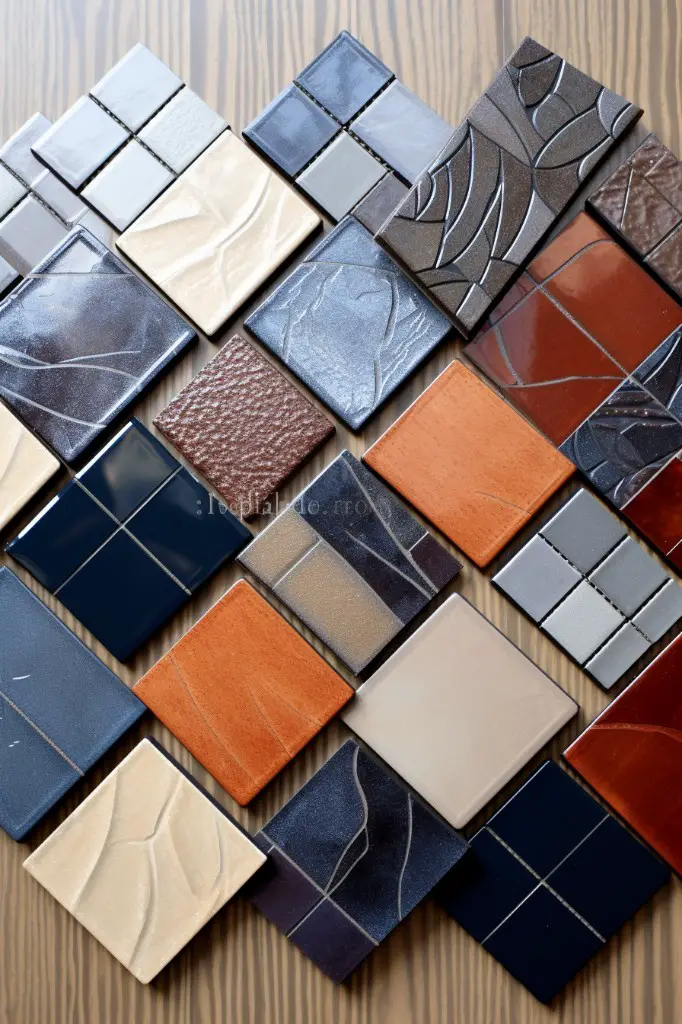
Another benefit of peel and stick tile is that they are highly versatile. They come in various colors, patterns, shapes, sizes which means you can find the perfect design for your home decor style without breaking the bank.
Moreover, these types of tiles are also durable and long-lasting when installed correctly. They can withstand heavy foot traffic areas like kitchens or bathrooms without showing signs of wear-and-tear quickly.
Reasons to Choose Groutable Peel and Stick Tiles
These tiles come with built-in grout lines, which give them an authentic appearance that is hard to distinguish from real ceramic or stone tile. There are several reasons why you should choose groutable peel and stick tiles over other types of flooring options.
Firstly, they offer easy installation as compared to traditional tiling methods that require specialized tools and skills. With groutable peel-and-stick tiles, all you need is a clean surface area free from debris or dust particles before laying down your new floor covering.
Secondly, these types of vinyl flooring options can be installed in any room in your home including high-moisture areas such as bathrooms and kitchens since they have waterproof properties making them resistant to water damage.
Thirdly, Grouted Peel-and-Stick Tiles come in various designs ranging from classic marble patterns to modern geometric shapes giving homeowners endless possibilities when it comes time for selecting their preferred style preference.
Selecting the Right Grout
Grout comes in different colors, textures, and types. It’s essential to choose the right type of grout that will adhere well to your peel and stick tiles.
Epoxy-based or urethane-based grouts are ideal for use with peel-and-stick tile because they provide excellent adhesion properties. They also resist stains, mold growth, cracking or shrinking over time.
When selecting a color for your grout, it’s best to go with something that complements your tile design while still providing contrast so that each individual tile stands out on its own.
It’s important not only to consider aesthetics but also functionality when choosing the texture of your chosen product as some options may be more slip-resistant than others which can make them safer in high traffic areas like bathrooms or kitchens where spills are common occurrences.
When selecting a suitable adhesive for Peel & Stick Tiles always opt-in for an epoxy- based or urethane-based adhesive as these offer superior bonding strength compared with other types of adhesives available on the market today.
Materials and Tools Required
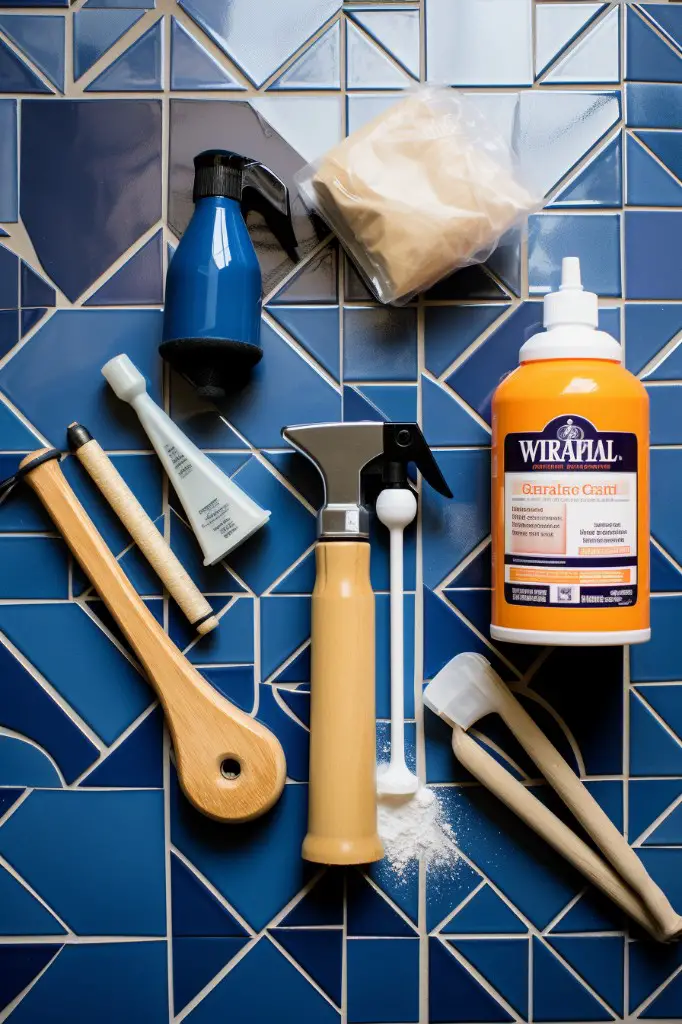
Here are some of the things you’ll need:
1. Grout: Choose a high-quality grout that matches your tile color.
2. Grout float: This tool is used to apply the grout evenly on the surface.
3. Sponge or cloth: You will need this for wiping off excess grout from tiles.
4. Bucket of water: To clean up any messes made during installation.
5. Caulk gun (optional): For caulking joints and corners after applying grouts.
6. Tape measure, level, chalk line- These tools help in measuring accurately before cutting vinyl tiles.
7. Razor knife or utility knife – Used for cutting vinyl tile sheets into smaller pieces if needed.
Removing the Old Floor
This step ensures that the surface is clean, smooth, and free of any debris or bumps that can affect the adhesion of your new tiles. To remove an old floor, first clear out all furniture from the room.
Then use a pry bar or hammer to lift up any baseboards around the perimeter of your space.
Next, using a utility knife cut along edges where flooring meets walls so you can easily pull up pieces without damaging them too much (if possible). Once everything has been removed sweep away dust and debris with a broom before vacuuming thoroughly.
Toilet Removal and Reinstallation
This step will ensure that the tiles are installed correctly around the base of your toilet, giving a seamless finish. Removing and reinstalling a toilet may seem like an intimidating task, but with proper guidance and tools, it can be done quickly.
To remove the toilet:
- Turn off water supply: Locate the valve behind or near your toilet’s base on its wall side; turn it clockwise until tight.
- Drain remaining water: Flush out all remaining water in your tank by holding down its handle until empty.
- Disconnect Water Supply Line: Use pliers to loosen nuts connecting supply line from valve at wall end & bottom of tank; then lift up hose gently
- Remove Toilet Tank Lid: Lift lid straight up & set aside safely
- Disconnect Flapper Chain: Unhook chain from flush lever arm inside tank
- Remove Nuts From Base Bolts: Loosen bolts securing bowl to floor using wrenches (one for nut underneath bolt head)
- Lift Bowl Off Floor Carefully
Once you have removed the old wax ring sealant between flange under floor& bottom of bowl needs cleaning before reinstallation.
Reinstalling Your Toilet:
- Place new wax ring onto flange underfloor where previous one was located.
- Carefully lower bowl back into place over bolts sticking through holes in flange while aligning them with mounting holes on underside rim edge .
- Tighten nuts onto each bolt evenly using wrenches so that they’re snug against porcelain without overtightening which could crack ceramic material .
Preparing the Surface for Tile Installation
The first step in preparing the surface for tile installation is to ensure that it is clean and free of any debris or dust. Sweep or vacuum the floor thoroughly before starting.
Next, inspect your subfloor for any cracks, holes, or unevenness. If you find any issues with your subflooring, fix them before proceeding with tile installation.
If you are installing peel and stick tiles over an existing floor covering such as vinyl flooring or linoleum flooring that has been glued down securely to a concrete slab substrate; then there’s no need to remove these materials unless they’re damaged beyond repair.
However if you have carpet installed on top of plywood subfloors then removing this layer will be necessary since carpet padding can hold moisture which could cause mold growth under new floors leading eventually into structural damage over time if not addressed promptly enough by professionals who specialize in water damage restoration services like ServiceMaster Restoration by Zaba.
Proper Tile Spacing
Proper spacing is crucial in ensuring that the tiles look seamless and professional once grouted. The recommended spacing for peel and stick tile is 1/8 inch between each tile.
To achieve this, use spacers or pennies as a guide when placing the tiles on the floor. This will help you maintain consistent spacing throughout the installation process.
It’s also important to note that if your room has uneven walls or floors, adjust your tile placement accordingly to avoid unsightly gaps or overlaps between them.
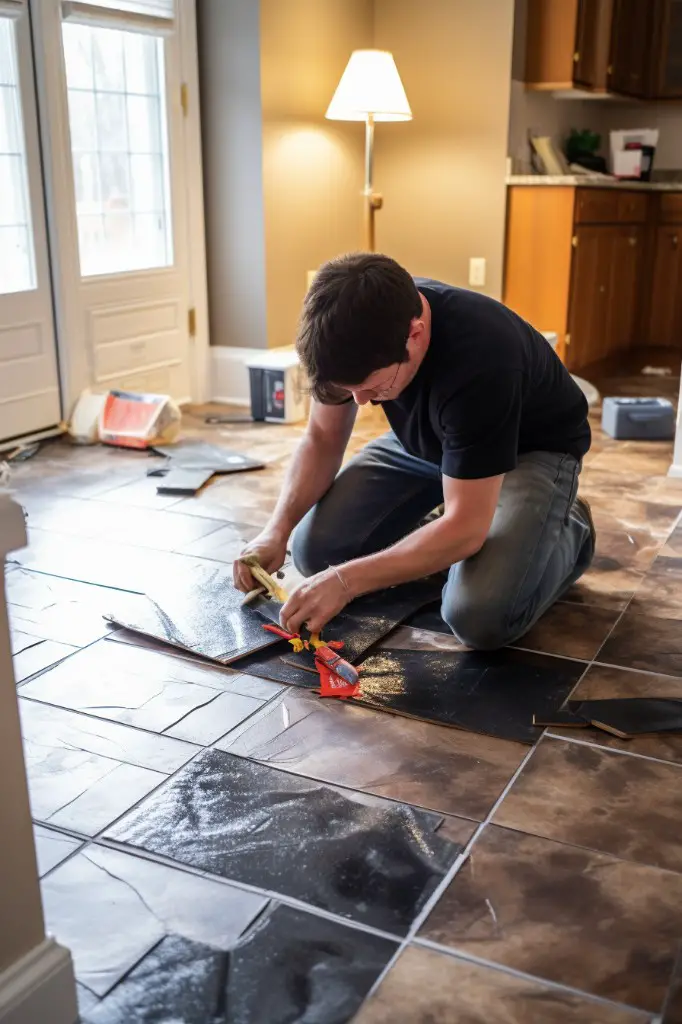
Laying Peel and Stick Bathroom Tile
Start by finding the center of your room and marking it with a chalk line. This will help ensure that your tiles are laid out evenly.
Next, begin laying the tiles along one side of the room, starting at the center point and working outward toward each wall. Peel off a small section of backing from one tile at a time and press firmly onto the floor in its designated spot.
Make sure to align each tile carefully with its neighbors so that they fit together seamlessly without any gaps or overlaps. Use spacers between each tile to maintain consistent spacing throughout.
As you work across each row, use a utility knife or scissors to cut any pieces needed for edges or corners. Be sure to measure twice before cutting once!
Mixing the Grout
You can choose between sanded or unsanded grouts depending on your tile spacing. Sanded grouts are ideal for wider gaps while unsanded ones work best with narrow spaces.
To mix the grout, follow these simple steps:
- Pour a small amount of water into a clean bucket.
- Add some powdered grout to it and stir well using a margin trowel until it forms a smooth paste.
- Let it sit for 5-10 minutes before stirring again to ensure that all lumps are dissolved.
- Check if the consistency is correct by scooping some onto your float or trowel; if it holds its shape without being too runny or dry, then you’re good to go.
Remember not to mix more than what you can use within an hour as this will cause premature drying and hardening of unused portions which may lead to wastage.
Grout Mixing and Application Techniques
Grout mixing is a crucial step in ensuring that the final result looks professional. The first thing you need to do is read the manufacturer’s instructions on how to mix their product correctly.
When mixing grout, always start with water before adding any powder or liquid additives. Use a margin trowel or drill mixer attachment to blend everything together until there are no lumps left in your mixture.
Next, let the mixture sit for about 10 minutes before remixing again briefly; this will allow all of its components enough time to activate fully.
When applying grout onto your peel-and-stick tile surface, use a rubber float tool at an angle of approximately 45 degrees while pressing down firmly into each joint space between tiles so that they fill up completely without leaving any gaps behind them. Work quickly but carefully as once applied; it can be challenging to remove excess material from surfaces where unwanted residue has been left behind after drying out over time.
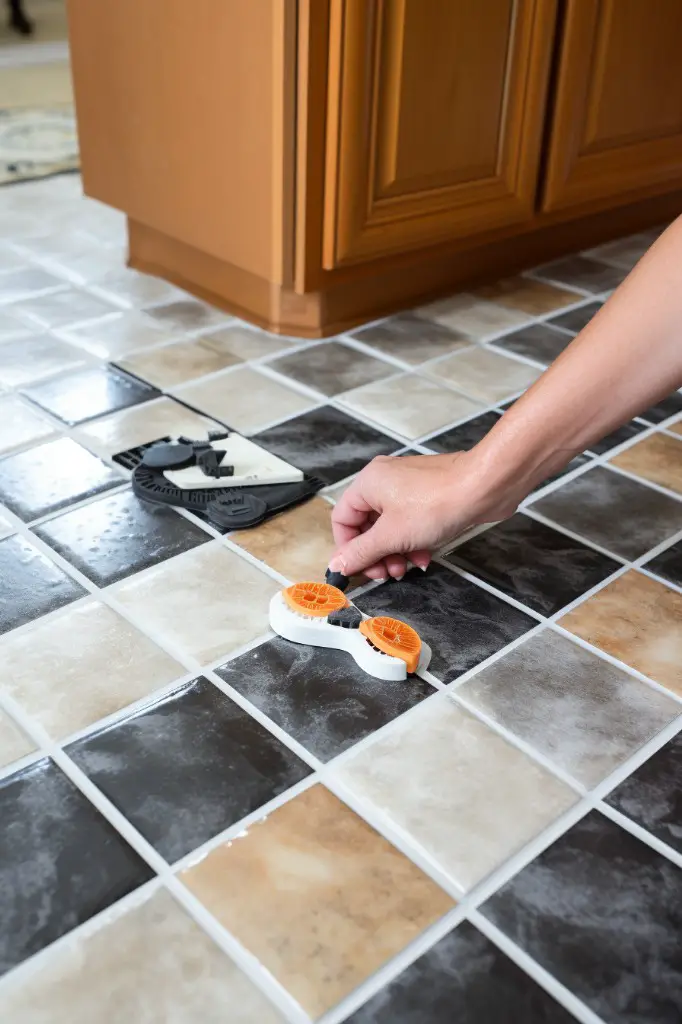
Applying the Grout
Using a rubber float, spread the grout over a small section of tiles at a time. Hold the float at an angle and use firm pressure to push the grout into all of the gaps between your peel and stick tiles.
Be sure not to leave any gaps or air pockets in between each tile as this can cause them to loosen over time. Once you have applied enough grout on one section, use a damp sponge or cloth in circular motions across each tile surface until they are clean.
Repeat this process for every section until all areas are covered with fresh new grouts.
Wiping Excess Grout
Use a damp sponge or cloth to gently wipe away the excess grout from the surface of your peel and stick tiles. Be careful not to press too hard as this can remove too much grout from between your tiles.
It is important that you work in small sections and rinse out your sponge frequently with clean water. This will help prevent any dried-up bits of grout from sticking onto other areas of your tile surface.
After wiping down each section, use a dry cloth or towel to buff away any remaining haze on the tile surface. Repeat this process until all excess grout has been removed and only clean lines remain between each tile.
Cleaning Excess Grout and Haze
This step ensures that your peel and stick tile looks neat and professional. To clean excess grout, use a damp sponge or cloth to wipe away any visible residue from the surface of the tiles.
Be sure not to press too hard as this can remove some of the freshly applied grout.
After wiping off all visible residue, allow time for drying before using a dry cloth or towel to buff out any remaining haze on your peel-and-stick tile floor gently.
Caulking Joints and Corners
Caulking is an essential step in ensuring that your peel and stick tiles are waterproof and durable. It also helps prevent dirt, dust, or moisture from getting between the tiles.
To start caulking, use a silicone-based caulk that matches your grout color. Cut off a small tip of the tube at an angle to create a small hole for precision application.
Apply steady pressure on the trigger while moving along each joint or corner with even strokes until you reach its end. Use your finger or a damp sponge to smooth out any excess caulk before it dries up.
Allow enough time for drying as per manufacturer instructions before using water around these areas again. Caulking can be messy; therefore, ensure you wear gloves when applying it and clean up any spills immediately with warm soapy water before they dry up completely.
Curing the Grout
Curing time can vary depending on the type of grout used and environmental conditions such as temperature and humidity. Generally, most types of grouts require 24-48 hours to cure completely.
During this time, avoid walking or placing any heavy objects on the newly tiled surface as this may cause cracks or damage to your tiles. It’s also important not to clean or wet the area during curing time.
After 24-48 hours have passed, check if there are any areas where additional grout needs filling in before proceeding with cleaning excess residue from tile surfaces using a damp sponge.
Applying Grout Sealer
Grout sealer helps protect your tiles from moisture and stains, ensuring that they remain in good condition for years to come. Applying grout sealer is a simple process that can be done using a brush or roller applicator.
Before applying the sealer, ensure that the grout has cured completely as per manufacturer’s instructions.
Start by cleaning any excess dust or debris from the surface of your tiles and make sure there are no cracks in between them. Then apply an even coat of grout sealer over all areas where you have applied grouts including corners and edges with a brush or roller applicator.
Allow sufficient time for drying before applying another coat if necessary (refer to manufacturer’s instructions). Once dry, wipe off any excess residue with a clean cloth.
Cleaning and Maintenance
Regular cleaning will help keep the tiles looking new for longer. You can use a damp mop or cloth to clean the surface of the tile regularly.
Avoid using harsh chemicals or abrasive cleaners that may damage the surface of your peel and stick tile. Instead, opt for mild detergents that are safe for vinyl surfaces.
In case there are stubborn stains on your floor, you can use a soft-bristled brush with warm water mixed with vinegar solution to scrub off dirt gently.
It’s also important to avoid dragging heavy furniture across your newly installed floor as this could cause scratches or dents in some cases. Use felt pads under furniture legs instead of rubber ones which tend to leave marks on floors over time.
Tips for Cutting Vinyl Tiles
With the right tools and techniques, it’s possible to achieve clean cuts that fit perfectly into your space. Here are some tips for cutting vinyl tiles like a pro:
1. Measure twice: Before making any cuts on your vinyl tile, make sure you measure the area where it will be installed accurately.
2. Use a straight edge: A straight edge is essential when cutting vinyl tiles as it helps ensure that your cut is precise and accurate.
3. Score before cutting: To avoid cracking or breaking the tile while cutting through its surface layer with an X-Acto knife or utility blade first before using scissors or snips to finish off the cut.
4. Cut slowly and carefully: Cutting too quickly can cause jagged edges in your tile which may not fit well together during installation; take time so that each piece fits snugly against one another without gaps between them!
By following these simple tips for cutting peel-and-stick tiles correctly, you’ll have no trouble achieving professional-looking results in no time!
FAQ
Can you put grout on peel and stick tiles?
Yes, you can apply grout on peel and stick tiles to make them resemble ceramic tiles.
Do you need grout for peel and stick vinyl?
No, there is no need to grout luxury vinyl tile flooring, as the grout lines are in the tile itself.
Can you put grout between vinyl tile?
Yes, you can put grout between vinyl tiles for visual appeal, but ensure the tiles are groutable and use the appropriate type of grout.
Can you grout floor pop tiles?
Yes, you can grout floor pop tiles, but it is recommended to fill all grout lines with thin-set tile mortar before installing to create a flat, smooth surface.
Is using a grout sealer necessary when grouting peel and stick tiles?
Using a grout sealer is not necessary when grouting peel and stick tiles, as they typically do not require grout.
How do you choose the right grout color for peel and stick tile projects?
Choose the right grout color for peel and stick tile projects by selecting a color that complements the tile and the overall design aesthetic of the space.
Are there specific techniques to apply grout on peel and stick tiles for optimal results?
For optimal results when applying grout on peel and stick tiles, use specific techniques such as spreading the grout diagonally with a float and wiping off excess with a damp sponge.


