Last updated on
Nail the process of connecting your dishwasher to your garbage disposal because doing so can enhance maintenance, promote hygiene, and optimize efficiency in your kitchen.
Connecting a dishwasher to a garbage disposal is indeed a task you can handle without professional help, assuming you follow the proper steps. The process involves some plumbing and electrical work, but nothing that a bit of careful instruction and patience can’t tackle.
First, you’ll need to prepare the garbage disposal unit; then you’ll have to set up the dishwasher drain. But don’t worry, this guide takes you through the method step-by-step, providing all the details you need to ensure a seamless setup and fantastic performance.
Whether you’re updating your kitchen or installing a new appliance, mastering this procedure will be a breeze, empowering you for future DIY projects!
Key takeaways:
- Gather necessary tools and materials before starting the installation process.
- Turn off the electrical supply to the dishwasher and garbage disposal.
- Follow the step-by-step instructions to connect the dishwasher drain hose to the garbage disposal or air gap.
- Use hose clamps to secure all connections and prevent leaks.
- Ensure the drain hose is properly aligned and free from bends or kinks.
What's Inside
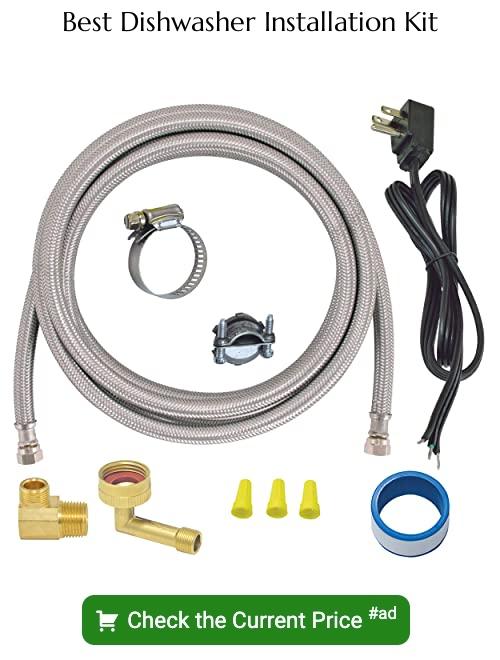
What You’ll Need

To ensure the installation process runs smoothly, gather all necessary equipment and materials beforehand. Essential tools include a screwdriver, a utility knife, and hose clamps. For the materials, you’ll need a flexible hose compatible with both your dishwasher and disposal unit. Depending on your specific set-up, an air gap fitting might also be essential, serving as a vital backflow prevention device. If at any stage you’re in doubt, consult your dishwasher and disposal device’s user manuals for detailed specifications.
Equipment / Tools
Managing this task will require a specific set of tools. Unsurprisingly, the first tool in the lineup is a trusty screwdriver. It is handy for tightening the hose clamps.
You’ll also need a set of adjustable pliers. These technical tongs make a world of difference when manipulating and turning threaded plumbing parts.
Lastly, investing in good quality hose clamps cannot be overemphasized. Remember, they are crucial to secure the hoses.
The right tools ensure smooth execution and successful completion of the task at hand.
Materials
For this task, you’ll need a few essential materials. They are:
- A Dishwasher Drain Hose: It serves as the vital line of flow between your dishwasher and garbage disposal, ensuring the drainage of used water.
- Hose clamps: These handy little tools will provide a secure fit to prevent leaks between the garbage disposal and drain hose.
- Air Gap (if applicable): This is a device that stops dirty water from reentering the dishwasher by providing a “gap” of air. Not all jurisdictions require them but their usage, where applicable, ensures a more hygienic drain system.
- Screwdriver: A must-have tool to secure hose clamps or in some cases, the air gap.
Do remember to keep these materials handy before starting the process. Proper implementation of these materials ensures an efficient and hassle-free connection between your dishwasher and garbage disposal.
Instructions
Remember to turn off the electrical supply to both the dishwasher and garbage disposal before starting. Find the dishwasher drain connection point on the side of the disposer and remove the plug inside this tube. Start the garbage disposal and let it run for a few seconds to ensure any debris inside the drain disappear.
When hooking up your garbage disposal system, it’s essential to make sure the drain hose is properly attached to prevent any leaks or damage. Start by attaching the smaller end of the air gap hoses to the dishwasher discharge opening, located on the back of your appliance. Use the provided hose clamp to secure this connection.
Next, connect the larger end of the air gap hoses to the garbage disposal unit. It should fit snugly and is typically located on the top side of the unit. Be aware, the arrangement can vary based on the unit’s model.
The final step in this assembly process is ensuring all connections are secure. With the help of a screwdriver, tighten the hose clamps around both ends of the dishwasher’s hose. This will prevent any future leaks or spills.
Drain Connection With Air Gap and Garbage Disposal
Begin by connecting the dishwasher drain hose to the smaller outlet on the air gap, a safety device installed on the countertop to prevent the dirty dishwasher water from entering the clean water supply.
Then, the larger end of the air gap needs to be linked to the garbage disposal with a rubber hose.
Ensure the route is unobstructed and avoid sharp bends to allow easy water flow.
A hose clamp is necessary to secure joint spots, tightening sufficiently to prevent leaks but avoiding excessive force which can damage the hoses.
Always remember, any bends or kinks in the hose can lead to drainage issues that may eventually harm the dishwasher.
Connect Hose to Air Gap
Given that your air gap is appropriately mounted to the kitchen sink, you can continue with the hose connection. Here’s your guide on how to do it properly:
1. Guide the end of the dishwasher drain hose onto the smaller leg of the air gap. This should form a snug fit. The air gap usually has two ports of different sizes to make sure you don’t confuse the water in and out.
2. Secure the connection by sliding a hose clamp over the end of the hose and onto the air gap. Making sure it’s tight and secure prevents any leaking or disconnection later on.
3. Using a screwdriver, tighten the hose clamp until the hose is properly secured onto the air gap.
Remember, the key is to make sure every connection is secure to avoid water leakage.
Connect Hose to Garbage Disposal
Firstly, locate the dishwasher inlet on your garbage disposal unit. This is typically a circular opening on the side. Remove the cover of the inlet using pliers, ensuring to hold onto the plug so it doesn’t fall down the disposal.
Next, align the end of your drain hose with the inlet. Once they are aligned properly, slide the hose onto the inlet until it is secure.
Last**l**y, tighten your hose clamp around the connection to ensure it remains secure. You can do this by threading the clamp onto the hose before attaching the hose to the disposal. Once the hose is attached, position the clamp so that it’s over the section where the hose and disposal meet, then tighten it down.
Remember, this connection needs to be watertight to prevent any potential leaks during operation. Test the connection by giving it a gentle tug. If it holds firm, it’s connected properly. Don’t forget to consult your dishwasher’s instructions manual for any specific recommendations or requirements.
Secure With Hose Clamps
To ensure a watertight seal, hose clamps are integral. Using a screwdriver or a nut driver, you will tighten the clamp around the hose. Position the clamp where the hose overlaps the attachments, allow no slack. Avoid overtightening as it may result in hose damage. The key is to make it firm, but not overly strained.
Confirm the fit by gently tugging on the hose; it should remain securely in place. Your drainage system is now one step closer to being leak-free and efficient.
Drain Connection Using High Loop to Garbage Disposal
To begin, prepare the drain hose. Make sure it’s long enough to reach the sink drain but not so long that it kinks or loops unnecessarily. You can cut it to the correct length, but always err on the side of too long rather than too short.
Next, form a high loop with the hose. This is crucial for preventing wastewater from flowing back into the dishwasher. Aim to position the top of the loop at least 20 inches above the floor. You can secure the loop with a zip tie or similar device.
Finally, attach the free end of the hose to the sink drain. Use a hose clamp to guarantee a secure fit. Remember, a tight connection prevents leaks and potential water damage. All the steps are simple when performed carefully with attention to detail.
Prepare the Drain Hose
Before kicking off your installation process, be sure to have your drain hose ready.
Begin by detaching the hose from your dishwasher.
With careful attention, remove any kinks or bends that may have formed.
This step is crucial because a smoothly running drain hose is essential for optimal dishwasher performance.
Straightening the hose also aids in preventing potential blockages or slow drainage.
Once you’re confident of a wrinkle-free hose, you’re ready for the next setup step.
Loop the Drain Hose
To effectively loop the drain hose, elevate it to a height of approximately 20-22 inches above the dishwasher’s base, just under the countertop. Use utility clamps to secure the hose in position, ensuring the loop is sustained and that water flow will be unimpeded. This positioning is critical; it prevents backflow from the sink into the dishwasher.
Try not to create any kinks in the hose as this could hinder drainage. Once in place, you can move on to the next step.
Attach Hose to Sink Drain
To attach the dishwasher drain hose to the sink, start by identifying the sink’s drain tailpiece. This is the segment of pipe that extends downward from the sink basin to meet the large drain pipe. The drain tailpiece often has an inlet, known as a dishwasher tailpiece, for the connection.
Follow your dishwasher’s manual to install the drain hose and remember these key points:
- Point the end of the hose downward: This ensures optimal water flow and helps prevent hose damage.
- Make a solid connection: Use a hose clamp or similar tool to secure the drain hose to the tailpiece. Tighten the clamp to ensure a firm connection.
- Check for kinks or bends: Once connected, ensure the drain hose is not kinked or sharply bent. These conditions can interfere with the water flow.
- Effective alignment: The hose should be relatively level, avoid any major inclines or declines along its length.
By ensuring a proper connection and alignment, you’ll enable your dishwasher to function efficiently and prevent potential leaks or damages.
Drain Connection With Air Gap (But No Garbage Disposal)
Turning off the breaker, disconnect the power. Position the dishwasher unit within easy reach of water supply and drain outlet. Attach one end of the drain hose to the outlet on the air gap. Fasten using a hose clamp. You can capitalize on an adjustable wrench to tighten.
Next, attach the other end of the drain hose to the opening on your drain pipe – again, secure this connection with a hose clamp. Make sure all connections are firm and secure. Check to affirm there are no kinks in your hose, which may prevent water from draining effectively.
Complete the process by turning the breaker back on and running a test cycle on your dishwasher. Monitor closely for leaks and rectify immediately if any are found. You can now use your dishwasher, confident of a successful and secure drain connection.
Connect Hose to Drain Pipe
Once the dishwasher drain line has been guided through the hole in the sink cabinet, it’s time to finalize the connection. Measure and cut the appropriate length of the drain hose to ensure a snug fit. Utilize a hose clamp to affix one end of this hose to the threading on the air gap.
Remember to secure it tightly, as loose connections could potentially lead to leaks. Also, ensure the hose runs at a high angle to prevent dirty water from re-entering the dishwasher from the drain pipe.
Once attached, verify that the newly hooked-up hose allows water to flow from the dishwasher to the air gap, and then to the drain pipe without obstruction. If the water flows correctly, the connection is successful! Now, you can continue enjoying the convenience of your dishwasher, now more efficient than ever.
Up next, let’s take you through the process of securing the entire setup with hose clamps; an important final step for optimal functioning.
FAQ
How do I stop my garbage disposal from draining into my dishwasher?
To prevent your garbage disposal from draining into your dishwasher, you should disconnect the sink trap (P trap) located underneath the sink and clear out any blockages.
Can a dishwasher and garbage disposal be on the same line?
Yes, a dishwasher and garbage disposal can be on the same circuit, provided the combined load does not exceed 80% and a suitable circuit breaker is used, and although it’s not mandatory, it is advisable to connect the dishwasher and disposal to prevent sink and drainage issues.
What necessary precautions should be taken while connecting a dishwasher to a garbage disposal?
Ensure to connect the dishwasher to the garbage disposal via a properly installed air gap or high loop to prevent backflows and leakage.
What common mistakes should be avoided when installing a dishwasher to a garbage disposal unit?
When installing a dishwasher to a garbage disposal unit, avoid common mistakes such as not removing the disposal unit’s drain plug, forgetting to connect to an air gap device, or incorrectly aligning the hose higher than the drain connection.
Is there a specific type of garbage disposal recommended for optimal dishwasher performance?
For optimal dishwasher performance, a continuous-feed garbage disposal with a dishwasher drain connector is recommended.


