Last updated on
Learn how to efficiently install a kitchen sink drain with step-by-step guidance and practical tips for a seamless DIY project.
Key takeaways:
- Use the right tools and materials for a professional outcome.
- Measure twice and buy once to ensure compatibility.
- Gather equipment like wrenches, pliers, and a hacksaw.
- Get key materials like a basket strainer and P-trap.
- Prepare your workspace and clean the drain hole before starting.
What's Inside
What You’ll Need
Equipping yourself with the right tools and materials is essential for a smooth installation process. Not only does this ensure efficiency but also contributes to a professional-level outcome, even for DIY enthusiasts.
Starting with tools, have a wrench and pliers handy to tighten and adjust components. A plumber’s putty or silicone caulk, which acts as a sealant, is crucial for preventing leaks. A hacksaw may be required if you find yourself needing to trim any pipes for a perfect fit.
Materials involve the sink drain assembly itself, which typically includes a basket strainer and a tailpiece. Don’t forget the P-trap, which is vital for preventing sewer gases from entering the home, and any additional PVC or ABS pipes if modifications are needed.
Each item serves a specific purpose in the overall structure of the sink’s drainage system. For instance, the basket strainer is a sieve-like component that prevents food waste from clogging the pipes, while the P-trap is ingeniously designed to retain a small amount of water, thus stopping backflow of unpleasant smells.
Always ensure compatibility between the materials chosen and the type of sink and plumbing you have. Compatibility is the linchpin of seamless installation, and mismatched components can lead to leaks or the need for expensive do-overs. Hence, measure twice and buy once.
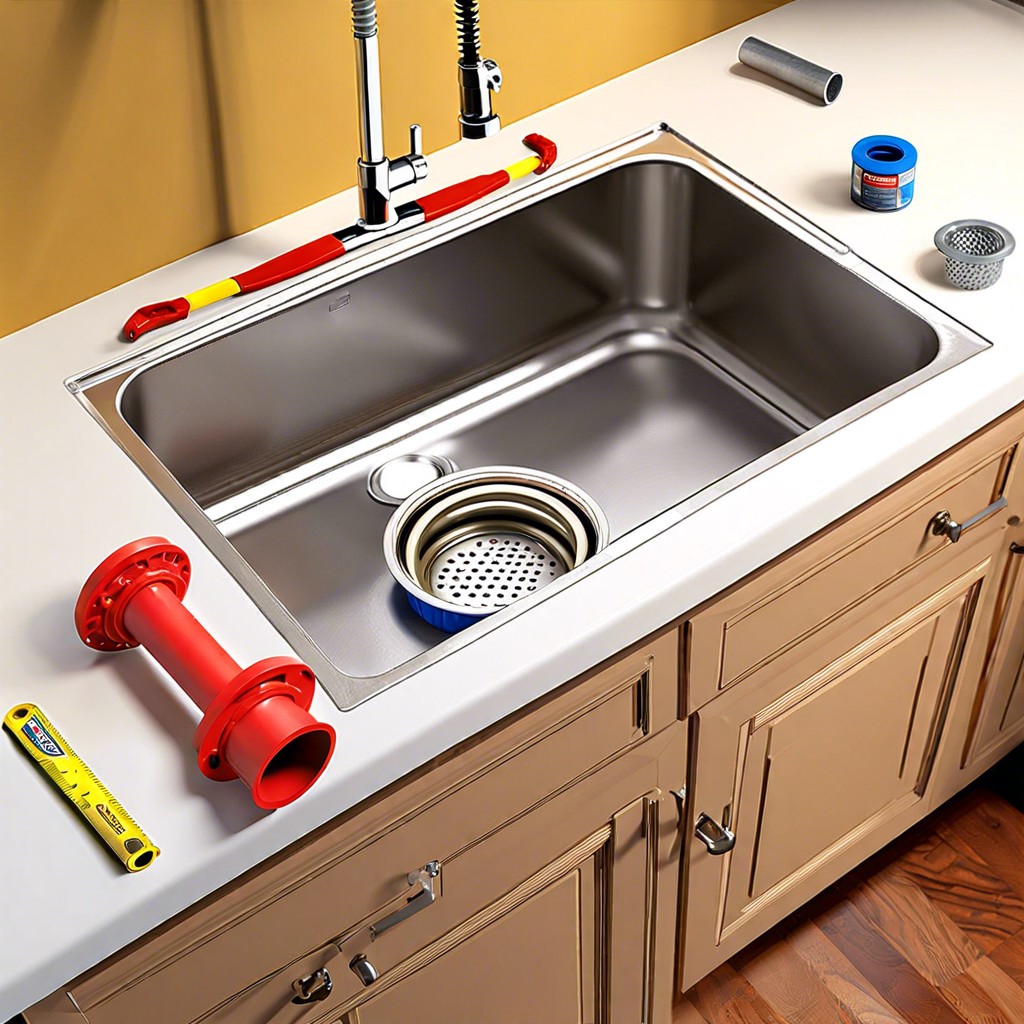
Equipment / Tools
Having the right equipment and tools at hand before you start is crucial for a smooth installation process. You’ll need:
Adjustable wrenches for tightening and loosening connections. These versatile tools will allow you to work with various nut and bolt sizes.
Plumber’s putty to ensure a watertight seal around the basket strainer. This pliable substance will be your first defense against leaks.
Channel-lock pliers to grip and turn pipes or other plumbing parts. Their adjustable jaws make them suitable for a range of different-sized tasks.
A hacksaw for cutting any pipes to size. It’s essential that the pipes fit perfectly to avoid future plumbing woes.
A pipe wrench for extra leverage on stubborn pipes. This heavy-duty tool can come in handy when more force is necessary.
A screwdriver for tightening any screws involved in the installation. A set with multiple heads is advantageous.
A flashlight to illuminate the workspace. Good visibility is a must when working under the sink.
Thread sealing tape, sometimes known as Teflon tape, to secure threaded joint connections. This will help to prevent leaks where pipes screw together.
A bucket to catch any residual water when you disconnect the old sink drain.
Gather these tools beforehand to prevent any unnecessary interruptions once you begin the installation process. Each tool serves a specific purpose and direct impact on ensuring a tight, secure fit for your new kitchen sink drain.
Materials
Equipping yourself with the right materials is akin to gathering your armor for battle. You are setting the stage for a successful installation without the need for a mid-process hardware store run. Key materials include:
The basket strainer acts as a gatekeeper, ensuring debris doesn’t enter your plumbing. Opt for stainless steel for durability and ease of cleaning. Silicone sealant is your waterproof glue; it secures the strainer and prevents water from seeping through crevices. Plumbers putty, although traditional, can’t hold a candle to silicone’s longevity and resistance to hardening.
For the pipelines, PVC pipes stand out for their corrosion-resistant properties, ensuring longevity. They’re light, easy to work with, and widely available. The P-trap, which is part of this assembly, prevents sewer gases from wafting back into your kitchen, an unsung hero in the world of plumbing.
Don’t forget the washers; they provide a tight seal between connections. Just like the right spices make a meal, the right washers perfect a plumbing job. If possible, get extra – they’re like the socks of the plumbing world, easy to lose and always useful to have in surplus.
Transitioning to assembly, remember, these materials are the orchestra and your handiwork is the conductor; harmonize them well for a symphony of functionality in your kitchen sink.
Before You Begin
Embarking on a DIY plumbing project requires preparation and understanding of the task at hand. Ensure you have a clear workspace and the old sink drain is completely removed. Shut off the water supply to avoid any unexpected geysers. Familiarize yourself with the local building codes to ensure compliance, especially if you’ll be making significant alterations to your plumbing system. Gather all necessary tools and materials beforehand to streamline the installation process. Additionally, having a bucket and rags nearby to deal with residual water in the pipes will prevent undesired spills. Lastly, if you’re not replacing the sink itself, clean the area around the drain hole to ensure a secure seal with the new hardware.
Inserting the Basket Strainer
Begin with placing a plumber’s putty around the edge of the drain hole, which ensures a watertight seal. Roll the putty in your hands to form a rope and wrap it around the lip of the basket strainer.
Next, press the basket strainer firmly into the drain hole. From below the sink, attach the rubber gasket, friction ring, and locknut to the strainer’s threads. These components prevent water from seeping through by securing the basket strainer in place.
Tightening the locknut is crucial. Use channel-type pliers for a solid grip—avoid over-tightening, which may cause damage. The excess putty will ooze out from the edges as you tighten; this is a good sign. Once secure, wipe away the excess with a rag. This attention to detail ensures the future functionality and prevents leaks, which could lead to more significant plumbing problems.
A quick tip is to keep a bucket underneath while working. It catches any stray water or putty, keeping your workspace clean and dry.


