Last updated on
Discover the essential techniques for ripping wood accurately and safely without a table saw in this comprehensive guide.
Have you ever started a DIY project that required ripping wood, only to realize that you don’t have a table saw? Don’t worry, you’re not alone. Many home decorators and DIY enthusiasts face this challenge at some point in their projects.
But fear not! In this article, we’ll explore some alternative methods for ripping wood without a table saw. Whether you’re working on a small-scale project or tackling a larger renovation, these tips will help you achieve clean and accurate cuts every time.
So grab your safety goggles and let’s get started!
Key takeaways:
- Wear protective gear: Always wear eye protection and earplugs when using power tools.
- Secure your workpiece: Make sure your workpiece is firmly secured before making any cuts.
- Use sharp blades: Dull blades can cause kickback or binding, which could result in injury.
- Keep fingers away from the blade: Never put your fingers near the blade while cutting; use push sticks or other devices instead.
- Avoid loose clothing and jewelry: Loose clothing or jewelry can get caught in machinery and cause serious harm.
What's Inside
Essential Safety Precautions

Ripping wood can be dangerous if you’re not careful, so make sure to follow these guidelines:
1. Wear protective gear: Always wear eye protection and earplugs when using power tools.
2. Secure your workpiece: Make sure your workpiece is firmly secured before making any cuts.
3. Use sharp blades: Dull blades can cause kickback or binding, which could result in injury.
4. Keep fingers away from the blade: Never put your fingers near the blade while cutting; use push sticks or other devices instead.
5. Avoid loose clothing and jewelry: Loose clothing or jewelry can get caught in machinery and cause serious harm.
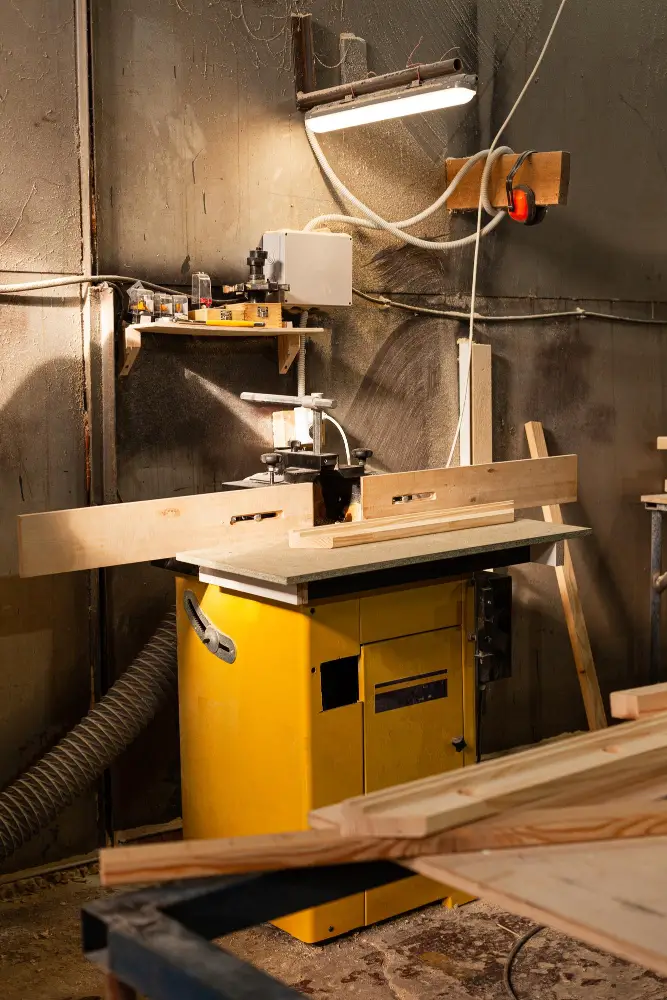
Choosing the Right Tools

While there are several methods for cutting wood, each tool has its own unique advantages and disadvantages. For instance, if you’re looking for speed and efficiency, a circular saw might be your best bet.
On the other hand, if you prefer more control over your cuts or need to make intricate designs in the wood grain pattern with precision cuts then using a handsaw or jigsaw may be more appropriate.
Before selecting any tool for ripping woods without a table saw ensure that they are sharp enough as dull blades can cause rough edges on your cut pieces of lumber which will require additional sanding time later on.
Measuring and Marking Wood

This step is crucial because even a small mistake can lead to uneven cuts or wasted material. To ensure precision, use a measuring tape and pencil to mark your cut line on both ends of the board.
If you’re working with large boards or sheets of plywood, consider using clamps or weights to hold them in place while marking your cut line. This will prevent any movement that could cause inaccuracies.
Another useful tip is to use a straight edge as a guide when marking long cuts. A level works well for this purpose since it has an accurate straight edge that can be used as a guide for drawing lines along the length of the board.
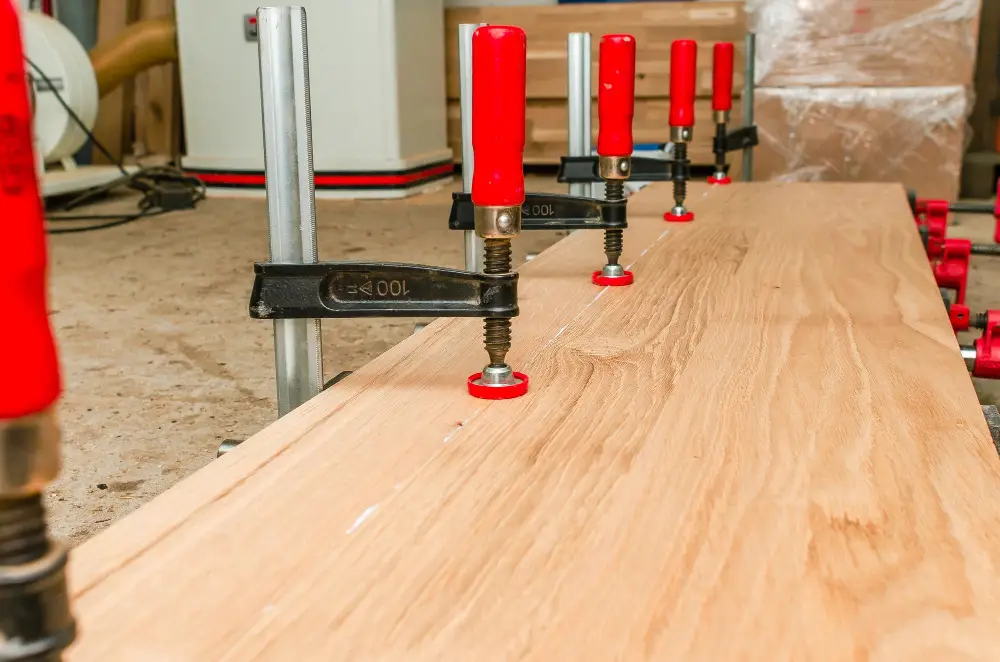
Crafting a Rip Fence
A rip fence is essentially an adjustable guide that helps you make straight cuts along the length of your board. You can easily craft one yourself using some scrap wood and clamps.
To create your own DIY rip fence, start by measuring the distance between your circular saw blade and its edge base plate. Then cut two pieces of scrap wood to this exact length, making sure they are perfectly straight.
Next, clamp one piece onto each side of your board so that they run parallel to each other and extend beyond both ends of the board. Make sure they’re securely fastened in place before proceeding with cutting.
Check the Fence Alignment
A misaligned fence can lead to inaccurate and unsafe cuts, which can ruin your project or cause injury. To ensure that the fence is aligned correctly, use a straight edge or level to check if it’s parallel with the blade of your saw.
If not, adjust the position of the fence until it aligns perfectly with the blade.
Another way to verify that your rip cut will be accurate is by measuring from both ends of your board and comparing them at different points along its length. This technique helps identify any bowing in wood boards so you can make adjustments accordingly.
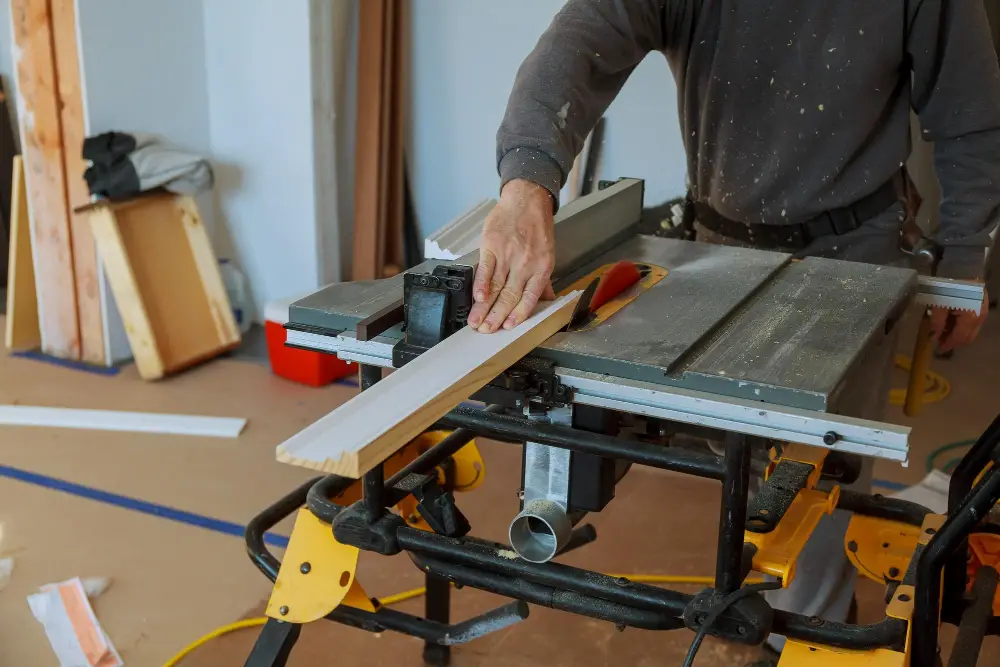
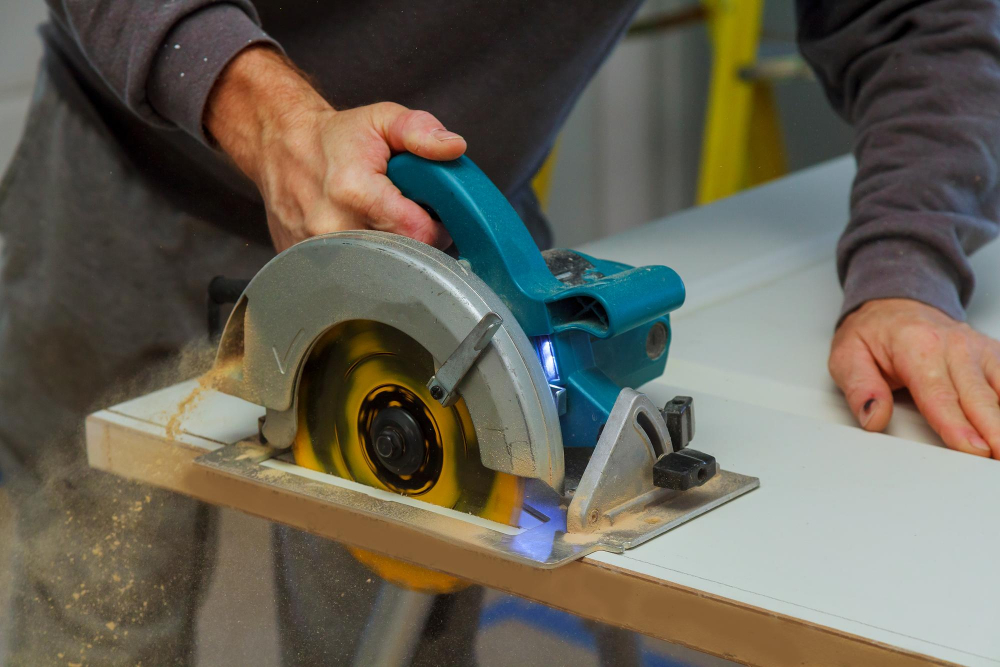
Using a Circular Saw
It’s portable, easy to use, and can make precise cuts with the right technique. To get started, you’ll need a circular saw with a sharp blade and an edge guide or rip fence.
Firstly, measure and mark your wood where you want to make the cut. Then clamp it securely onto your work surface so that it doesn’t move while cutting.
Next up is setting up the edge guide or rip fence on your circular saw according to how wide of strips you want from each board. This will help keep your cut straight along its length.
Once everything is set up correctly, turn on the tool and slowly lower it onto the marked line at one end of your board while keeping pressure against both sides of its base plate throughout this process until reaching another end point without stopping in between cuts as this may cause unevenness in thicknesses across different parts due mainly because blades tend not always being perfectly aligned perpendicular relative towards material surfaces they are cutting through which causes some deviation when moving forward too quickly during operation time leading into wavy edges instead straight ones we desire most times!
Make Table Saw-Quality Rips With a Circular Saw
With the right technique and setup, you can make precise cuts that are just as clean and straight as those made with a table saw.
To get started, first ensure that your circular saw blade is sharp and in good condition. Next, set up your workpiece on two supports so that it’s level with the surface of your cutting area.
Then clamp down both ends of the board to prevent any movement during cutting.
Now it’s time to create an improvised rip fence by clamping down another piece of wood parallel to where you want to make the cut. This will serve as a guide for keeping your cut straight throughout its length.
Once everything is securely in place, turn on your circular saw and slowly push it forward along the edge of this makeshift fence while maintaining even pressure throughout each pass until reaching completion.
Employing a Handsaw
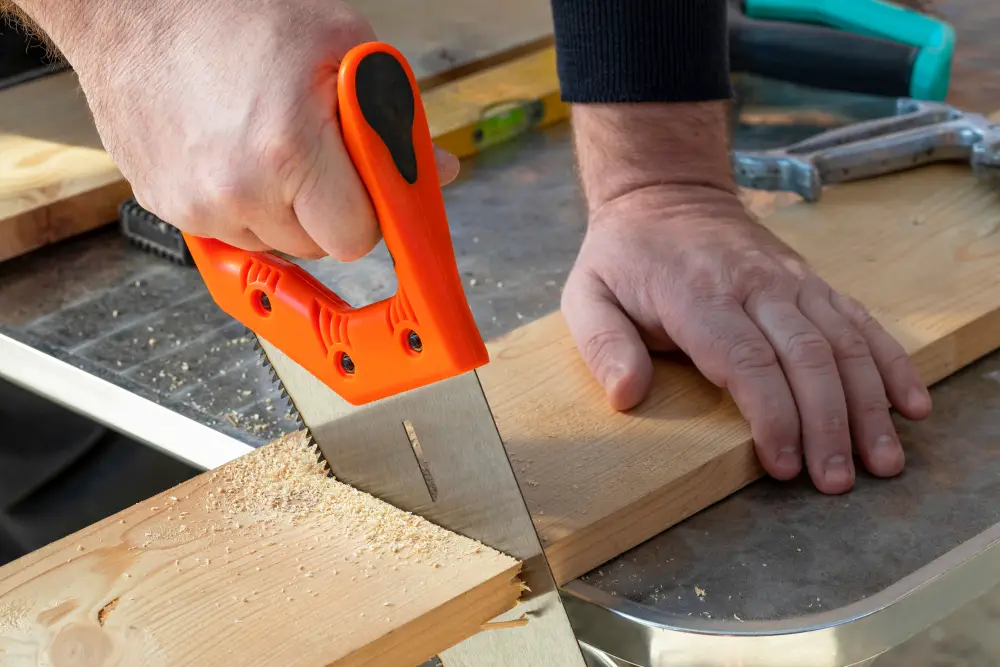
While this method may require more elbow grease and patience than using power tools, it can be an effective way to achieve precise cuts. To use a handsaw for ripping wood, start by marking the cut line on your board with a pencil or chalk line.
Then clamp the board securely in place on your work surface so that it doesn’t move while you’re cutting.
Next, choose the right type of saw for your project – rip saws are designed specifically for making long cuts along the grain of wood and will give you better results than crosscut saws or other types of hand-held blades.
Once you have everything set up correctly, begin cutting slowly and steadily along your marked line with smooth strokes until you reach the end of your cut. Remember to keep both hands firmly on either side of the blade as you work to maintain control over its movement.
Trying a Jigsaw
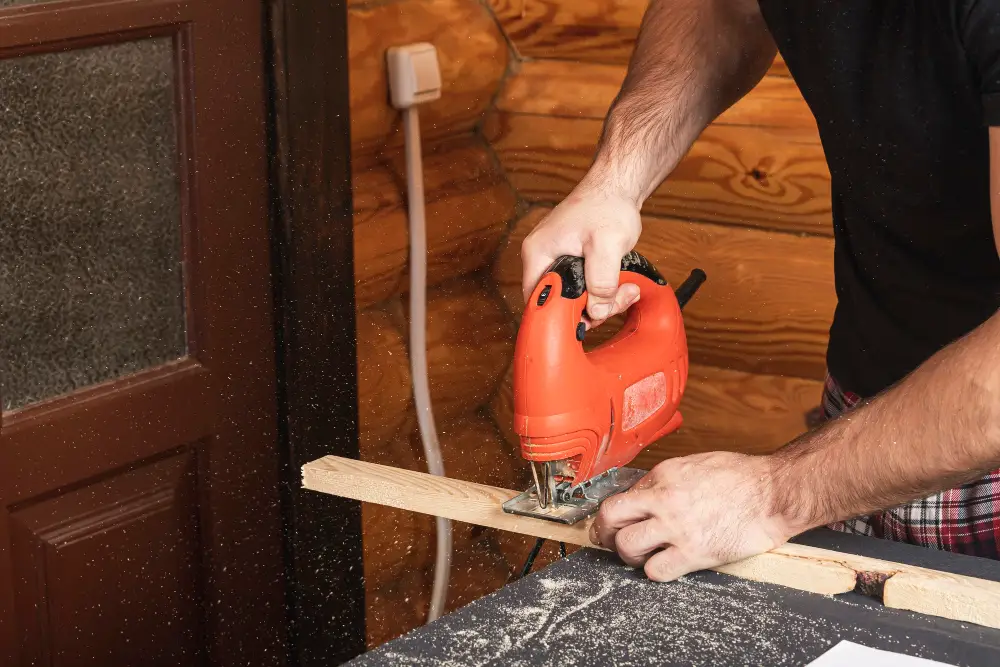
A jigsaw is an excellent tool for cutting curves and intricate shapes in wood, but it can also be used to make straight cuts. To use a jigsaw for ripping wood, start by clamping the board securely to your work surface.
Then attach the appropriate blade (a fine-toothed blade works best) and adjust the speed of your saw according to the thickness of your board.
Next, align your saw with the cut line on your board and begin making slow and steady cuts along that line. Keep both hands firmly on either side of the base plate as you guide it through each pass until you reach its end.
One thing to keep in mind when using a jigsaw is that it may not produce perfectly straight edges like other tools such as circular or table saws would do; however, this method will still give satisfactory results if done correctly.
Navigating a Hand Plane

A hand plane is a manual tool that shaves off thin layers of wood to create smooth and even surfaces. It’s perfect for small-scale projects or when you need precise control over your cuts.
To use a hand plane, start by clamping the board securely onto your workbench with one end hanging slightly over the edge. Hold the handle firmly with one hand and place your other on top of the blade assembly.
Begin at one end of the board and push down gently while moving forward in long strokes along its length. Keep applying pressure until you reach near to where it hangs off from bench edge.
Then flip it around so that this part now rests on bench surface instead; repeat process as before but pushing upwards instead this time around – always keeping firm grip throughout entire motion!
Applying a Router

It’s especially useful for creating decorative edges or cutting grooves into the wood. To use a router, you’ll need to attach it to a base plate and adjust the depth of cut according to your needs.
Once you’ve set up your router, clamp down your workpiece securely onto the workbench and position it so that you can move the router along its length with ease. Start by making shallow passes over the surface of the wood until you reach your desired depth.
It’s important not to rush this process as too much pressure on one side could cause uneven cuts or even damage both tools and material. Always keep an eye on how much material is being removed at once; if necessary, make multiple passes rather than trying for one deep cut.
Cutting Technique Tips
The key to achieving clean and accurate cuts is maintaining a steady hand and following some basic guidelines.
Firstly, always keep both hands on the saw or tool while cutting. This will help you maintain control over the cut and prevent any accidents from happening.
Secondly, make sure that your body position is stable before making a cut. Stand with your feet shoulder-width apart and brace yourself against a wall or workbench if necessary.
Thirdly, use slow but consistent pressure when guiding the saw through the wood. Avoid pushing too hard as this can cause uneven cuts or even damage to your blade.
Lastly, practice makes perfect! Take some scrap pieces of wood and experiment with different techniques until you find what works best for you.
Sanding and Finishing Edges
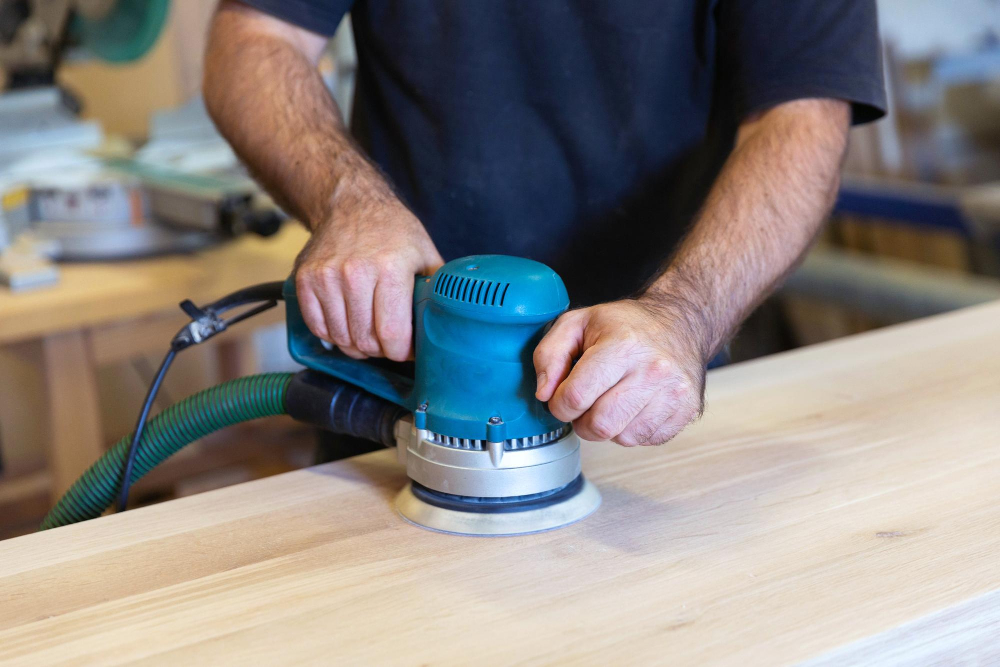
Sanding will remove any roughness or splinters left behind by the saw blade, while finishing will protect the wood from moisture and wear. Start by using coarse-grit sandpaper (around 80 grit) to smooth out any large bumps or ridges along the edge of your board.
Then move on to finer grits (120-220) until you achieve a smooth surface.
When it comes time for finishing, there are many options available depending on your project’s needs and preferences. You can use paint, stain, varnish or oil-based finishes like tung oil that penetrate deep into wood fibers providing long-lasting protection against water damage.
Mount a Featherboard for Accurate Rips
One way to achieve this is by using a featherboard. A featherboard is a simple yet effective tool that helps hold the wood securely against the fence while you make your cut.
To mount a featherboard, start by attaching it to your table saw or workbench with clamps or screws. Position it so that its fingers are pointing towards you and slightly angled towards the blade.
Next, adjust the height of your featherboard so that its fingers press firmly against your workpiece without bending them too much. You want enough pressure to keep things stable but not so much as to cause any damage.
Once everything is set up correctly, turn on your saw and slowly feed in your board while keeping firm pressure against both sides of the blade with one hand and holding onto either end of the board with another hand for added stability.
Straighten a Crooked Edge

There are several techniques that you can use to straighten out the board before ripping it. One method is using clamps and scrap wood as guides.
Firstly, place the crooked board on your work surface and identify which side needs to be trimmed down. Then take two pieces of scrap wood that are longer than your board’s width and clamp them onto either end of the warped section.
Next, run a circular saw along one guide rail while keeping its base plate flush against both rails at all times until reaching the other end. Repeat this process for each pass until achieving an even cut across all edges.
Alternatively, if you don’t have enough space for clamping or prefer not to use power tools in this step; try using hand planes instead! Start by marking where you want your new edge line with pencil lines parallel from top-to-bottom sides (or vice versa). Then hold plane perpendicular over marked area while pushing forward gently but firmly towards opposite direction till getting desired results!
Support Long Boards
One way to do this is by using sawhorses or a workbench with clamps. Place one end of the board on a stable surface and support the other end with sawhorses or clamps.
If you’re working alone, consider using an adjustable roller stand that can hold up long boards while you make your cuts. These stands are easy to set up and adjust as needed for different lengths of wood.
Another option is creating makeshift supports out of scrap lumber by attaching them perpendicular to your work surface at intervals along its length. This will help keep your board level throughout its entire length while also providing additional stability during cutting.
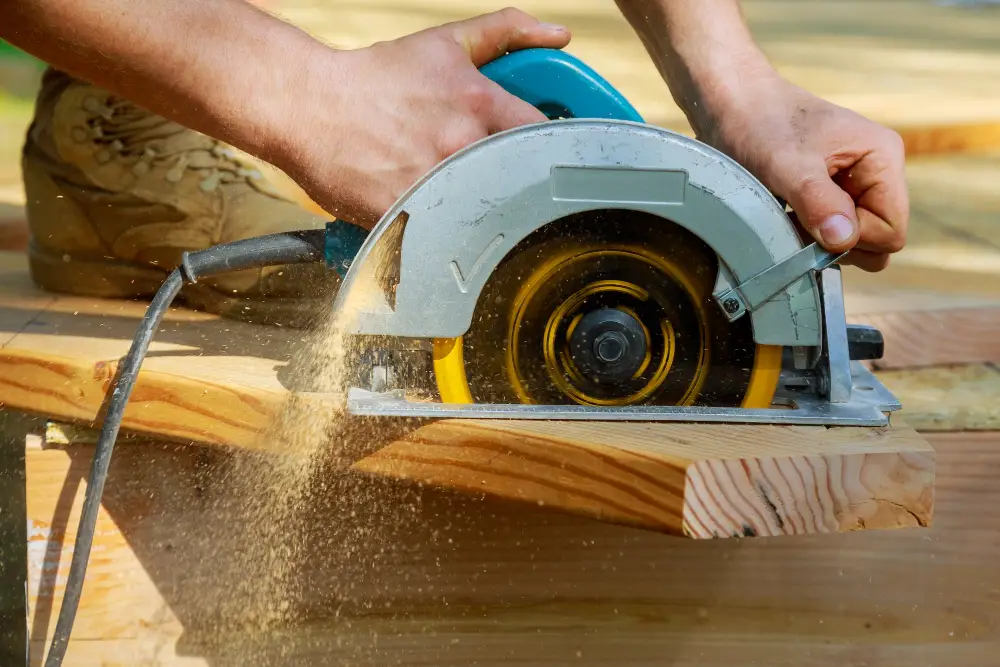
Make the Cut At a Steady Speed Without Stopping
This technique ensures that your cuts are clean and accurate, with no jagged edges or rough spots. To achieve this, you need to maintain a consistent pace throughout the entire cut.
One way to do this is by using a circular saw with an adjustable speed setting. Start at a slower speed and gradually increase as you get comfortable with the motion of cutting through wood.
Another tip is to use both hands when guiding your tool along the marked line on your board. Keep one hand on top of the saw while holding onto its handle firmly with another hand for better control.
It’s also important not to force or push too hard against your blade; let it do its job naturally without any extra pressure from you.
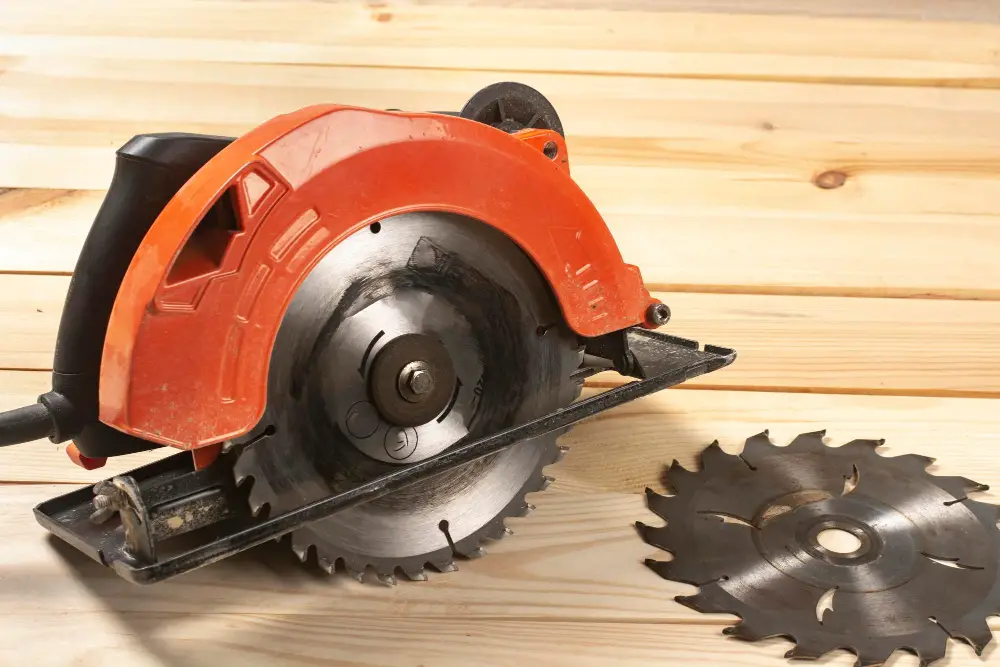
Choose a Circular Saw Blade With More Teeth for Smoother Cuts

Circular saw blades come with different numbers of teeth, ranging from 24 to 80 or more. The number of teeth on a blade affects how smoothly it cuts through wood.
Blades with fewer teeth are ideal for rough cutting tasks like framing lumber or ripping thicker boards where speed is more important than precision. However, if you want smoother edges and cleaner finishes on your ripped pieces, opt for blades with higher tooth counts.
Circular saw blades that have between 40-60 teeth are perfect for general-purpose use when ripping plywood sheets or thinner boards because they produce clean and precise cuts without tearing up the material’s surface fibers.
If you’re working on fine woodworking projects that require even smoother finishes such as cabinetry work or furniture making, consider investing in a high-quality circular saw blade with over 80-teeth count designed explicitly for cross-cutting hardwoods cleanly while leaving behind minimal tear-out marks along its path.
FAQ
What can I use if I don’t have a table saw?
If you don’t have a table saw, you can use a circular saw, a band saw, a jigsaw, or a track saw as alternatives depending on your budget, space, and requirements.
What are some effective techniques for ripping wood using a circular saw instead of a table saw?
Some effective techniques for ripping wood with a circular saw include using a straight edge guide, proper blade selection, and maintaining correct saw speed and pressure.
How can I ensure accurate and consistent cuts while ripping wood without a table saw?
To ensure accurate and consistent cuts while ripping wood without a table saw, use a circular saw with a straight edge guide and carefully measure and mark your cuts.
Are there any specialized tools or jigs available for ripping wood in the absence of a table saw?
Yes, in the absence of a table saw, specialized tools like circular saws and straight edge guides, or jigs like a Kreg Rip-Cut can be used for ripping wood.


