Last updated on
Discover the essential steps to effectively repair water-damaged kitchen cabinets and restore their functionality in no time.
Water damage is a common kitchen problem that can wreak havoc on your cabinets. It can be caused by a leaky faucet, a burst pipe, or even high humidity levels.
Not only does it look unsightly, but it can also compromise the structural integrity of your cabinets over time. But don’t worry! With the right tools and techniques, you can repair water-damaged kitchen cabinets and restore them to their former glory.
In this article, we’ll guide you through the steps to repair kitchen cabinets with water damage so that you can get back to cooking in style.
What's Inside
Identifying Water Damaged Cabinets
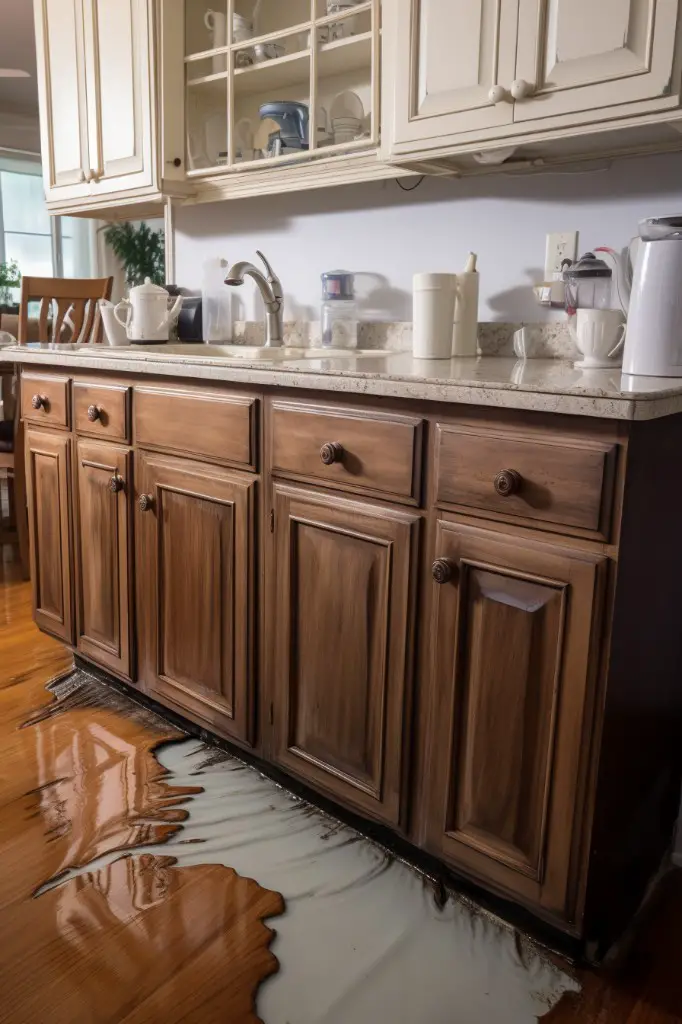
The first step in repairing water-damaged kitchen cabinets is to identify the extent of the damage. Water damage can manifest itself in different ways, depending on how long it has been present and what type of material your cabinets are made from.
Some signs that you may have water-damaged cabinets include warping or buckling wood, discoloration or stains on surfaces, mold growth, and a musty odor emanating from your cabinetry.
If you notice any of these symptoms in your kitchen cabinet area after a leak or flood incident has occurred; then it’s time to take action before things get worse. Identifying the source of water intrusion is also crucial as this will help prevent future occurrences once repairs are done.
Identify the Cause of Water Damage
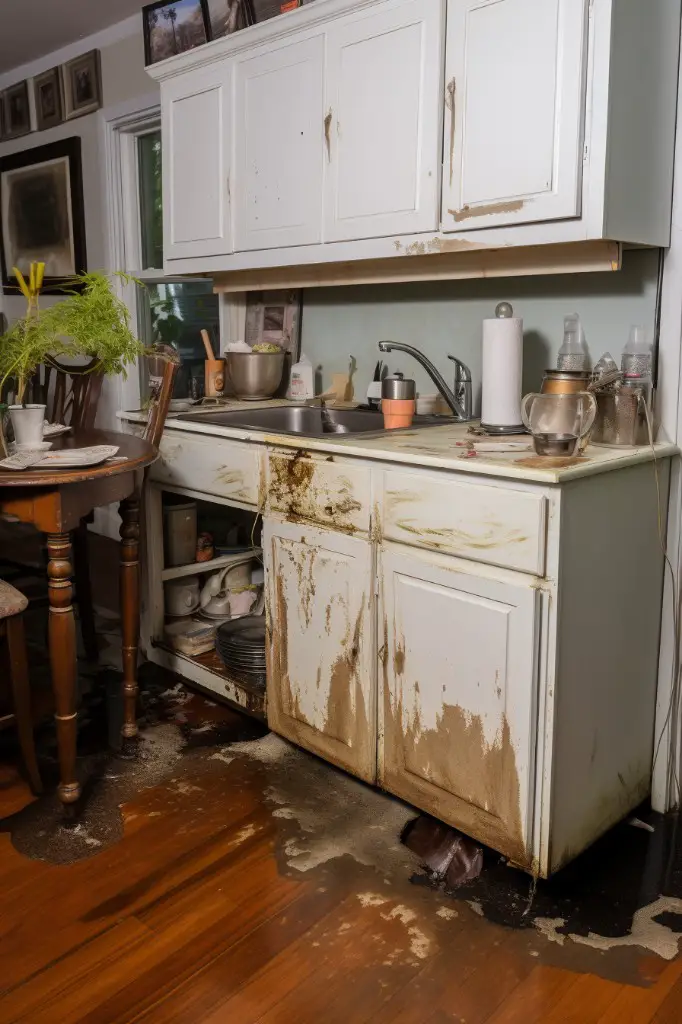
The first step in identifying the cause of water damage is to look for visible signs such as stains, discoloration, or warping on your cabinets. If you notice any of these signs, it’s essential to investigate further and determine the source of the problem.
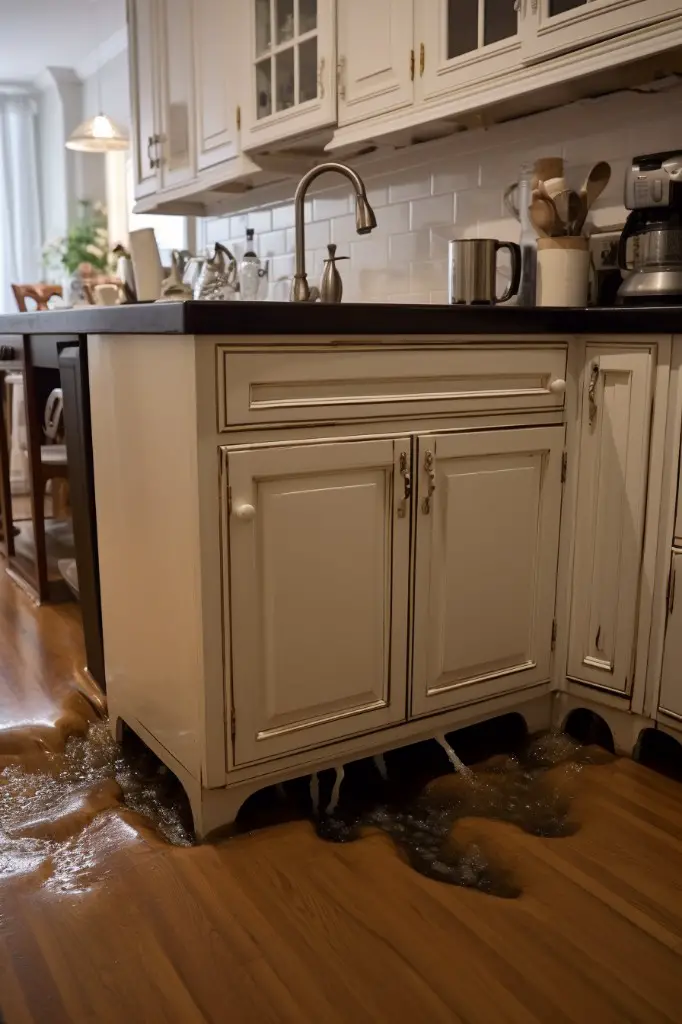
Common causes of kitchen cabinet water damage include leaky pipes under sinks or behind walls, overflowing dishwashers or washing machines, high humidity levels due to poor ventilation in your kitchen space. Once you have identified what caused the issue with your cabinets’ moisture content level (which can be done by using a moisture meter), take steps immediately before more significant problems arise.
Assess the Severity of Damage
This will help you determine whether you can repair or replace your cabinets and what tools and materials are required for the job.
Start by examining your cabinets closely, looking for signs of warping, discoloration, or mold growth. If there’s visible damage on the surface level only, such as peeling paint or minor swelling around edges that doesn’t affect functionality – then it may be possible to fix them with some simple repairs.
However, if there’s significant structural damage like cracks in wood panels or swollen particleboard that has lost its integrity due to prolonged exposure to moisture – then replacement might be necessary. In this case, it’s best not to attempt any repairs yourself but instead seek professional assistance from a carpenter who specializes in cabinet restoration.
Assessing the severity of water damage is crucial before starting any repair work because it helps avoid wasting time and money on futile efforts while also ensuring safety during DIY projects.
Tools and Materials Required
Here are some essential items that you’ll need:
1. Screwdriver: You’ll need a screwdriver to remove any screws or hardware from your cabinets.
2. Putty knife: A putty knife is useful for removing damaged wood or applying wood filler.
3. Sandpaper: Sandpaper will help smooth out rough edges and prepare surfaces for painting or staining.
4. Wood filler: This material can be used to fill in cracks, holes, and other surface damage on wooden cabinets.
5. Waterproof sealant: Applying a waterproof sealant will protect your repaired cabinet from future water damage.
- Paintbrushes/rollers/spray gun (depending on preference): These tools are needed if you plan on painting or staining your repaired cabinet parts.
- Paint/stain/varnish: Depending upon what finish was there before ,you may require paint,stain,varnish etc
Safety Precautions
Water damage can weaken the structural integrity of your cabinets and make them unstable. Here are some safety tips to keep in mind:
1. Turn off the power supply: If there are any electrical outlets or switches near the damaged area, turn off the power supply before starting repairs.
2. Wear protective gear: Always wear gloves and eye protection when handling tools or chemicals.
3. Use a respirator mask: When sanding or applying sealants, use a respirator mask to avoid inhaling dust particles.
4. Work in a well-ventilated area: Open windows and doors for proper ventilation while working on your cabinets.
5. Keep children away from work areas: Ensure that children stay away from work areas as they may accidentally touch sharp tools or hazardous materials.
Removing the Damaged Cabinet Parts
This step is crucial as it allows you to assess the extent of damage and determine which parts need repair or replacement. Before starting, make sure that you have all the necessary tools and equipment at hand.
Begin by removing any items stored in your cabinets and clearing out space around them for easy access. Next, use a screwdriver or drill to remove screws holding together damaged cabinet pieces such as doors, shelves or drawers.
Be careful not to damage surrounding areas while removing damaged parts from your kitchen cabinets. If there are stubborn screws that won’t come off easily due to rusting or other factors, try using penetrating oil like WD-40 before attempting removal again.
Repairing Surface Damage
This step is crucial in restoring your cabinets’ appearance and preventing further damage. Start by sanding down the affected area with a fine-grit sandpaper until it’s smooth and even.
Then, clean the area thoroughly with a damp cloth to remove any dust or debris.
Next, apply wood filler to fill in any cracks or holes caused by water damage. Use a putty knife to spread the filler evenly over the damaged area and let it dry completely according to manufacturer instructions.
After drying, use another round of sandpaper (with finer grit) on top of dried wood filler for smoothing out rough edges before painting or staining your cabinets again.
Fixing Structural Damage
Structural damage can weaken your cabinets and make them unsafe to use. Here are some steps to follow when fixing structural damage:
1. Reinforce weak areas: Use wood glue or epoxy resin to reinforce any weakened areas in your cabinet structure.
2. Replace damaged parts: If there are parts of your cabinet that cannot be repaired, such as a broken shelf or drawer bottom, replace them with new ones.
3. Rebuild support structures: If the water has caused significant structural damage, you may need to rebuild support structures for shelves and other components.
4. Check for mold growth: Water-damaged cabinets can become breeding grounds for mold if not properly treated; check thoroughly before rebuilding anything.
Repairing or Replacing Cabinet Materials
In some cases, surface damage can be fixed with wood filler and sanding. However, if the structural integrity of your cabinets has been compromised due to water damage, replacing the affected parts may be necessary.
If only a small area is affected by water damage and needs replacement, then it’s best to remove that part alone instead of replacing the entire cabinet. You can purchase new pieces from a hardware store or order them online from manufacturers who specialize in making replacement parts for kitchen cabinetry.
When choosing new materials for your cabinets’ replacements such as doors or drawers fronts consider matching their style with existing ones so that they blend seamlessly into your overall design scheme.
Replacing damaged cabinet material requires precision cutting and fitting skills; therefore hiring an experienced carpenter might be necessary if you’re not confident in doing this yourself.
Sanding and Cleaning the Affected Area
Sanding is an essential step in repairing water-damaged cabinets as it helps to smooth out any rough edges or surfaces that may have been left behind after removing the damaged parts. It also prepares the surface for painting or staining later on.
Start by using a fine-grit sandpaper (around 220 grit) and gently sand down any rough spots until they are smooth to touch. Be careful not to over-sand as this can damage your cabinet further.
After you’ve finished sanding, use a damp cloth or sponge with warm soapy water to clean off any dust particles left from sanding. Make sure that all areas are thoroughly cleaned before moving onto applying wood filler.
Applying Wood Filler and Sanding
This process will help smooth out any rough patches or uneven surfaces left behind by the repair work.
To begin, apply a thin layer of wood filler over any holes or cracks in the cabinet surface using a putty knife. Be sure to fill in all gaps completely and allow it enough time for drying as per manufacturer instructions.
Next, use fine-grit sandpaper (220 grit) on an orbital sander or by hand with a sanding block. Sand down the dried wood filler until it is flush with the surrounding cabinet surface.
Repeat this process until all areas are even and smooth.
Afterward, switch over to medium-grit (120 grit) then coarse-grit (80 grit) paper if necessary for deeper scratches that need more attention before finishing up with 220 again for final smoothing touch-ups.
Sealing and Waterproofing
This step will help prevent future water damage and ensure that your cabinets last for years to come. To do this, you can use a waterproof sealer or varnish that is specifically designed for wood surfaces.
Before applying any sealant or varnish, make sure the surface of your cabinets is clean and dry. Sand down any rough spots or uneven areas with fine-grit sandpaper until they are smooth to the touch.
Next, apply a thin layer of sealer using a brush or roller in long strokes along the grain of the wood. Be sure not to leave any bubbles behind as these can cause an uneven finish once dried.
Allow each coat of sealer/varnish enough time (as per manufacturer’s instructions) before applying another one on top until you achieve your desired level of protection against moisture damage.
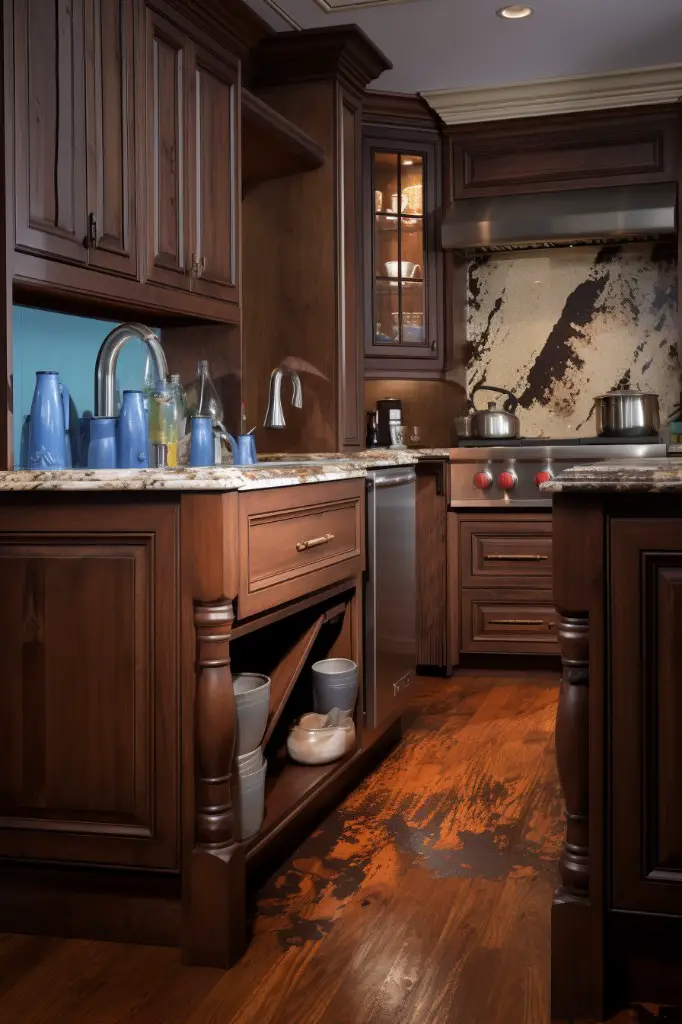
Painting or Staining the Cabinets
Painting or staining is an excellent way to revamp your cabinets and make them look brand new again. Before painting or staining, ensure that the surface is clean and dry by wiping it down with a damp cloth.
If you choose to paint your cabinets, start by applying a primer coat first before adding two coats of paint in thin layers. Allow each layer of paint to dry completely before adding another one.
On the other hand, if you prefer staining over painting, apply wood conditioner first for even absorption of stain color into the wood grain. Then apply 2-3 coats of stain using long strokes along with wood grain direction allowing each coat enough time for drying between applications.
After either process (painting/staining), allow ample drying time as per manufacturer instructions then finish off with at least two protective topcoats such as polyurethane varnish which will protect against scratches and moisture damage while giving an attractive sheen finish.
Reassembling and Reinstalling Cabinets
Begin by carefully fitting the pieces back together, making sure that they align properly. Use wood glue or screws to secure any loose joints or connections.
Next, attach any hardware such as handles or knobs onto the doors and drawers before reattaching them to their respective places on the cabinet frame. Make sure that all hinges are securely fastened in place.
Use a level tool to ensure that your cabinets are straight and even before securing them firmly into position with screws through their mounting brackets into wall studs.
Reassembling and reinstalling kitchen cabinets can be a challenging task for those who lack experience in DIY projects.
Final Touch-ups and Clean-up
This step is crucial to ensure that your cabinets look as good as new and are ready to use again. Start by wiping down all surfaces with a damp cloth to remove any dust or debris left over from the repair process.
Next, inspect your cabinets carefully for any remaining imperfections or blemishes. Use wood filler or putty if necessary to fill in gaps or holes in the surface of your cabinet doors and drawers.
Give your cabinets a fresh coat of paint or stain if needed. This will not only make them look brand new but also protect them from future water damage.
Repairing kitchen cabinets with water damage may seem like an overwhelming task at first glance but following these steps can help you restore their functionality quickly and efficiently while saving money on replacement costs.
Preventing Future Water Damage
Here are some tips:
1. Fix leaks promptly: If you notice a leaky faucet or pipe, fix it as soon as possible to avoid further damage.
2. Use waterproof sealants: Apply a waterproof sealant on the surface of your cabinets and around sinks and faucets.
3. Proper ventilation: Ensure that there is proper ventilation in your kitchen space by installing exhaust fans or opening windows when cooking or using appliances that generate steam.
4. Regular maintenance checks: Inspect your cabinets regularly for signs of water damage such as discoloration, warping, mold growths among others so that any issues can be addressed early before they escalate into bigger problems.
Maintaining Waterproof Sealants
One of the best ways to do this is by maintaining waterproof sealants on your cabinets. Waterproof sealants are designed to protect wood from moisture and humidity, which can cause warping, cracking or rotting over time.
To maintain waterproof sealants on your kitchen cabinets, start by cleaning them regularly with a mild detergent and warm water solution. Avoid using harsh chemicals or abrasive cleaners that can damage the finish of your cabinet surfaces.
Next, inspect the seals around sinks and faucets for any signs of wear or tear. If you notice any cracks or gaps in these areas, apply a fresh layer of silicone caulk around them as soon as possible.
Consider investing in a dehumidifier for your kitchen space if high humidity levels are an ongoing issue in your home. This will help reduce moisture levels in the air and keep wooden surfaces dry.
Protective Measures for Kitchen Cabinets
Here are some tips that can help keep your cabinets dry and in good condition:
1. Use a dehumidifier: High humidity levels can cause moisture buildup inside the cabinets, leading to mold growth and wood rot.
A dehumidifier helps regulate the humidity levels in your kitchen.
2. Install cabinet liners: Cabinet liners act as a barrier between the cabinet surface and any spills or leaks that may occur.
3. Avoid placing wet items on top of or inside the cabinets: Wet dishes, towels, sponges should be dried before being placed back into their storage areas.
4. Regularly inspect pipes under sinks for leaks: Check under sink pipes regularly for signs of leakage such as dampness around joints or rusted fittings.
Properly Ventilating Your Kitchen Space
Poor ventilation can lead to high humidity levels, which can cause moisture buildup and eventually result in water damage. To avoid this, make sure that your kitchen has adequate airflow by installing a range hood or exhaust fan.
A range hood or exhaust fan helps remove excess moisture from cooking and prevents it from settling on surfaces like cabinets. It also helps eliminate unpleasant odors and smoke that may accumulate during cooking.
In addition to installing a range hood or exhaust fan, you should also keep windows open when possible to allow fresh air into the space. This will help reduce humidity levels and prevent mold growth.
Tips for Keeping Cabinets Dry
Here are some tips to help you keep your cabinets dry and prevent future water damage.
1. Fix Leaks Promptly: If you notice a leaky faucet or pipe, fix it as soon as possible before it causes any significant damage.
2. Use Exhaust Fans: Proper ventilation is essential in the kitchen to reduce humidity levels that can cause moisture buildup on surfaces like cabinets.
Install an exhaust fan if necessary.
3. Wipe Up Spills Immediately: Accidents happen, but don’t let spills sit on your cabinet surfaces for long periods of time; wipe them up immediately with a clean cloth or paper towel.
4. Avoid Excessive Water Exposure: Be mindful when cleaning around the sink area; avoid splashing excess water onto cabinet surfaces unnecessarily.
5. Apply Waterproof Sealants Regularly: Applying waterproof sealants regularly can help protect against moisture buildup and prevent future water damage from occurring.
By following these simple tips, you’ll be able to maintain dry kitchen cabinets that will last longer without requiring frequent repairs due to water damages caused by high humidity levels or leaks from pipes/faucets etcetera.
FAQ
How do you repair water damaged wood cabinets?
To repair water damaged wood cabinets, apply paste wax like Brimax or Harrell’s Jecowax Beeswax Blend with a clean cloth as directed, then wipe the cabinet surface for a clean and shiny appearance.
What steps should be taken to prevent future water damage to kitchen cabinets?
To prevent future water damage to kitchen cabinets, ensure proper sealing, install protective barriers, and maintain plumbing systems.
Can water-damaged laminate cabinets be successfully repaired, or do they require replacement?
Water-damaged laminate cabinets can be repaired to some extent, but severe damage often requires replacement.
What is the most effective way to remove mold and mildew that resulted from water damage in kitchen cabinets?
The most effective way to remove mold and mildew in kitchen cabinets is by using a solution of equal parts water and white vinegar, scrubbing the affected areas with a stiff brush, and ensuring proper ventilation for effective drying.


