Last updated on
Discover the simple steps to effectively trim exterior windows, enhancing your home’s curb appeal and improving its overall aesthetics.
Trimming exterior windows is an important part of home maintenance and can greatly enhance the overall look of your property. Whether you’re renovating an older home or just looking to give your house a facelift, updating your window trim is a simple and effective way to add curb appeal.
In this article, we’ll explore the steps involved in trimming exterior windows and provide some helpful tips to ensure that your project goes smoothly. So grab your tools and let’s get started!
What's Inside
Preparing for Exterior Window Trimming
Before you start trimming your exterior windows, it’s important to prepare the work area and gather all necessary tools and materials. Start by cleaning the window frames thoroughly with soap and water to remove any dirt or debris that may interfere with the installation process.
Next, inspect each window for damage or rotting wood that needs repair before proceeding.
Once you’ve assessed your windows’ condition, measure their dimensions carefully using a tape measure to ensure accurate cuts of trim pieces later on. It’s also essential to select appropriate trim material based on weather conditions in your area; PVC is ideal for humid climates while wood is best suited for dry regions.
Make sure you have all required tools such as a saw (circular saws are recommended), hammer/nail gun (depending on preference), measuring tape/ruler/square tool(s) as well as safety gear like gloves and goggles before starting work.
Selecting the Right Trim
First and foremost, you’ll want to choose a material that is durable enough to withstand the elements. Wood is a popular choice for window trim because of its natural beauty and versatility; however, it requires regular maintenance such as painting or staining.
If you’re looking for something low-maintenance, PVC or composite trims may be more suitable options. These materials are resistant to moisture damage and insects while still providing an attractive finish.
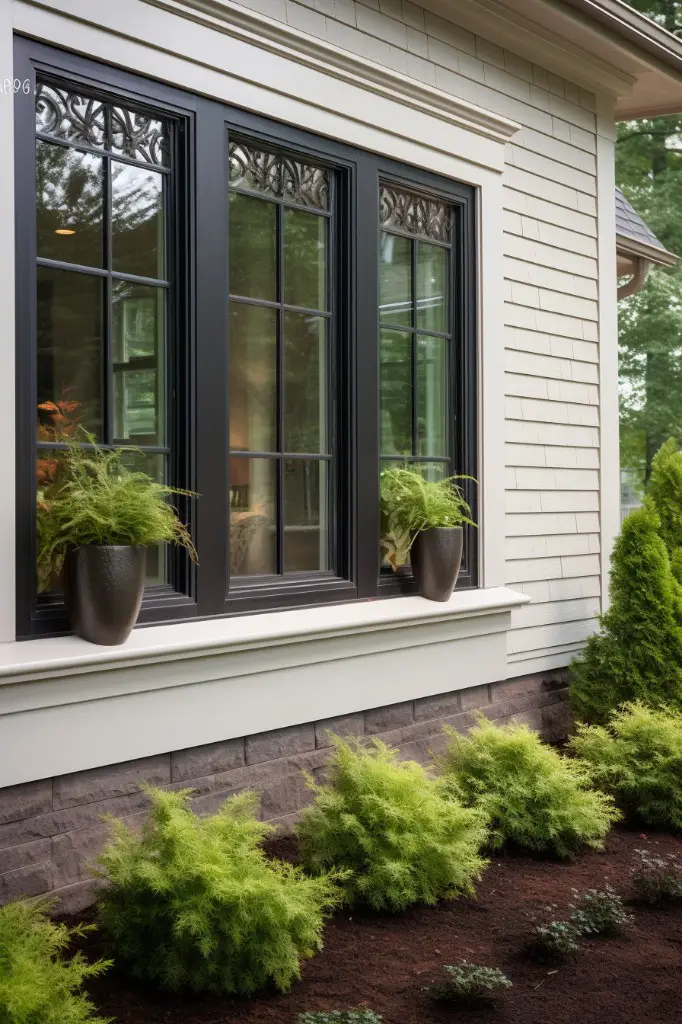
Another factor in choosing the right trim is style. The type of architecture your home has will play a role in determining what kind of window trim will look best on your house’s exterior.
For example, if you have a traditional-style home with lots of ornate details like crown molding or wainscoting inside then opting for decorative trims would complement well with this design aesthetic.
Tools and Materials Required
Here are some of the items you’ll need:
Tools:
- Measuring tape
- Miter saw or circular saw
- Jigsaw (for curved cuts)
- Hammer or nail gun
- Level
- Caulking gun
Materials: – Exterior trim boards (PVC, wood, composite) – Fasteners (nails/screws) – Wood glue – Paintable caulk – Primer and paint.
Having all these tools and materials ready before starting will make your job easier and more efficient. It is also essential to ensure that all equipment is in good working condition for safety reasons.
Measuring the Window Dimensions
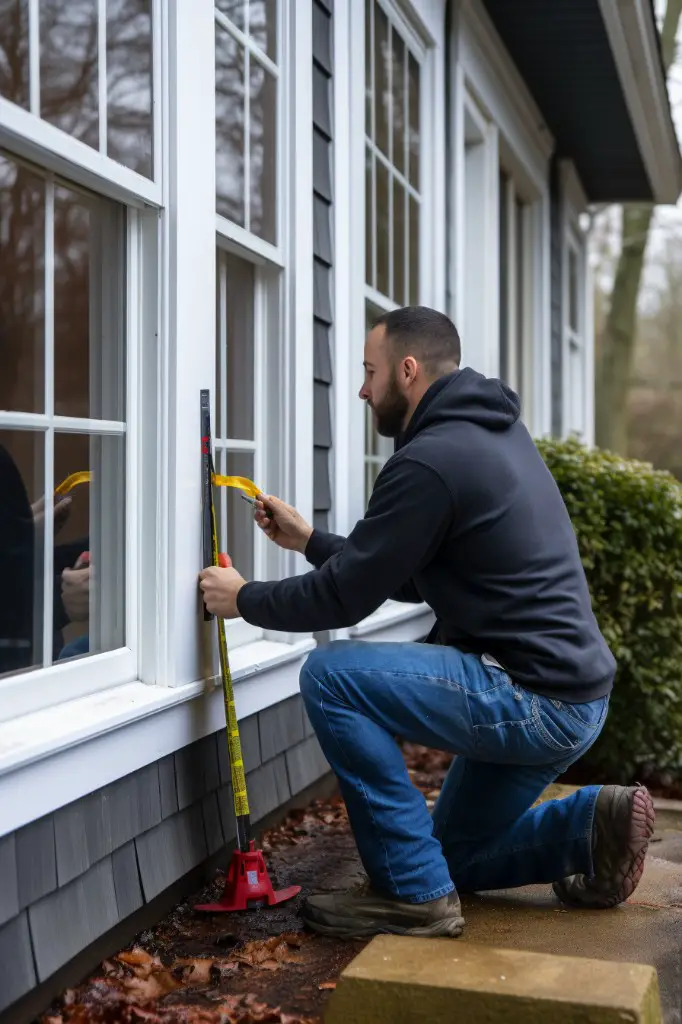
This will ensure that you purchase the right amount of trim and avoid any costly mistakes. To get started, grab a tape measure and follow these simple steps:
1. Measure the width: Start by measuring the width of your window from one side jamb to another at three different points (top, middle, bottom).
Record all three measurements.
2. Determine the smallest measurement: Once you have all three measurements recorded for width, determine which is smallest.
3. Measure height: Next up is measuring height in a similar way as with width – take 3 measurements (left side jamb to head casing; center left mullion or sash stile to sill; right side jamb to head casing) and record them.
- Determine shortest measurement again: Just like before with determining smallest measurement for widths now do so for heights too.
- Add extra inches if needed: Add an additional inch or two on both sides if necessary when purchasing trim pieces so that they can be cut down later during installation process.
Cutting the Exterior Trim Pieces
This step is crucial as it determines how well your window trim will fit and look once installed. Before you begin, make sure that all of your tools are in good working order and that you have all of the necessary materials on hand.
To cut exterior trim pieces accurately, measure each piece carefully using a tape measure or ruler. Double-check measurements before making any cuts to avoid costly mistakes later on.
When cutting with a saw blade, use slow and steady strokes while keeping an eye on where the blade is going at all times. It’s important not to rush this process as uneven cuts can lead to gaps between sections or even damage surrounding areas.
Prepping the Work Area
This will help ensure that the project goes smoothly and that you achieve professional-looking results.
Start by clearing any debris or clutter from around the window. Remove any outdoor furniture, potted plants or other items that may be in your way.
You’ll also want to cover nearby landscaping with a tarp or drop cloth to protect it from sawdust and other debris.
Next, inspect the window frame for damage or rotting wood. If there are any issues with the frame itself, these should be addressed before proceeding with trim installation.
Make sure you have all of your tools and materials on hand before beginning work on your exterior windows. This includes measuring tape, a saw (preferably a miter saw), nails/screws/fasteners appropriate for outdoor use as well as caulking gun & sealant tube(s).
Removing Old Trim (if Applicable)
This will ensure a clean and even surface for the new trim to be installed on. To remove old exterior window trim, start by carefully prying off any visible nails or screws with a pry bar or hammer.
Once all fasteners have been removed, gently pull the old trim away from the wall using your hands.
If you encounter stubborn areas where the old caulk is still holding onto both surfaces tightly together, use a utility knife to cut through it before pulling out each piece of wood one at a time.
Be sure not to damage surrounding siding during this process as well as avoid breaking glass panes if they are present in your windows.
Get the Proportions Right
This means ensuring that each piece of trim is in proportion with the others and that they are all correctly sized for your windows. One common mistake people make when trimming their windows is using pieces that are too small or too large, which can throw off the balance of your home’s exterior.
To avoid this issue, start by measuring each window carefully and selecting trims that match its size and shape. You’ll want to choose a style of trim that complements both your home’s architecture as well as any existing features such as shutters or columns.
Once you’ve selected the appropriate trims for each window, take care during installation to ensure everything lines up properly. Use a level to check horizontal alignment and adjust accordingly before securing with fasteners.
Mill the Sill
The sill is an essential part of your window trim that provides a base for your windows and helps prevent water from entering into your home. To mill the sill, you’ll need to use a table saw or circular saw with a guide.
Start by measuring the width of your window opening at its widest point. Then add 1/2 inch on each side for overhangs before marking out this measurement on both ends of your board using a pencil.
Next, set up guides on either side of where you will be making cuts so that they are parallel with one another – this ensures consistency in size throughout all sills installed around windows in different parts of the house.
Installing Sill Trim
The first piece of trim that you will install is the sill trim. This is the horizontal piece of wood that sits at the bottom of your window frame.
To begin, apply a bead of caulk along the top edge of your existing window sill. Then, place your new sill on top and press down firmly to ensure a tight seal.
Next, use finishing nails or screws to secure the sill in place. Be sure to countersink each nail or screw so that it sits flush with the surface of the wood.
Apply another bead of caulk along both sides and across any gaps between adjacent pieces before moving on to install side casing trims.
Installing Side Casing Trims
These are vertical pieces of trim that run along either side of the window frame and help to create a finished look. To install them, start by measuring and cutting your pieces of exterior trim according to your window dimensions.
Next, hold one piece in place against the side of your window frame and use a level or square tool to ensure that it is perfectly straight. Once you’re satisfied with its position, secure it in place using nails or screws.
Repeat this process for each remaining piece until both sides are fully trimmed out. Be sure to check each piece for levelness as you go along – even small deviations can be noticeable once all trims are installed.
Keep the Casing Square During Assembly
This will ensure that your window trim looks neat and professional once installed. To do this, use a carpenter’s square or a speed square to check that each corner is at a perfect 90-degree angle before nailing the pieces together.
If you find that your corners are not perfectly squared, don’t worry! You can easily adjust them by tapping one of the pieces with a hammer until it lines up correctly. It may take some trial and error to get everything just right, but taking the time to make sure your trim is properly aligned will pay off in the end.
Remember also to measure twice and cut once when assembling your exterior window trim. Double-checking all measurements before cutting any wood will help prevent costly mistakes down the line.
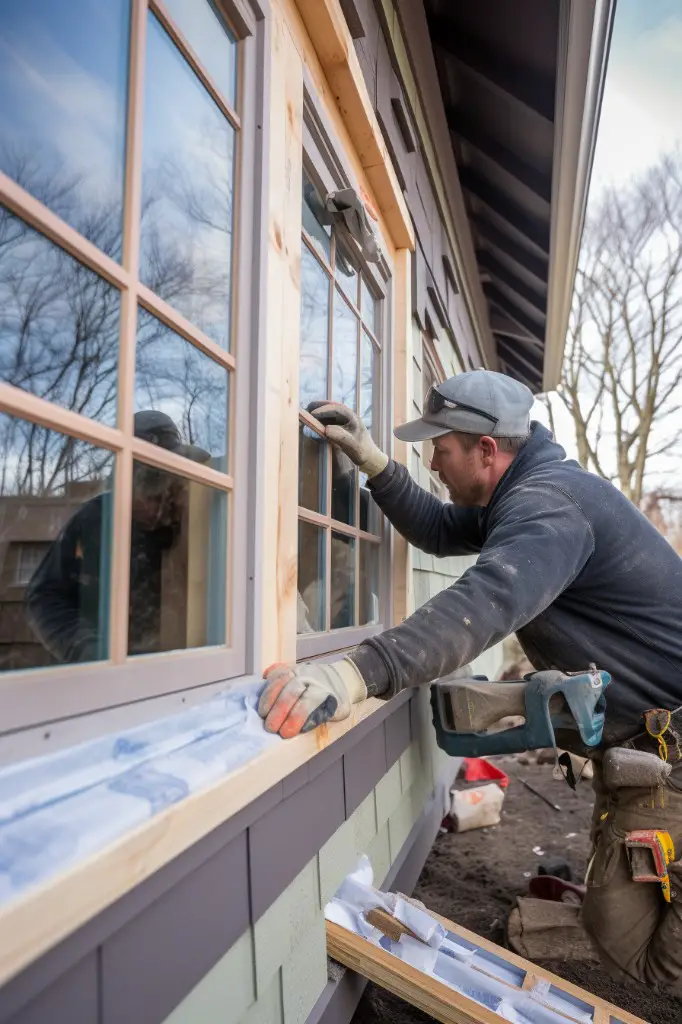
Installing the Head Casing Trim
This is the top piece of trim that runs horizontally across the top of your window frame. To install this piece, measure and cut a length of trim that fits snugly between your two side pieces.
Hold your head casing in place and make sure it sits flush against both sides before securing with nails or screws. Be sure to use a level tool during installation so that everything remains straight and even.
If you’re working with an older home or uneven walls, you may need to scribe (or shape) one end of your head casing for a perfect fit. Use a compass or contour gauge tool for this task.
Securing Trim With Fasteners
The most common way to do this is by using fasteners such as nails or screws. When selecting fasteners for your project, be sure to choose ones that are appropriate for outdoor use and will not rust or corrode over time.
To ensure a strong hold, it’s important to space out the fasteners evenly along each piece of trim. For example, when securing side casing trims on either side of a window frame, start at the top and work down towards the bottom with equal spacing between each nail or screw.
When nailing casing trims into place around windowsills or headers above windows (where there may be less support), consider adding additional nails/screws closer together than usual so that they can better withstand any potential stress from wind loads.
Nail the Casing; Screw the Sill
For this step, use a nail gun or hammer to attach the trim pieces securely to the window frame. It is important that you nail through the thickest part of each trim piece and into solid wood for maximum stability.
When it comes to securing your sill trim, however, screws are a better option than nails. This is because sills tend to experience more wear and tear over time due to exposure from rainwater runoff or snow accumulation during winter months.
Siding & Exterior Trim Integration
The key is to choose a trim that complements your existing siding material and color. For example, if you have vinyl siding, consider using PVC or composite trims that match its texture and finish.
If you’re installing new windows along with the trim work, make sure they are properly flashed before adding any exterior trims. This will help prevent water infiltration behind the sidings which can cause rotting of wood framing members over time.
For homes with brick or stone exteriors, use masonry screws instead of nails when attaching window trims to avoid damaging these materials during installation.
Caulking the Joints and Edges
This will help prevent water from seeping in and causing damage to your home’s interior. Start by applying a small bead of caulk along the joint between the trim and siding, making sure to fill any gaps completely.
Use a caulking gun for precision application and smooth out the bead with your finger or a putty knife. Be sure not to over-apply as this can create unsightly bulges that are difficult to remove once dry.
For best results, use an exterior-grade silicone or acrylic latex caulk that is paintable after drying. Allow ample time for drying before painting over it.
Applying Primer and Paint
This step is crucial for protecting the wood from moisture and other environmental factors that can cause damage over time. Before applying any paint or primer, make sure the surface of your trim is clean and dry.
Start by applying a coat of high-quality exterior primer to all surfaces of the trim using a brush or roller. Allow this coat to dry completely before moving on to painting.
When selecting an exterior paint color, consider choosing one that complements your home’s existing color scheme while also providing contrast against the window frame itself. Apply two coats of high-quality acrylic latex paint with a brush or roller, allowing each coat ample drying time in between applications.
Maintaining Trim Over Time
This will help ensure that your windows continue to look great and function properly for years to come. One of the most important things you can do is regularly inspect the trim for any signs of damage or wear and tear.
If you notice any issues, such as cracks or rotting wood, be sure to address them promptly before they become more serious problems.
Another key aspect of maintaining exterior window trim is keeping it clean. Dirt and debris can accumulate on the surface over time, which not only looks unsightly but can also cause damage if left unchecked.
To clean your window trim effectively, use a soft-bristled brush or cloth along with a mild detergent solution.
Consider applying a fresh coat of paint every few years as needed in order to keep your exterior window trims looking their best. This will not only enhance their appearance but also provide an added layer of protection against weathering and other environmental factors that could cause damage over time.
Tips for a Safer and Faster Job
Before you begin, make sure to wear appropriate protective gear such as gloves and eye protection. It’s important to use caution when working on ladders or other elevated surfaces.
To ensure that your window trimming project goes smoothly and efficiently, here are some additional tips:
1. Plan ahead: Take the time to carefully measure your windows and select the right trim pieces before beginning the installation process.
2. Work in stages: Rather than trying to complete all of the steps at once, break up the job into smaller tasks that can be completed over several days or weekends.
3. Use quality materials: Investing in high-quality trim materials will not only improve your home’s appearance but also help ensure that it lasts for years to come.
4. Keep tools organized: Make sure all of your tools are easily accessible and well-organized before starting work on each window.
By following these tips for a safer and faster job while trimming exterior windows you’ll have an easier time completing this task without compromising quality or safety standards!
FAQ
What is the best wood trim for exterior windows?
The best wood trim for exterior windows is cedar and redwood, as they naturally resist moisture and insect activity, ensuring longevity.
What are the essential steps to follow when trimming exterior windows?
Measure and cut trim, nail it to the window frame, caulk gaps, sand edges and apply paint or stain.
How do you maintain and care for wood trim on exterior windows?
To maintain and care for wood trim on exterior windows, regularly clean, inspect, and apply a high-quality paint or wood finish, as well as repair any damages to the trim.
What are the alternatives to wood trim for exterior windows?
Alternatives to wood trim for exterior windows include vinyl, aluminum, and fiber cement trim.


