Last updated on
Dive into this article because it unpacks some innovative covert shelf ideas that will transform your interior spaces into highly functional and aesthetically pleasing environments.
These are my unique design concepts made using design tools. I hope you find them inspiring!
Decorating your house with covert shelves can be an exciting journey. A home full of well-designed shelf spaces not only declutters your life but also adds an aesthetic appeal.
You might have seen a plethora of ideas across the World Wide Web from vintage corners to modern minimalist shelves. For those who love tried and tested concepts, there will be resources linked to the best existing ideas at the end of this article.
However, the purpose isn’t to rehash conventional concepts but to propose fresh and unique angles. Expect a salvo of innovative, unexplored ideas in this article – all set to inspire and spruce up your wall spaces.
Let’s dive into the realm of unseen, covert shelf designs. You’re sure to find this new list helpful in transforming the ambiance of your abode.
What's Inside
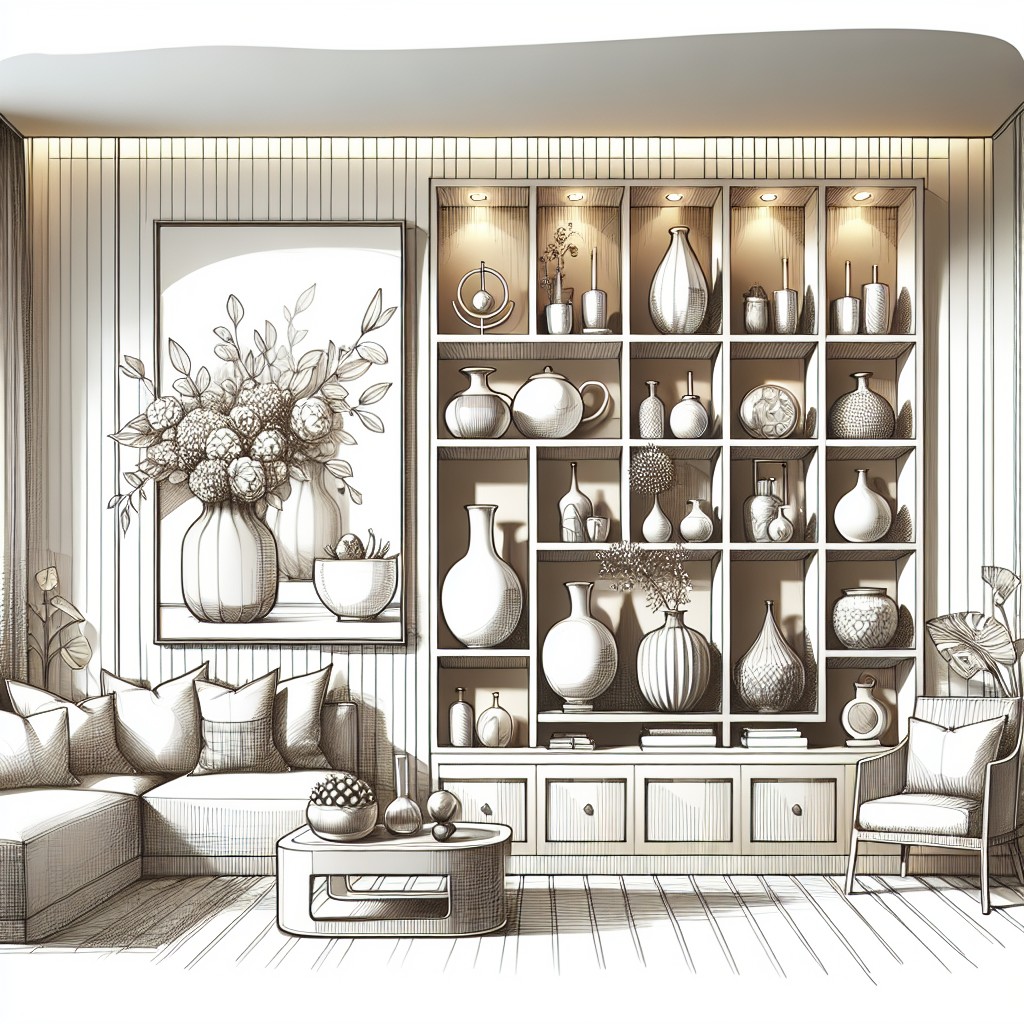
Shelving Behind Paintings
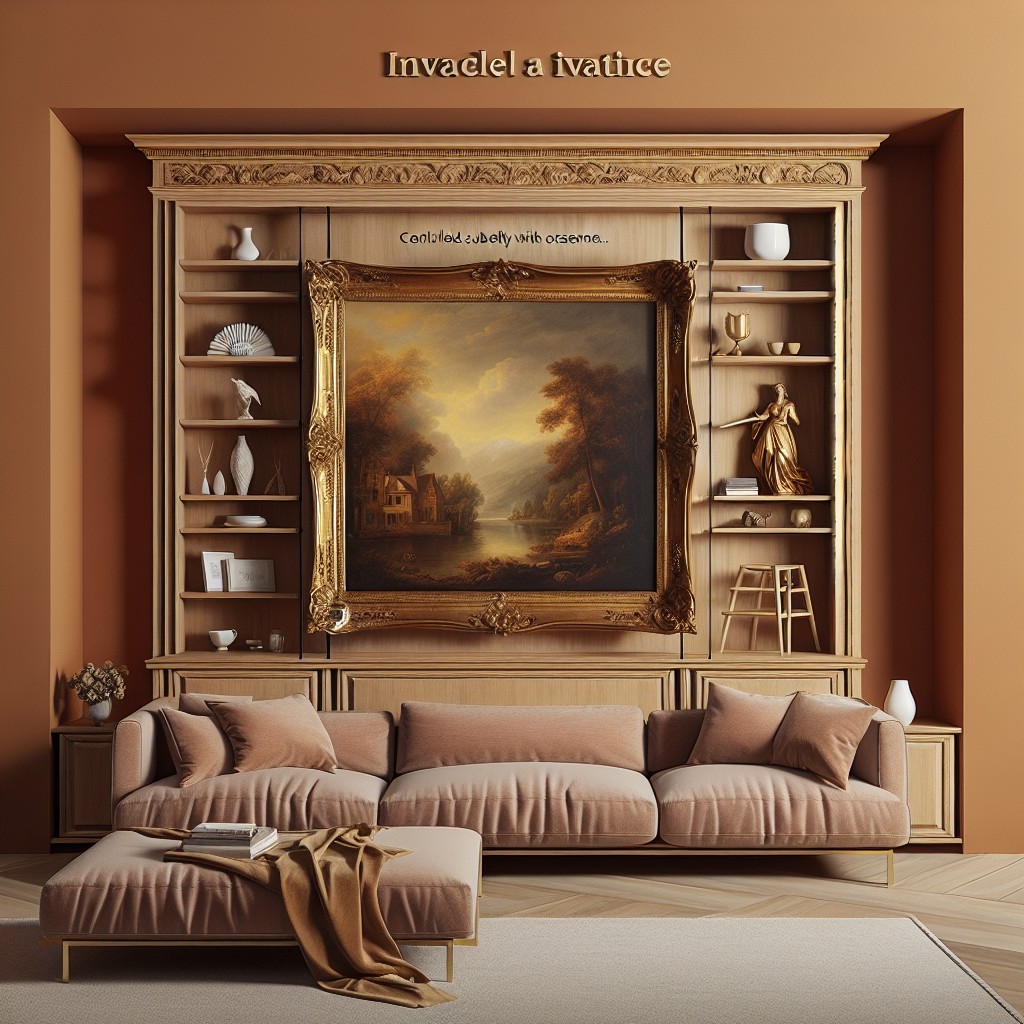
Concealing shelves behind artwork presents an elegant blend of function and aesthetics. These hidden storage spaces can be created by attaching a canvas or framed painting to a hinge, flipping open to reveal a shelving unit.
Here are several pointers to consider when designing these hidden shelves:
- 1. Select artwork appropriate for the room’s theme for seamless integration.
- 2. The size of the painting should be proportionate to the shelving unit.
- 3. Ensure the hinges are stout enough to support the painting’s weight when it swings open.
- 4. Consider using a locking mechanism to keep the artwork secure when not in use.
- 5. The shelving unit can be as simple or complex as desired, make sure it fits your needs.
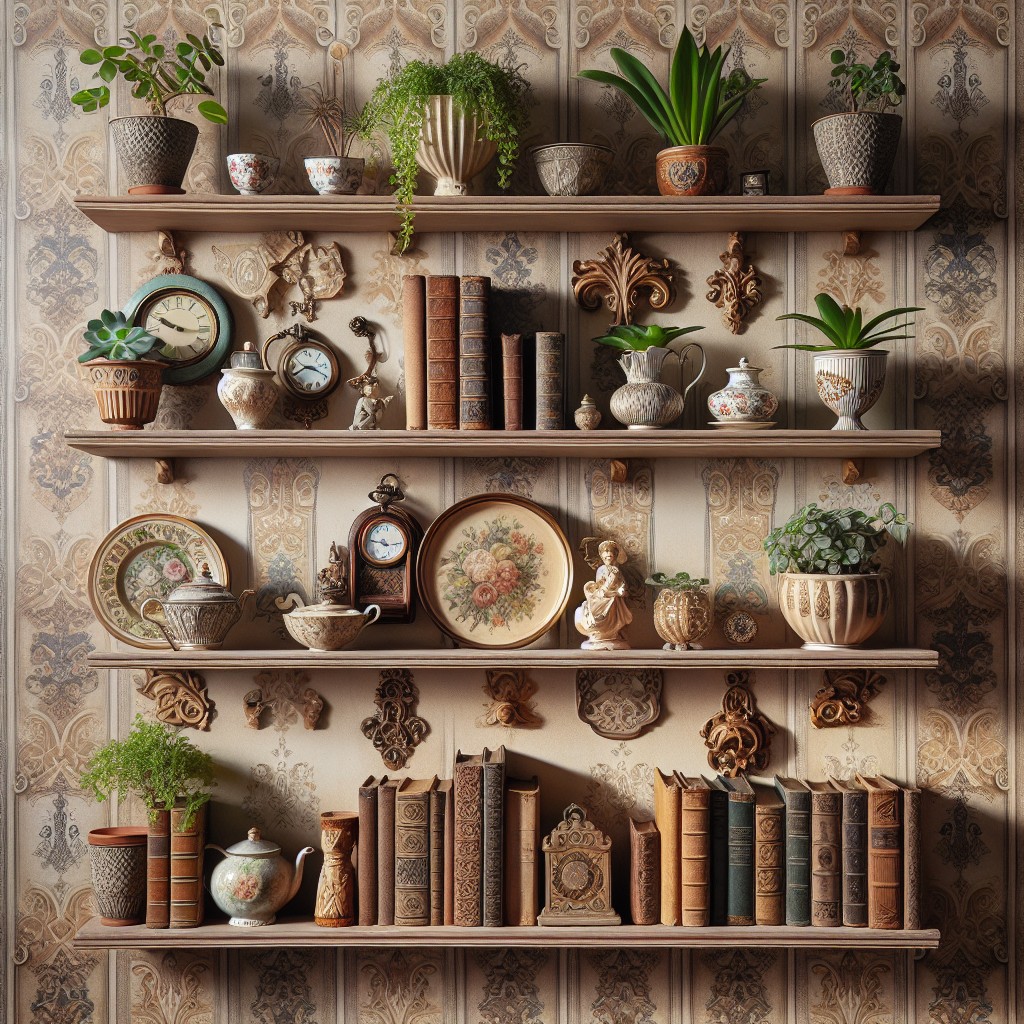
Shelves Integrated Into Wall Murals

Incorporating shelving into wall murals calls for a bit of creativity and flair. Begin by selecting a mural motif that can naturally accommodate ledges or alcoves. Landscape vistas, cityscapes, or tree-filled forests are ideal candidates. Invisible shelves, mounted on the wall and then painted over, will blend seamlessly, maintaining the mural’s uninterrupted visual flow.
While creating this setup, place emphasis on these three points:
- Consistency: Ensure the shelves are consistent with the mural’s style. For example, in a forest motif, shelves could represent branches.
- Load-bearing capacity: Check the weight these will hold. Lightweight objects are best for this setup.
- Placement: Ensure shelves are positioned strategically to highlight or fit within the larger mural without distracting from it.
This integration of artwork with functionality delivers a unique aesthetic appeal while also providing extra storage and display space.
Concealed Cabinet Shelves
Crafting a concealed cabinet shelf can be a clever way to maximize a room’s storage without adding visible clutter. This design involves building a shelf within a standard cabinet to keep items hidden from view.
Here are points to consider:
- Choose the Right Cabinet: Look for a free-standing piece with ample internal space. A second-hand find at a garage sale could be perfect!
- Customize for Purpose: Plan the interior layout based on what you need to store. For books, you’ll need sturdy flat surfaces; for knick-knacks, smaller compartments would work better.
- Use Complementary Materials: Depending on the existing material of the cabinet, wood, metal or acrylic shelves may be chosen. Try to match or complement the finish for a seamless look.
- Precision Installation: Aim for accurate measurements and precise installation to ensure the shelf fits perfectly and operates smoothly.
- Enlist Professional Help: If DIY isn’t your strength, consider hiring a professional carpenter. They can ensure both the aesthetic and functionality of your concealed cabinet shelves are top-notch.
Remember, concealed cabinet shelves can turn any ordinary cabinet into a marvel of organization, keeping your room looking its best.
Suspended Wire Baskets
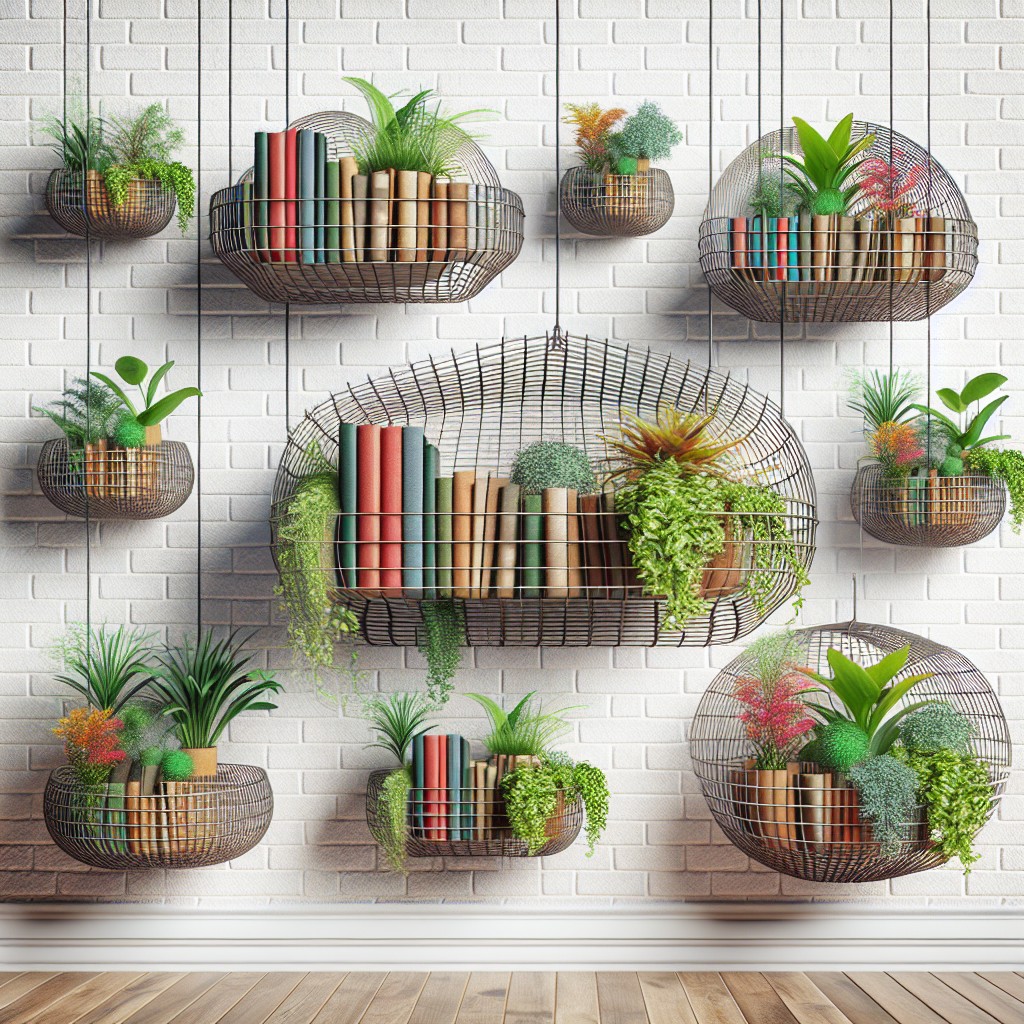
Implementing suspended wire baskets offers a versatile and visually striking option for unique storage solutions. Here are a few points that explain the concept:
- Versatility: With various sizes, shapes, and designs, these baskets can readily adapt to any decor style and storage need.
- Easy Installation: Simply affix a few ceiling hooks and hang your baskets with robust chains or ropes.
- High Functionality: Excellent for holding items that need to be within arm’s reach yet out of the way. Ideal for kitchen utensils, towels, or kids’ toys.
- Space-Saving: Perfect for small spaces, they utilize vertical space, keeping countertops and floors clear.
- Unique Aesthetic: The hanging element introduces an eye-catching, three-dimensional aspect to room design.
Incorporating these baskets can result in a design that blends style with easy accessibility and outstanding organization.
Wall Niches With Hidden Shelves
Incorporating shelves into wall niches plays on the element of surprise while offering functional storage solutions. This technique is especially effective in walls flanking a central feature such as fireplace or bed.
Consider the depth of the shelving to ensure it suits the items you plan to store. For a truly hidden look, paint or wallpaper the shelving interior to match your wall. Add LED lights to highlight the shelves contents once revealed.
Remember, the size and number of shelves you install should correspond with the wall niche’s size and shape. Another trick is to install a hinged or sliding panel on the front of the niche to truly keep the shelving out of sight.
While the idea is to keep shelving covert, an aesthetically pleasing reveal certainly adds a touch of charm and character to any room. Always ensure that the design and decor choices align with the overall style of your home for a beautifully hidden yet functional storage solution.
Wallpapered Floating Shelves
For an aesthetically seamless appearance, consider applying the same decorative wallpaper on the shelf as what’s already on the wall. Not only does this add an extra layer of decor, but it also creates a camouflage effect, giving the illusion that the shelf is merely an extension of the wall.
Remember to choose high-quality, durable wallpaper that can withstand the wear and tear of items being placed and removed. Here are some steps to help you create your wallpapered floating shelves:
- Measure the shelf: Ensure you have accurate measurements for both the wallpaper and the shelf. This includes the top, bottom, and sides.
- Cut Wallpaper: Using your measurements, carefully cut the wallpaper. It’s always better to have a slight excess that can be trimmed after application.
- Apply Adhesive: Apply a thin, even coat of adhesive to the shelf. Make sure it’s spread uniformly to avoid bubbles or creases in the wallpaper.
- Adhere Wallpaper to Shelf: Carefully position the wallpaper on the shelf, ensuring there are no bubbles or wrinkles.
- Trim Excess: Once the adhesive has fully dried, you can use a sharp utility knife to trim away any excess wallpaper for a perfect finish.
Finally, install the floating shelves as per hardware instructions and voila! You now have a seamlessly integrated storage solution that not only saves space but also adds decorative charm.
Shelves Behind Sliding Mirrors
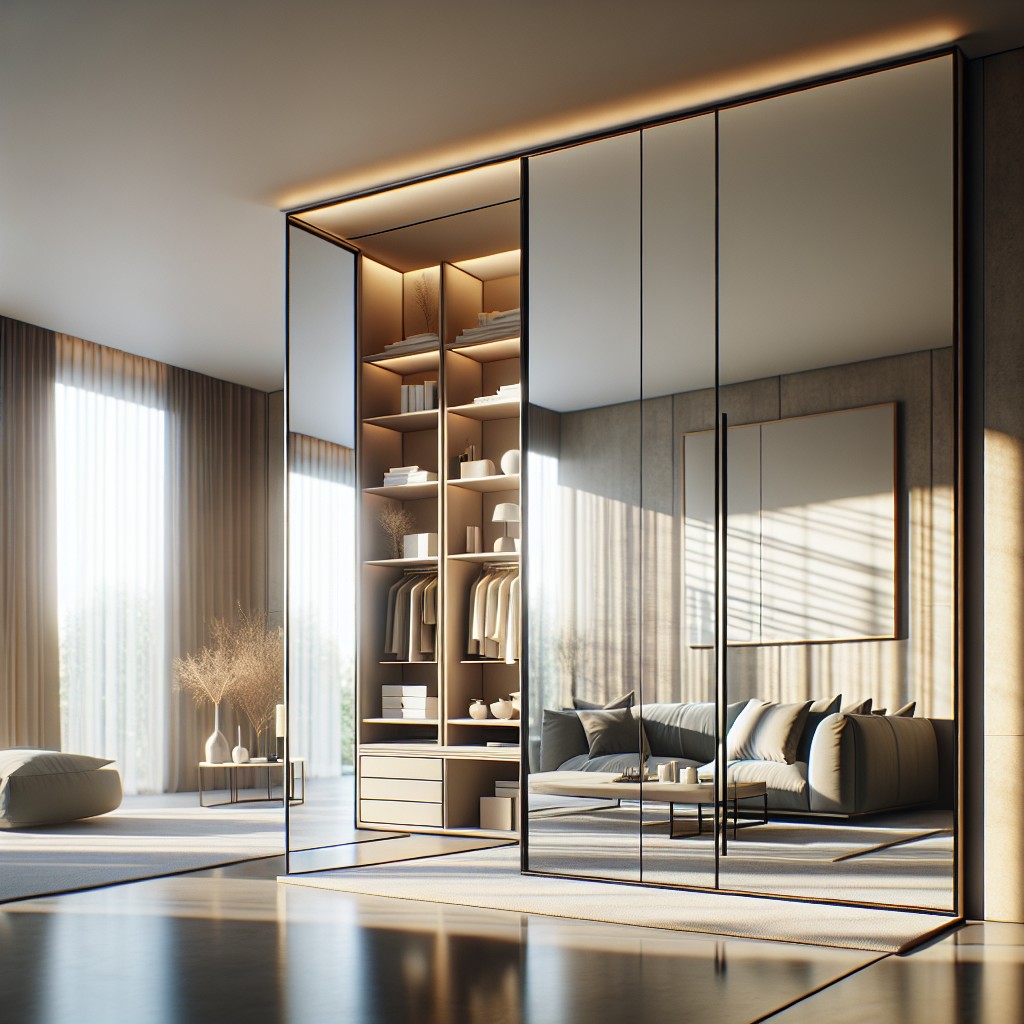
The elaborate aesthetic of a sliding mirror provides a grand opportunity for scenic hidden shelving. Ideal for bathrooms or bedrooms, these shelves can hold all the essentials, from toiletries to accessories, creating a clutter-free, organized space.
Implementing this concept commences by measuring the wall space to determine the size of the mirror and the built-in shelf. Ensure that the mirror slides smoothly and seamlessly to maintain a balance between function and style. Opt for a top hanging system that enables a smooth transition and easy accessibility to the shelves behind.
The materials used for the shelves should be resistant to moisture if you’re installing them in a bathroom. On the other hand, softer, more aesthetic materials like wood or laminated particle board can be used in bedrooms.
Individual compartments inside the shelving unit allow a more organized storage system, and adjustable height offers flexibility in what items can be stored.
Accent and spot lighting in strategic places can also improve visibility and accentuate the contents of the shelves, adding a touch of sophistication to your room. Installation of slow, silent closure systems can prevent any damage caused by abrupt closing of the mirror.
Undeniably, sliding mirror shelves integrate storage and style, providing a solution that is as fashionable as it is practical.
Corner Shelves Behind Screens
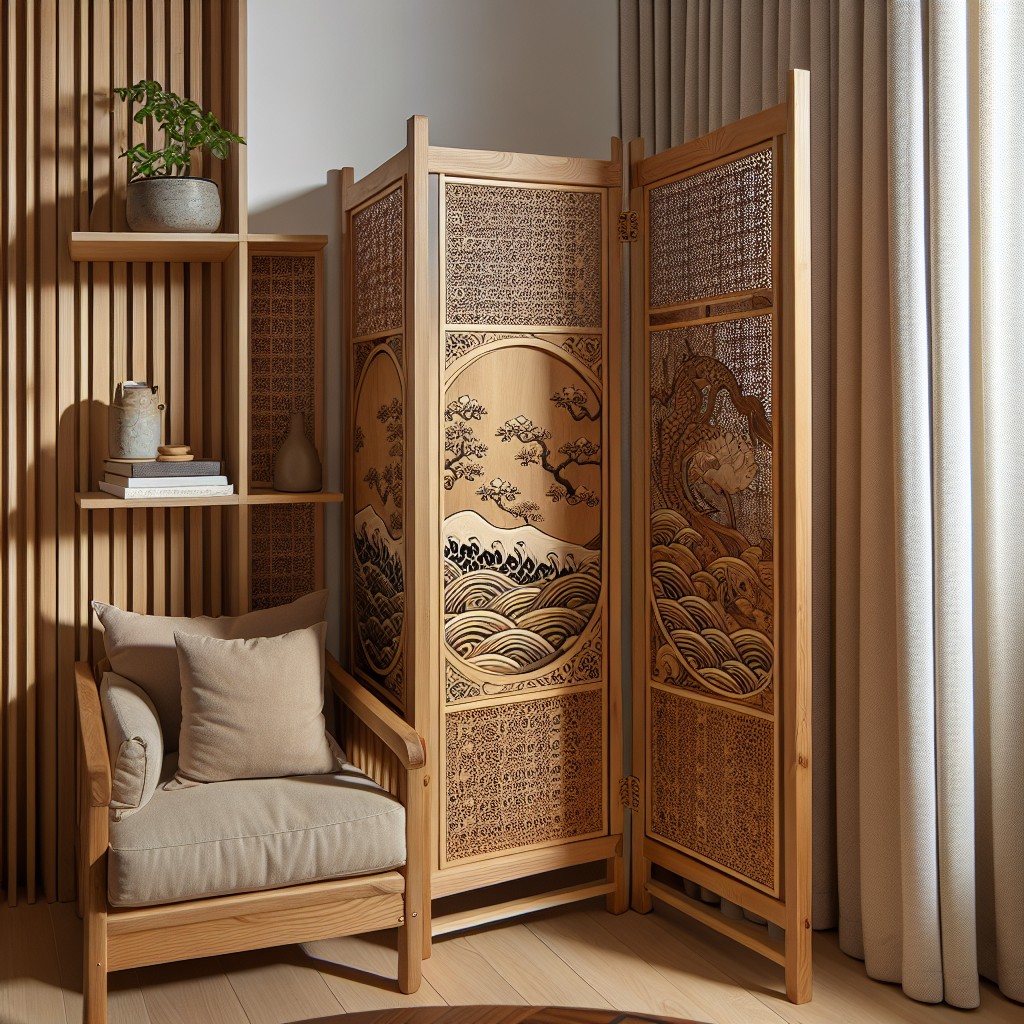
This unique approach optimizes space while subtly hiding storage. Start by choosing a stylish screen that complements your room. It could be contemporary, Asian, or vintage. Measure the width and height of your corner space to determine the size of your shelves.
For the shelves, opt for materials and finishes that blend with your room style. You might select polished wood to match a vintage screen or sleek white for a modern feel. Then, install these shelves in the corner.
After setting up your shelves, position your screen. Ensure it conceals the shelves effectively but also allows easy access. Regularly pace your items small distance apart to avoid clutter. Adjust your screen as needed.
Advantages of this setup include the element of surprise it adds, the practical storage it offers, and the decorative appeal of the screen itself. Furthermore, they are adaptable. You can easily alter the shelves’ contents and how much is on show, giving you freedom in displaying your items. You can also change your screen whenever you want to shake up your room style.
Disguised Shelving Inside Trunks
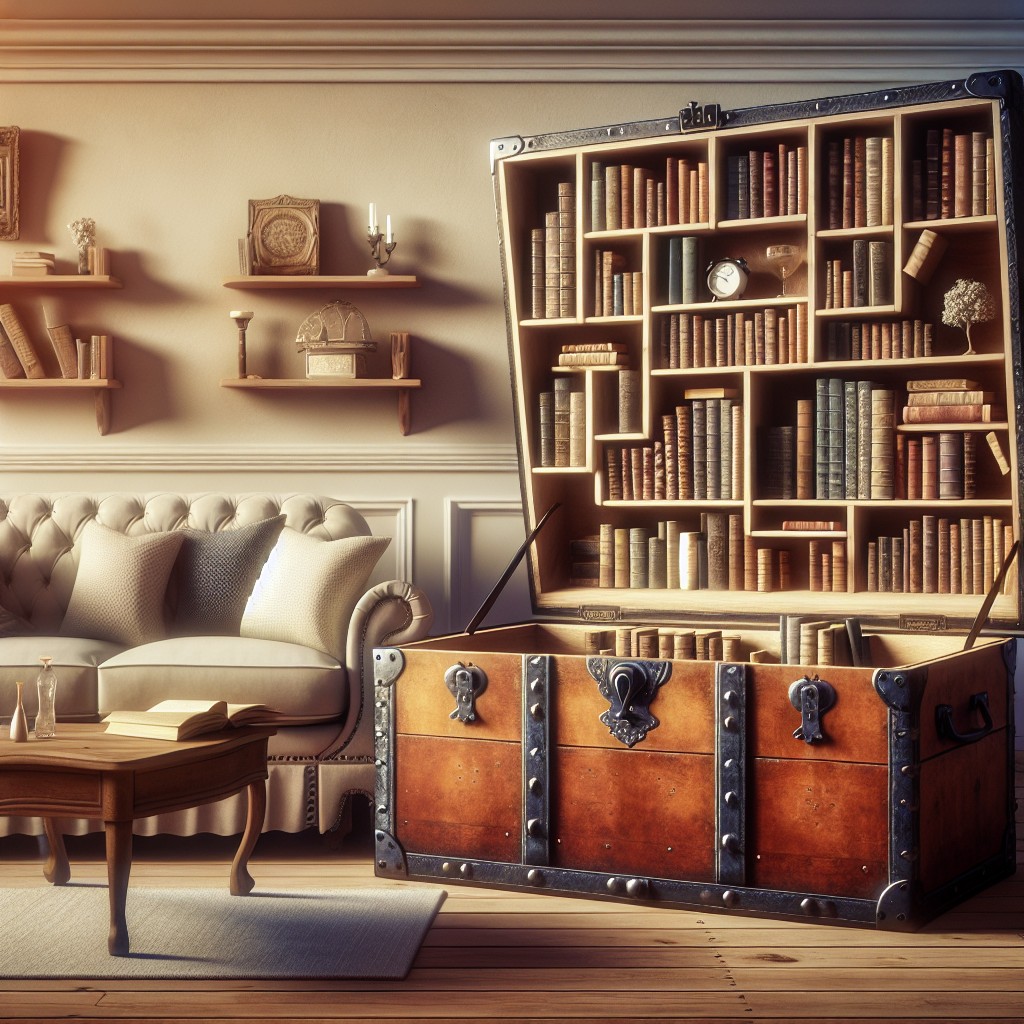
This innovative storage solution meshes seamlessly with a rustic or an antique aesthetic. Picture an old steamer trunk or a vintage wooden chest. Now imagine it with multiple tiers of shelving nestled inside. Here’s how to bring the vision to life:
1. Choose a trunk: The bigger the trunk, the more storage space. Antique shops, thrift stores or online marketplaces could provide you with great options. Pay attention to the quality of the build and the materials used.
2. Design Your Shelves: Depending on the trunk size, plan the number and configuration of shelves. They could be horizontal for books and vases, or vertical for documents and magazines.
3. Get Building: Use thin, sturdy wood like plywood to construct your shelves. Make sure to carefully measure and cut to ensure a snug fit. Or hire a professional carpenter if you’re not comfortable with DIY projects.
4. Paint & Personalize: Match the shelves to the trunk color or go bold with a contrasting hue. Use chalkboard paint on one side for personalized labels, or keep it rustic with a wood finish.
5. Add hardware: Depending on the items you plan to store, you might want to add hooks, rails, or small bins. Don’t forget stylish knobs or handles, if you opt for drawers.
6. Load Up: Start filling your trunk shelves with your items. Remember to balance the weight to prevent tipping.
7. Enjoy: You’ve not only repurposed a beautiful antique but also cleverly added extra storage to your home. Enjoy the fruitful result of your efforts and the ensuing compliments from your guests.
Invisible Book Shelves

With a touch of magical allure, these shelves provide the perfect blend of functionality and aesthetic appeal. They create an illusion of books floating in mid-air, making them a great conversation starter.
The secret behind this creative solution are brackets, specifically crafted to hold, and be concealed inside, hardcover books. For a seamless look, select a book with a cover complementing your room’s decor.
Installation is simple. Attach the brackets to the wall, slide the cover of the hardcover book onto the bracket and secure it. You then pile additional books on top, achieving the desired ‘floating’ effect.
Strategically use them in a minimalistic setup or as surprising design elements in an elaborate style. They aren’t just practical; they’re sure to enhance your decor in an exciting, innovative way.
Shelves Within a Room Divider
Room divider shelves are not only functional but also brilliantly fuse style with utility. Carefully selected dividers serve dual purposes as stylish pieces and essential storage. To maximize the benefit, consider these essential aspects:
1. Materials: Decide whether you want a chic, metallic aluminum divider with glass shelves for a modern aesthetic, or a warm, wooden one for a more rustic feel.
2. Size: The height, width, and depth of the room divider should coordinate with your space. It should boost your décor without hampering mobility.
3. Storage Needs: If your primary aim is to stash away a lot of items, choose a room divider with multiple shelves. Some even come with hidden drawers and compartments.
4. Position: Place the divider strategically so it works as a décor piece, a shelf, and does not hinder the flow of light and air.
5. Balance: Don’t overstuff the shelves. Maintain a reasonable balance between displaying items and providing open space to avoid a cluttered look.
Shelf Hidden Behind Clock Mechanism

Implementing this clever storage solution can truly impart a timeless charm to your space. A large, ornamental clock can serve as an unsuspected cover for hidden shelves. The trick here is to pick a clock with a thick frame for ample storage space.
To achieve this, take a round plywood board and install your shelves on it. Do ensure the shelves are slightly narrower than the clock to keep them hidden when the clock is in place. Use brackets for additional support if necessary.
Next, attach hinges to the plywood and the wall. The clock sits right on top of the plywood, securely connected but easily movable. This setup allows the clock to swing open like a door, revealing your secret shelves. It works best in living rooms or libraries, offering a visually appealing and functional storage solution, while keeping the room clutter-free.
To make the most of it, you can store lightweight items like books, small planters, or decorative pieces. Avoid overloading to ensure the clock mechanism remains functional and the door swings without a hitch. Of course, always think safety first, secure your items adequately. Loose items can fall causing injuries or damages. Another critical element is the clock itself. Opt for a sturdy, beautiful timepiece to add to the appeal and durability of this covert shelf.
Shelves Built Into Staircase
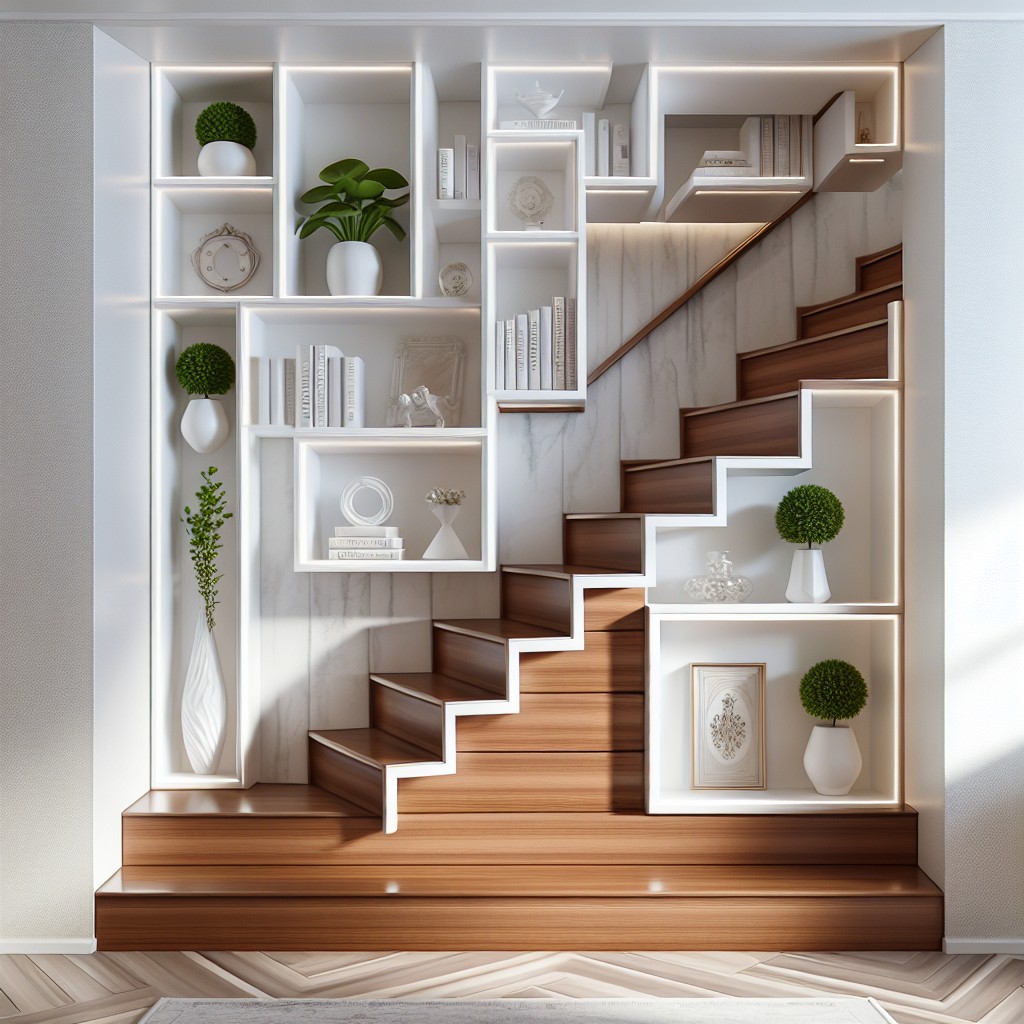
Taking advantage of the often unused space under the staircase, you can create an innovative and stylish storage solution. This practical idea can be adapted to fit any staircase design, whether it is straight, curved, or spiral.
Begin by assessing the space beneath the stairs. Measure each step’s depth and width to ensure the shelves fit seamlessly and provide maximum storage space.
Next, determine what type of items you intend to store on these shelves to design appropriately sized spaces. Some might prefer larger shelves for items like shoes or books while others might need smaller compartments for curios and artifacts.
Remember, the staircase shelves do not need to be uniform. Varying the sizes can add visual appeal and improve functionality.
Finally, consider the finish and style of these built-in shelves. They should complement the overall interior design of your home. You could stick to natural wood for a rustic feel or opt for a polished finish for a modern look.
Experimentation is key for this creative shelving idea. Whether you’re a fan of minimalism or enjoy the charm of eclectic design, there’s room to add personal touches while offering impactful storage and style.
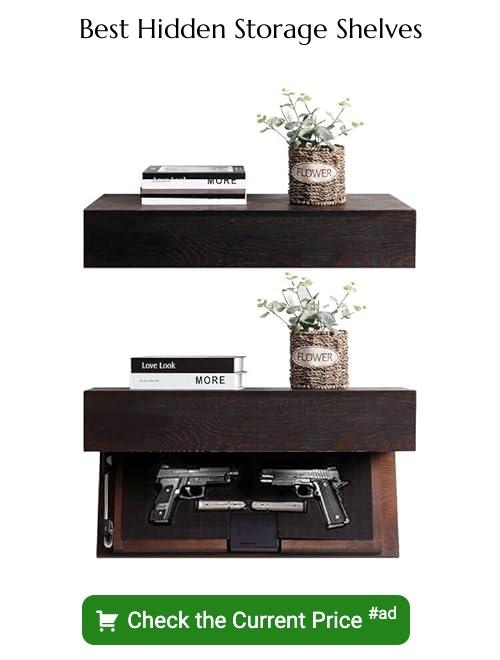
DIY Hinge Shelf

When crafting a DIY hinge shelf, consider these simple steps:
- Choose an appropriate location: spaces above couches, beds or desks often work well.
- Gather the necessary tools: hinges, screws, a drill, a level, a stud finder and your selected shelf.
- Use the stud finder to locate wall studs to ensure the shelf has adequate support.
- After marking the wall accordingly, attach the hinge to both the wall and the shelf.
- It’s crucial to check the level to ensure the shelf is straight.
- Once you’re done, you can start using your new, cleverly hidden shelf!
Remember, this option is not only space-saving, but also offers an unexpected yet practical decorative element.
Mirror Shelf
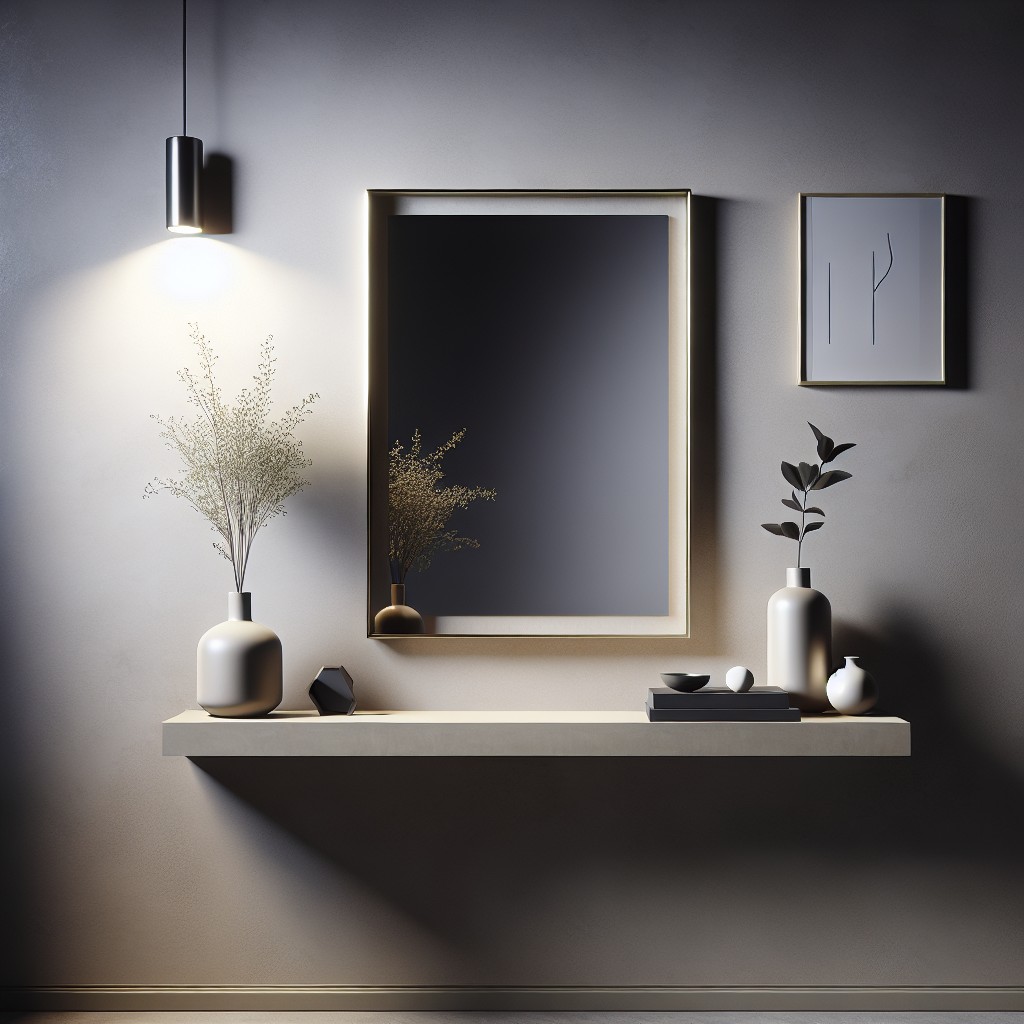
Utilizing a mirror as both a decorative piece and a covert shelf can incredibly save space, particularly in smaller homes or apartments. This savvy solution combines functionality with a minimalist design for an elegant effect.
1. Placement: Position the mirror above a vanity or a console table in your bedroom, bathroom, or entryway. The reflective surface will not only make your room look bigger but also conveniently tuck away your essentials.
2. Design Selection: Choose a large mirror with a substantial frame to allow space for your shelf. Ornate or simplistic, the design depends on your overall room decor.
3. Installation: Affix a slimline shelf to the base of the mirror, ensuring it is securely fitted. It should blend seamlessly with the mirror frame for the best covert effect.
4. Use: Store lightweight items like perfumes, watches or decorative objects. Remember not to overload it to maintain a clean, uncluttered look.
Incorporating a mirror shelf is an ingenious way to add covert storage space to any room, enhancing utility without compromising on aesthetics.
Convertible Coffee Table With Concealed Shelves
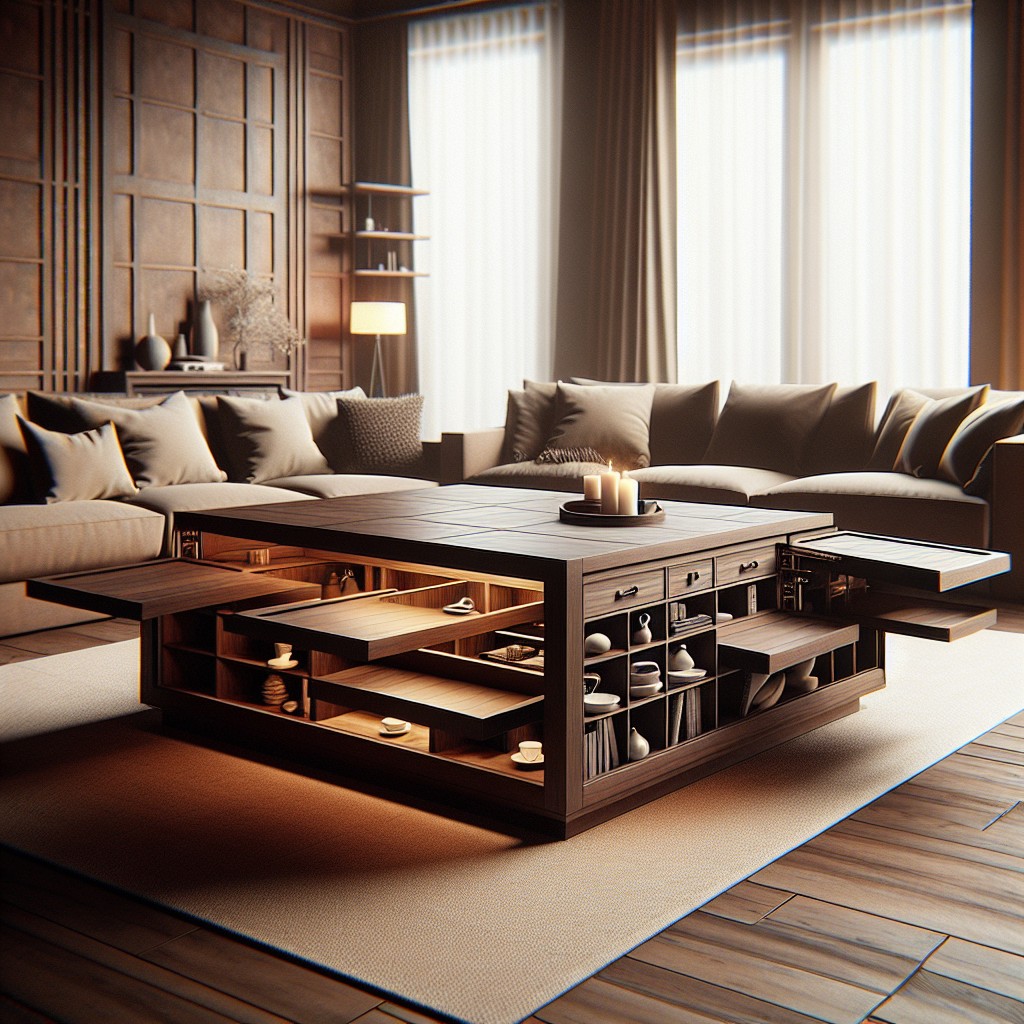
This innovative shelving idea appeals to those living in small spaces, where every square inch matters. A convertible coffee table not only serves as a centerpiece for your living area, but also performs double duty by offering hidden storage.
These multifunctional pieces are designed to fit into your living room decor seamlessly while keeping your belongings organized. From magazines and remote controls to board games and coasters, think of the possibilities!
While shopping for this type of furniture, look for a design that complements the rest of your decor. Consider the materials and the finishing, but don’t forget about the practical aspect: hinges need to be sturdy and movement smooth for easy operation.
If you’re feeling crafty, there are several DIY projects available online. With just a little woodworking knowledge and a free weekend, you can custom build one to suit your specific needs and aesthetic.
Remember, personalization is key. Be creative and don’t be afraid to add your touch to this concealed shelving idea. And the best part? Your guests will be none the wiser about the wealth of storage hiding in plain sight.
Secret Shelves Behind Bed Headboard
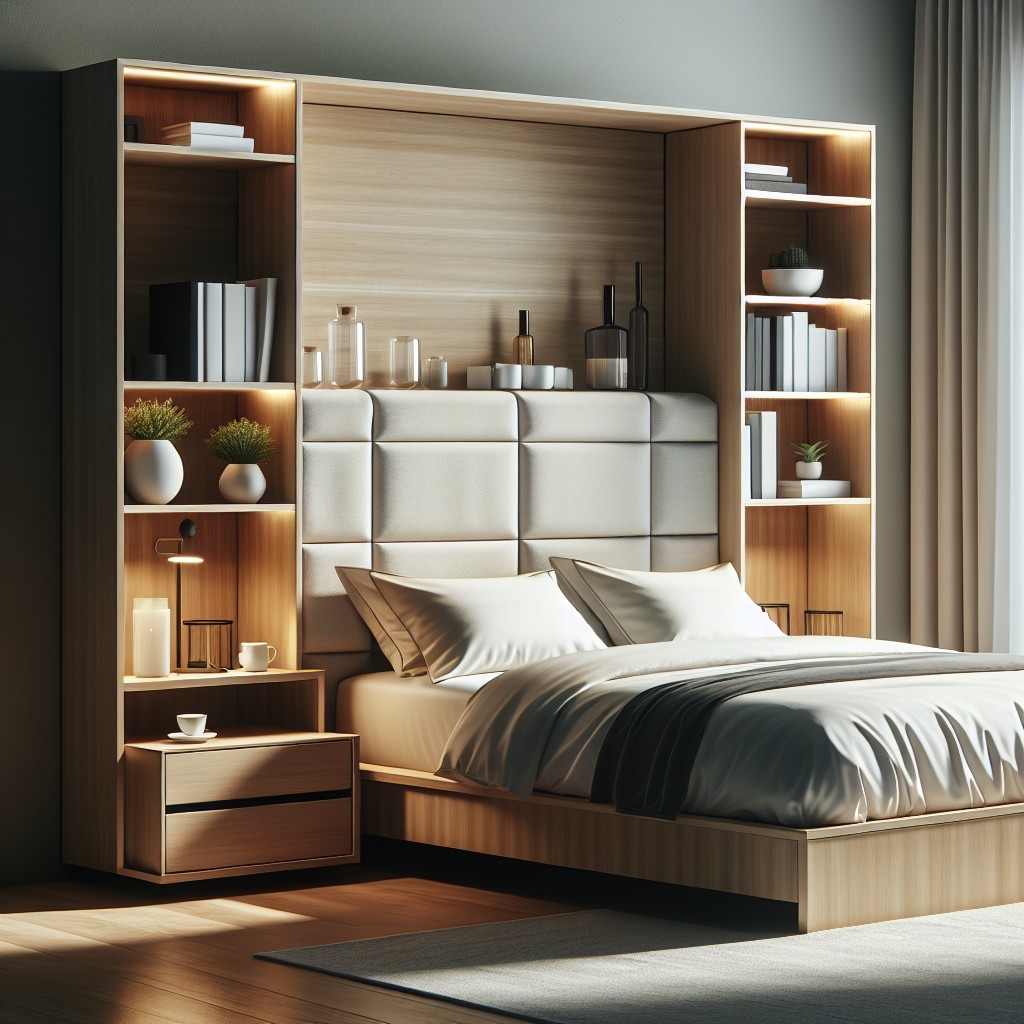
Adding unexpected storage, these secret compartments seamlessly blend into the design. They can be customized to fit books, reading lights, gadgets, or personal belongings, offering quick access without cluttering up the bedroom.
Here are some noteworthy considerations:
- Design Choices: Opt for a flip-up or slide-out design, depending on your preference. Ensure it complements the existing decor of your room and meets your storage needs.
- Material: Choose durable material that can stand up to daily use. Consider wood or high-grade MDF for an elegant and sturdy finish.
- Size: Measure the dimensions of your headboard carefully before any constructions begin. This ensures the built-in shelves remain discreet and symmetrical.
- Safety: Aim for smooth-edged designs to avoid any possible injuries, especially in a bedroom environment.
Remember, less is more when it comes to hidden shelves. The idea is to keep it sleek and minimalist while maximizing space!
Window Sills Turned Into Shelves

Initiating the transformation of window sills into shelves is an excellent way to maximize space. It not only gives a chic touch to the decor but also provides a perfect nook for plants, books, or decorative objects.
Let’s break it down into simple steps.
First, carefully assess the width and depth of the sill. This will determine how much weight it can bear and what items it can accommodate. An idea might be choosing small indoor plants or light accent pieces if the sill is narrow.
It’s important to treat or paint the wooden sill to protect it from moisture, especially if you plan to place plants. There are many sealants available in the market that can provide protection without compromising the aesthetic.
When arranging items on the sill-shelf, consider the visual balance. Pair tall items with shorter ones, or group small items together for a scenery effect. Playing with color schemes can also boost the overall appeal.
Lastly, make sure to maintain the sill-shelf. Regular dusting and cleaning ensure longevity and preserve the charm of the display. Always remove items before cleaning to avoid accidental falls.
Remember, the goal of this shelving idea is not just to provide additional storage, but also to enhance the overall decor aesthetic. Your window sill shelves can be as versatile and creative as you want them to be!
Retractable Shelves in Kitchen Cabinets
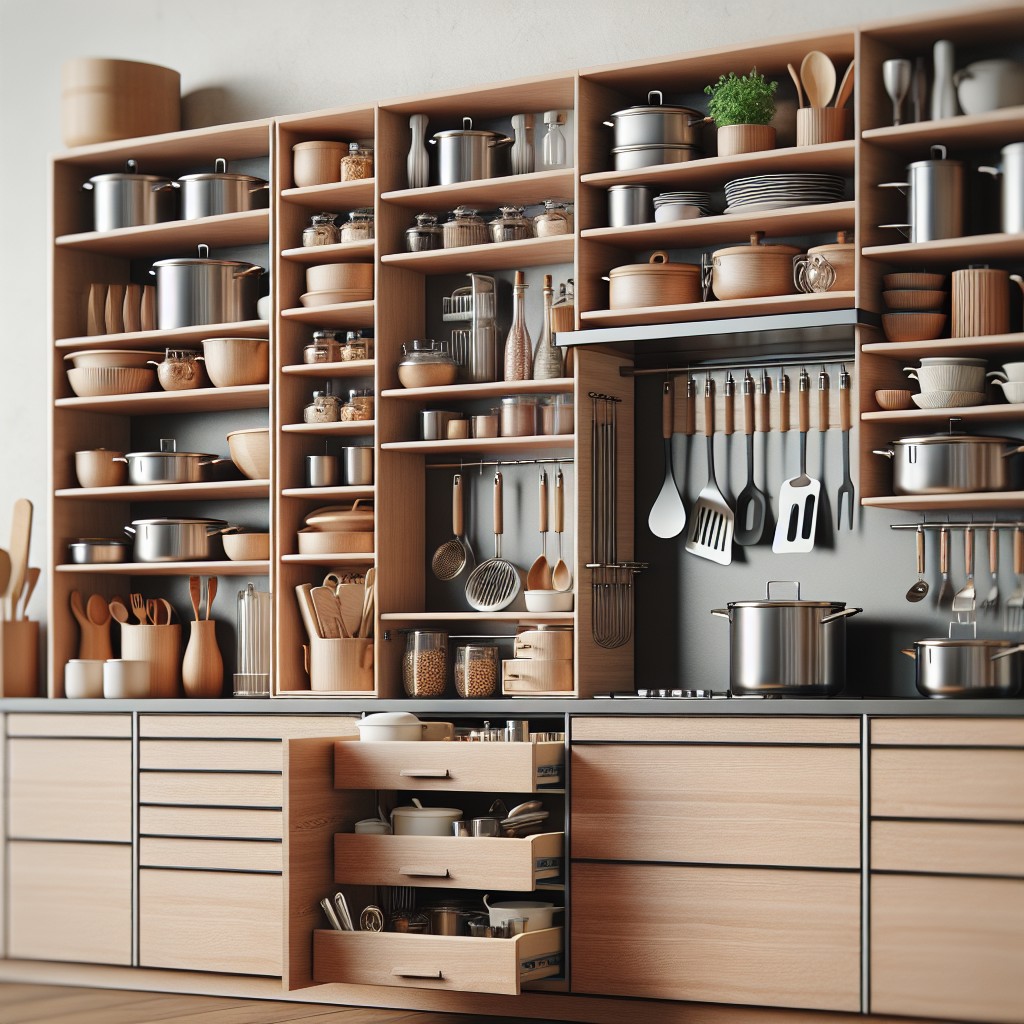
Undoubtedly a game-changer in kitchen organization, retractable shelves offer easy access to your cooking essentials. While implementing this idea, consider the following tips:
1. Installation Spot: Plan to locate them in lower cabinets. It saves you from stooping or bending over to reach the back of the cabinet.
2. Material Choice: Use sturdy materials due to the wear-and-tear they endure. Consider stainless steel or heavy-duty plastic for durability.
3. Categorized Storage: To make the most of it, dedicate each shelf to a specific type of utensil or food ingredient. It will make your cooking process efficient.
4. Safety Mechanisms: Opt for slow-closing mechanisms to avoid the loud bang and reduce the risk of damaging fragile items stored in these shelves.
5. Adjustable Levels: With adjustable levels, you can customize the shelf height according to the items stored. It also makes cleaning easier.
Once installed, these neatly tucked away shelves not only minimize kitchen clutter but also make cooking pleasing.
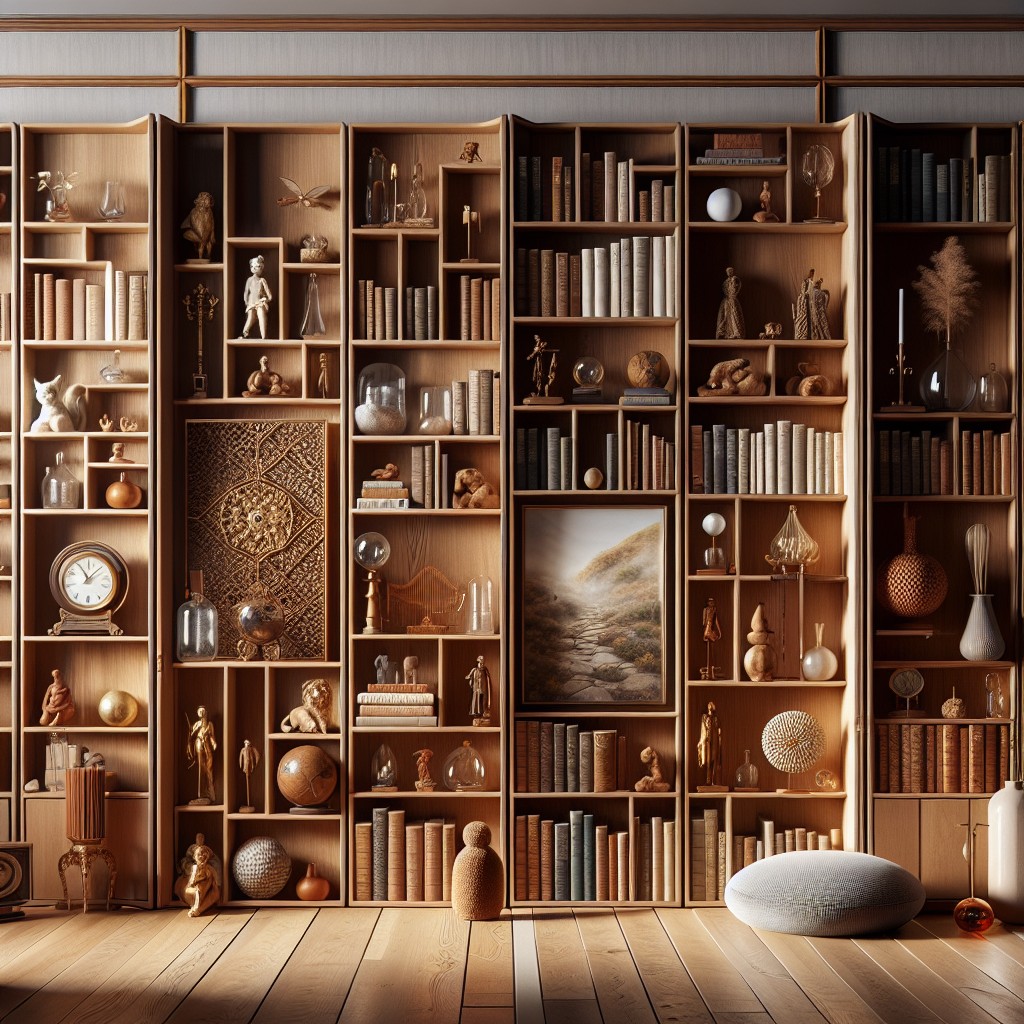
Floating Wooden Block Shelves
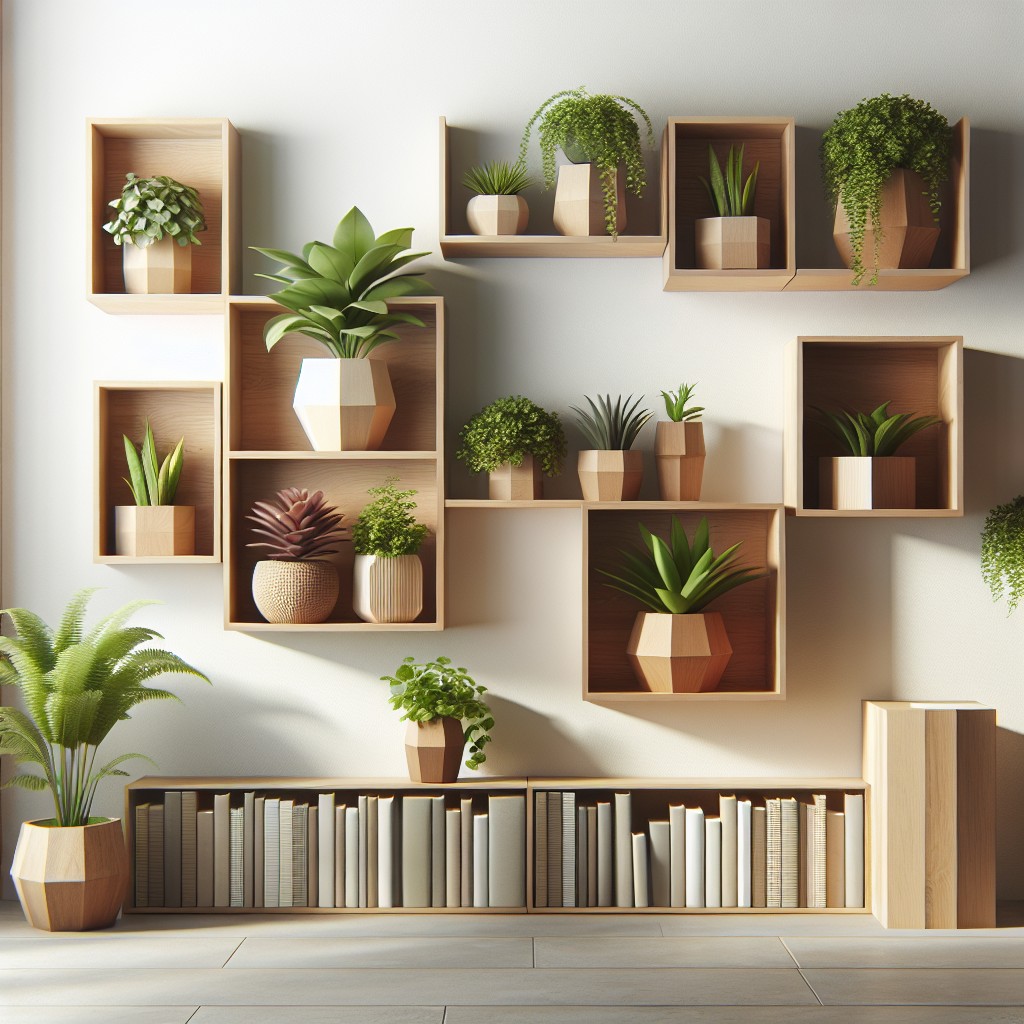
One interesting way to implement invisible shelves while adding a touch of craftsmanship is to use floating wooden block shelves. These shelves are excellent for minimalist interiors, providing both functionality and unique aesthetics.
Firstly, the blocks are made of high-quality wood, cut neatly and finished expertly to ensure a smooth and appealing texture.
Secondly, they’re attached to the wall using concealed bracket systems which adds to the ‘floating’ effect. These brackets screws into the wood block and the wall, providing a sturdy framework that can support a fair amount of weight.
Notably, they can serve as a decorative centerpiece or as a useful storage for books, photo frames, art pieces, or small indoor plants.
Lastly, floating wooden block shelves come in various sizes and can be arranged in a multitude of patterns, offering endless room for creativity. They can be employed across all rooms – from the living room to the kitchen, bedroom or even bathroom.
Remember to consider the wall’s color scheme and the decor of the room, and choose the shade of the wood block accordingly. To maintain the shelves, dust regularly and use a proper wood cleaner to keep them looking their best.
Ideas Elsewhere
- https://www.hgtv.com/design/make-and-celebrate/handmade/how-to-make-wood-wire-shelf-covers
- https://www.fromhousetohome.com/hide-clutter-on-shelves/
- https://myhomeandtravels.com/covering-up-those-ugly-wire-shelves/
- https://www.lemonslavenderandlaundry.com/foam-board-shelves/
- https://homelyville.com/covering-shelves-without-doors/
Read More
 How to Clean Wood Table: Step-by-Step Care Guide
 Table Height Standard: Understanding the Ideal Measurements for Your Space
 Where to Donate Furniture: Your Local Donation Guide
 Dining Table Height: Find the Ideal Measurements for Your Space
 40 Inches Size Guide: Understanding and Converting Measurements