Last updated on
Unearth the luxurious potential of your living space because Design Master’s 24k Gold Spray Paint goes beyond just sparkling finishing touches, doubling as a thrifty yet opulent solution to revamps and overhauls.
These are my unique design concepts made using design tools. I hope you find them inspiring!
Dive into the sparkling world of design with the 24k gold spray paint – a luxury transformation at your fingertips! This article uncovers fresh, unique ways to implement this stylish detail into your design projects.
From subtle accents to bold statements, discover ideas that push traditional boundaries. Of course, the internet is brimming with established concepts. To honor these, a valuable list of resources summarizing them will conclude the piece, ensuring you’re equipped with a comprehensive gold spray paint arsenal.
But the main ambition here is novelty. So buckle up, as you’re about to encounter gold spray paint ideas from surprising angles, guaranteed to inspire and provide you with fresh perspective.
Let’s strike gold together in the wonderous realm of home design!
What's Inside
Using 24k Gold Spray Paint for Photo Frame Makeovers
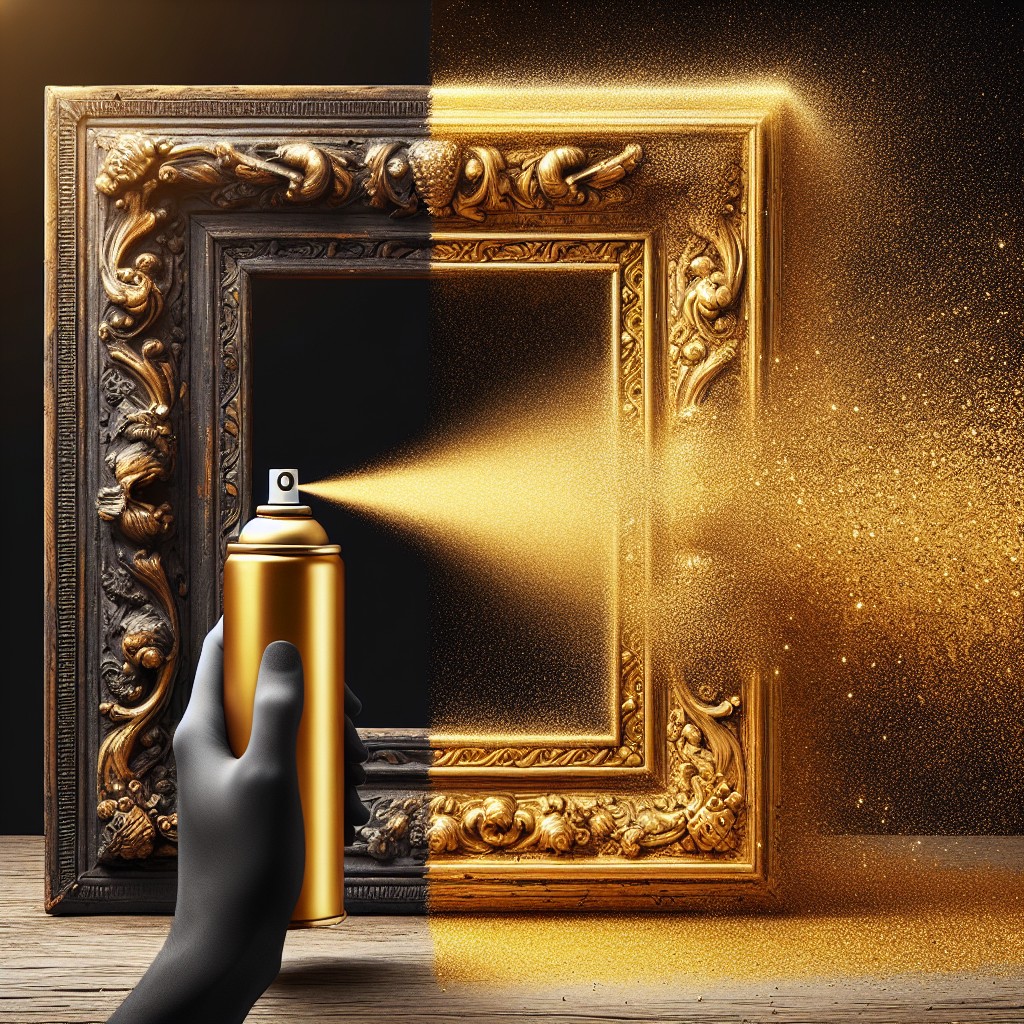
Picture frames come alive with a hint of 24k gold spray paint. Here are some quick steps to make the transformation.
Begin with removing any glass or backing from the frame. Gently sand the frame’s surface to ensure the paint adheres properly.
Next, apply a primer. This gives your paint a smooth and even surface to stick to. Once your primer is dry, it’s time for the fun part – the gold spray! Remember, always follow the manufacturer’s instructions for optimum results.
Apply thin, even coats and let them dry fully between applications. This prevents drips and keeps the final look refined. During this process, the frame should be placed on a protected surface or in an area where overspray won’t cause problems.
Whether it’s highlighting family photos or pieces of art, these gold-enhanced frames will add a subtle touch of luxury and warmth to any room. Patience is key here; take your time, and you’ll achieve a professional finish. With a can of 24k gold spray paint, you’re not just redoing a frame; you’re creating a conversation piece.
Enhancing Jewelry Designs With Gold Paint
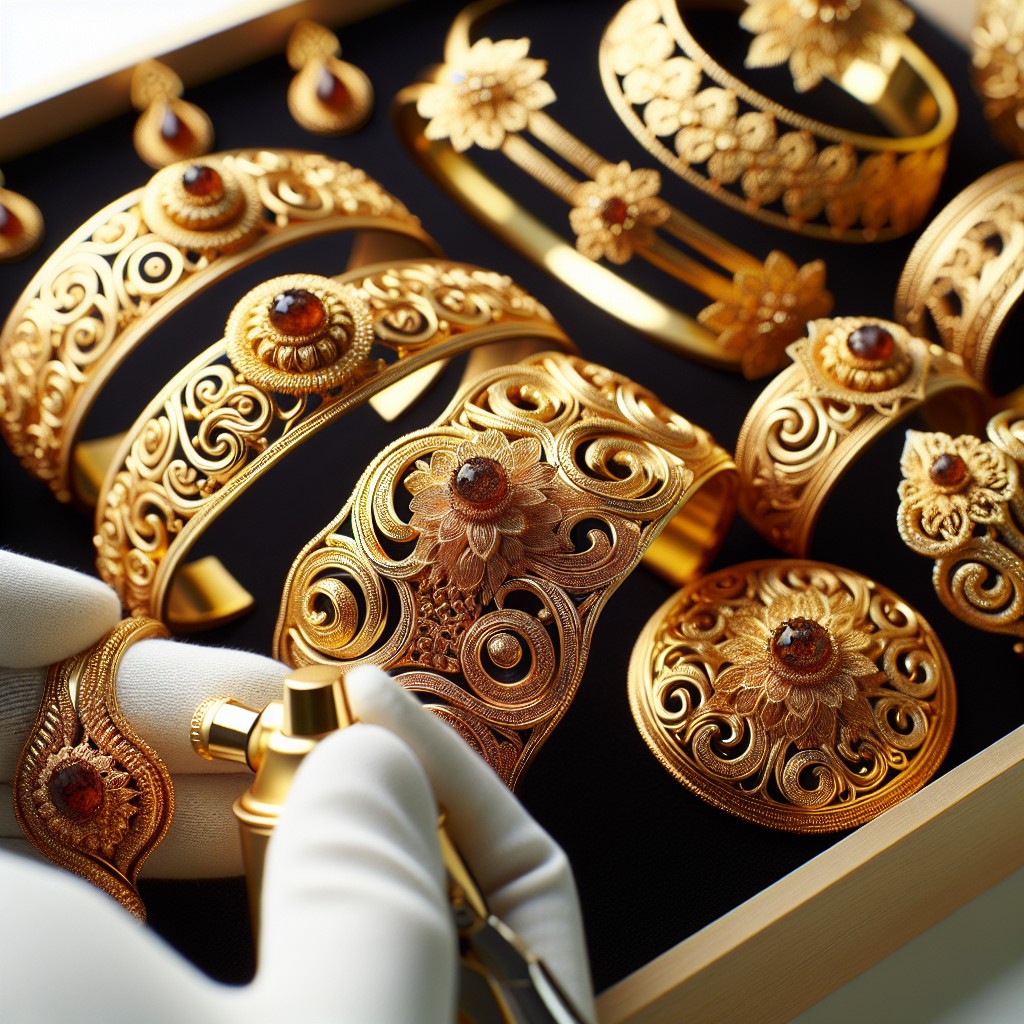
To transform ordinary jewelry pieces into exquisite accessories, 24k gold spray paint serves as an ideal tool. Smoothly apply a thin coat of the paint to pieces such as bead necklaces, old hoop earrings, or even bangles for a fresh, contemporary look. Remember to properly secure pieces before spraying for an even coat, and place them on clean surfaces for drying.
For those bored of traditional silver metal, gold adds a rich and royal touch. Moreover, gold painted jewelry suits all skin tones, making it perfect for personal use or gifting. The secret to a professional finish is multiple thin layers rather than one thick one. Ensure to dry each layer properly before adding the next one. Always use a sealing coat to protect the paint, giving it a long-lasting and durable finish.
Revamping Old Furniture With a Golden Touch
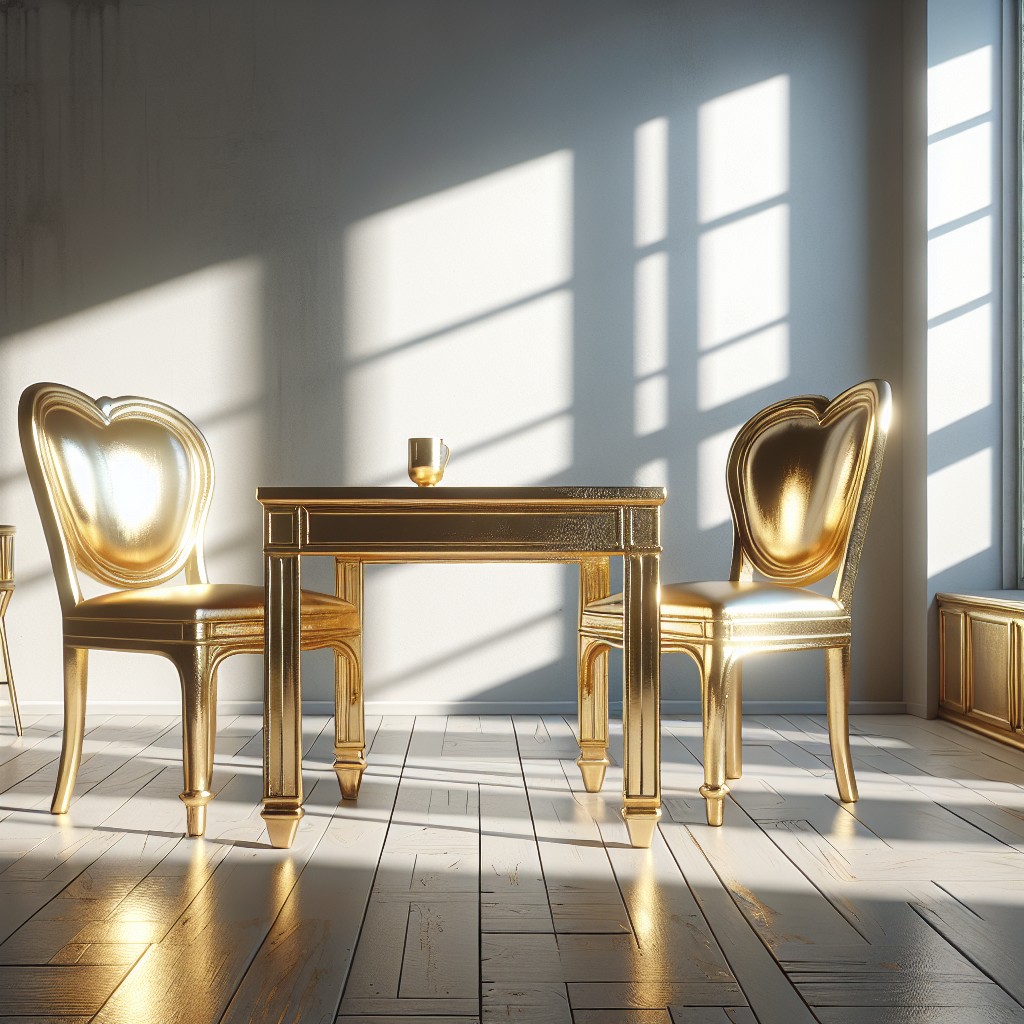
Casting a golden touch on timeworn furniture breathes new life into them. It’s an easy yet luxurious makeover. Think of your old coffee table, your antique mirror frame or that worn-out dresser crying for an upgrade. They could all benefit from a dash of 24k glamour.
First, you need to prepare the furniture. Remove any flaky paint, sand it down and clean it with a damp cloth. Then, apply a primer. This step is crucial, as the primer prevents the gold spray paint from soaking into the furniture, which could result in an uneven finish.
Once primed, the stage is set for the gold spray paint. Spray evenly, from about a foot away to avoid drips. Let each coat dry before applying another one to achieve a rich, gilded effect.
Safety is key during this process. So, always operate in a well-ventilated space, and use protective gloves and eyewear.
By following these simple steps, you can transform your old furniture into a dazzling statement piece with a 24k gold finish.
DIY Gold Spray Painted Wine Bottles

To ensure an immaculate finish, dust off your bottles thoroughly and apply a primer if needed. This process is important when working with slick surfaces like glass, providing the gold paint a solid surface to adhere to.
Follow up with a light coat of 24k Gold Spray Paint, always remember: several thin layers yield a far superior finish to a single thick one. Allow it to dry and repeat this step a couple of times – patience is key for a project like this.
Don’t fret over imperfect coats, flaunt the texture. Many decorators see beauty in imperfections, as they provide a unique, personalised charm to these gold-painted gems.
Now, the opportunities for creative detailing are boundless and very much encouraged. Think about adding additional hand-painted designs, using stencils or maybe stickers and washi tape, depending on your decor aesthetic.
You’ve essentially transformed an ordinary glass bottle into a shiny decorative piece that can be used as a vase, candle holder, or standalone tabletop decor. Unleash your creativity and flaunt your new golden do-it-yourself prowess.
Artistically Infuse Gold Paint On Canvas
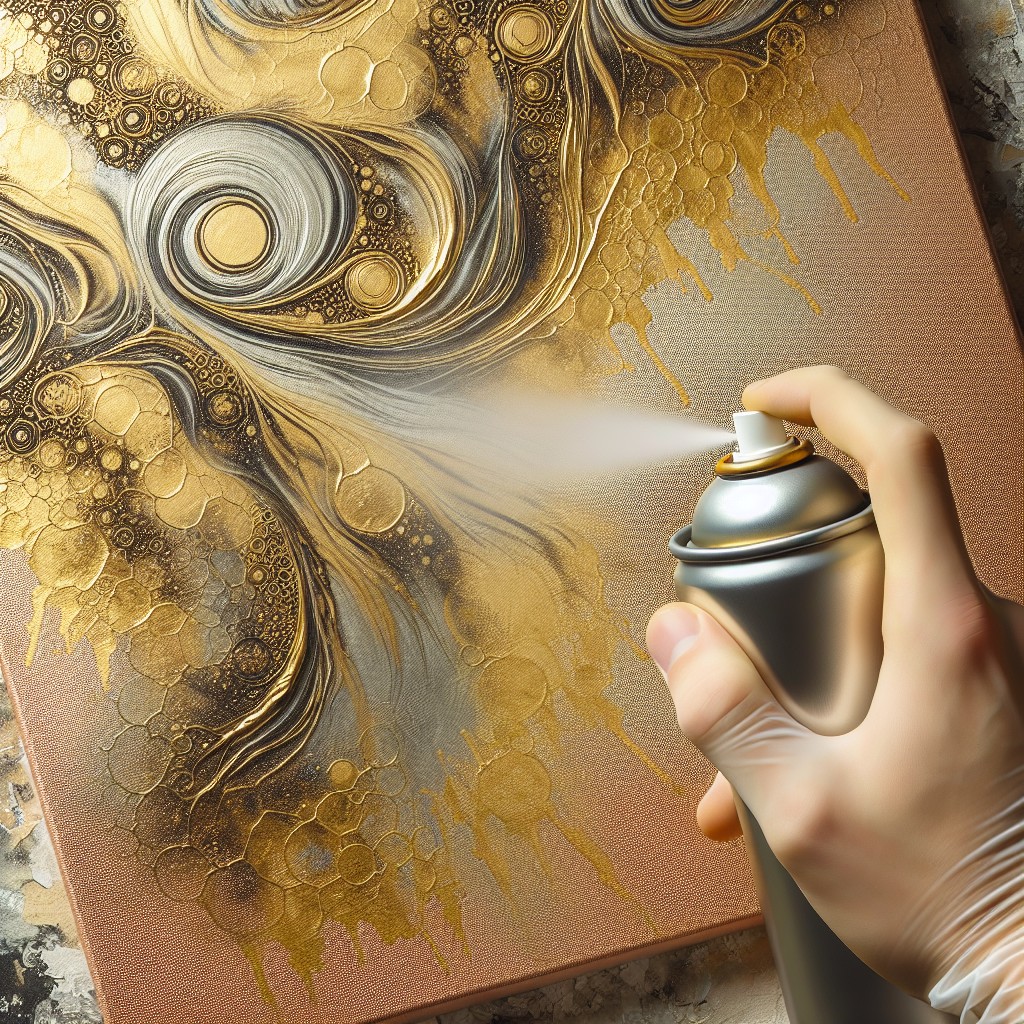
Starting with a blank canvas and 24k gold spray paint can lead to endless design possibilities. Here are some tips to truly embrace the artistic potential of this medium:
1. Abstract Art: Spray patches of gold randomly or around the borders. Allow it to dry and then overlay with acrylic or oil paint.
2. Glittering Stencils: Use stencils to create outlines and fill them in with the gold spray paint for a stunning effect.
3. Negative Space: Spray the entire canvas gold, then add other colors. The gold will peek through to create a shimmering negative space effect.
4. Nature Prints: Place leaves, branches, or flowers down, then spray. The plants will leave beautiful, organic impressions.
5. Gradient Effect: Begin with a heavy application at one end of the canvas and gradually decrease as you reach the other end, ideal for creating sunsets or ombre effects.
Remember, a masterpiece is born of courage to experiment. So, don’t hold back, let your imagination take the lead!
Garden Decor Upgrades Using Gold Spray Paint
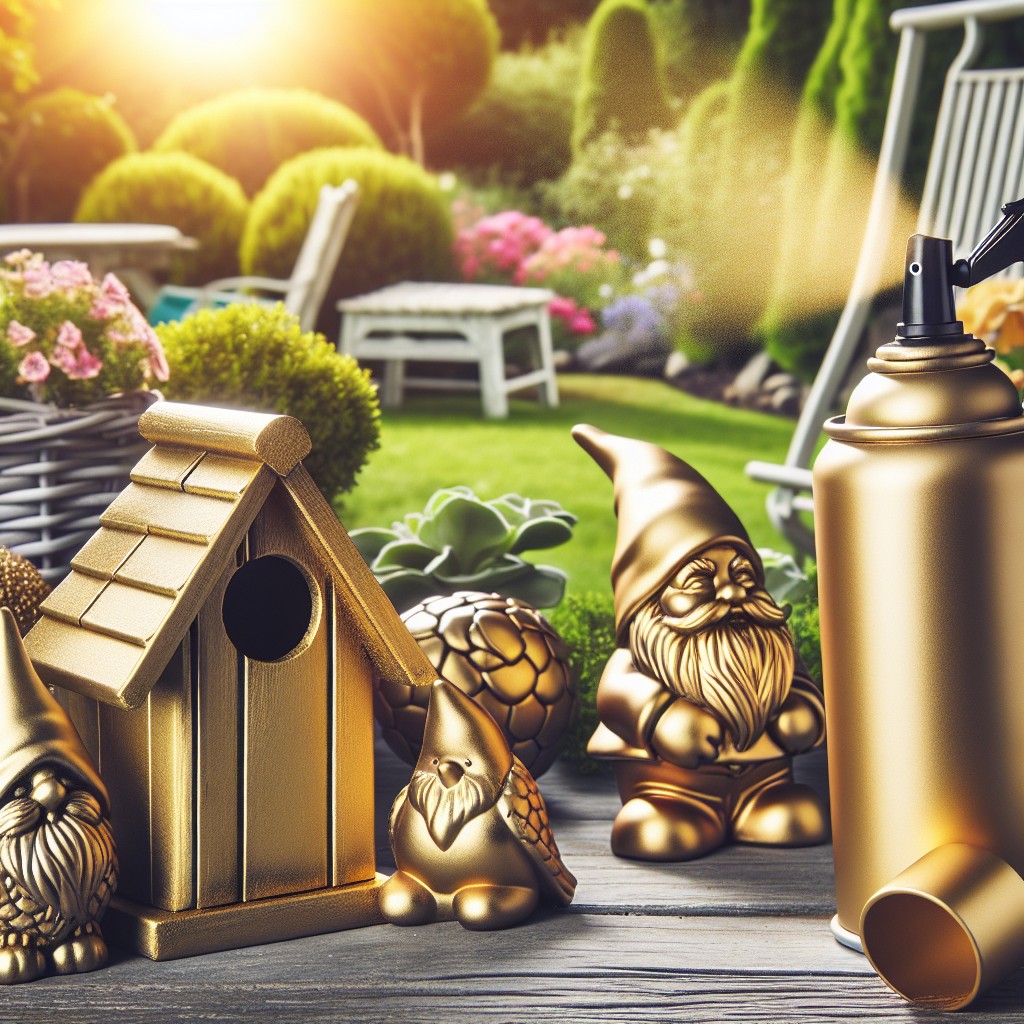
Take your garden from ordinary to radiant with the magic of 24k gold spray paint. Add or enhance focal points with golden accents that effortlessly catch the eye and increase the overall aesthetic value of your outdoor space.
1. Birdhouses: A gold-painted birdhouse can become a stunning centerpiece, providing a contrasting, bright color that makes it an immediate focal point.
2. Gilded Statues: Spraying small garden figurines or statues brings them to life, serving as a luxurious and captivating detail in your garden.
3. Plant Pots: Transform clay or plastic pots into golden masterpieces, creating a more upmarket, attractive home for your plants.
4. Garden Tools: Breathe life into old or rusty garden tools such as watering cans or trowels by giving them a gold makeover, turning them into decorative pieces.
5. Garden Furniture: A golden touch to a single chair or table can provide an eye-catching contrast in your green landscape.
Remember, when dealing with spray paint, always ensure to work in a well-ventilated area and protect nearby items from spray residue. Incorporating these ideas will help elevate your garden’s appeal with an elegant touch of gold.
Transforming Average Pumpkins to Gilt Decor
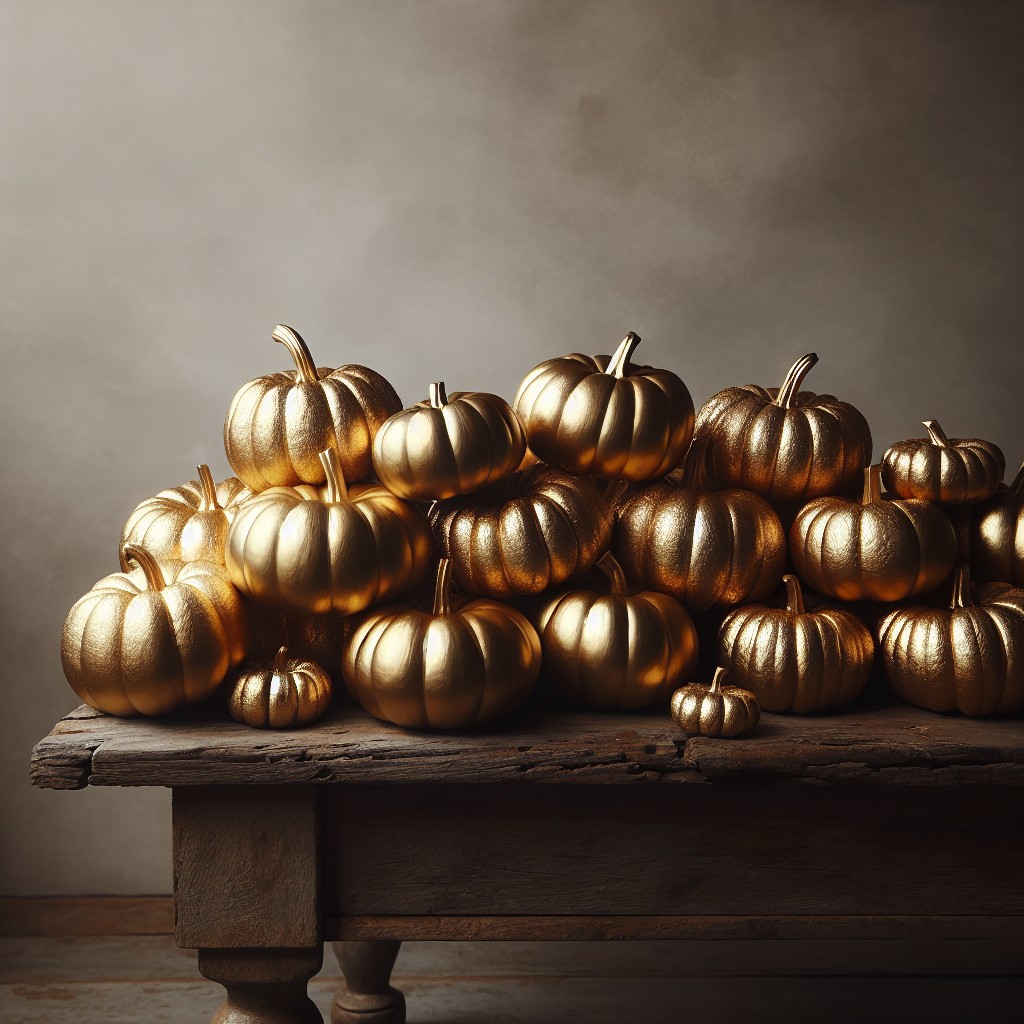
An unexpected yet delightful expression of luxury, this golden pumpkin crafting idea can be a statement piece for fall or Halloween decorations.
1. Choose pumpkins that match the desired size and shape. Tailor your selection to complement the area where they will be displayed.
2. Clean the pumpkins, wiping off any dirt or dust. This ensures the paint adheres smoothly.
3. Protect your workspace with a large cloth or newspapers. This prevents accidental specks of gold on surfaces not intended to be painted.
4. Vigorously shake the 24k gold spray paint can before starting the application process. This mixes the paint inside and gives an even distribution of pigments.
5. Hold the can about 12 inches from the pumpkin, and evenly coat the pumpkin’s surface. Use a steady back-and-forth motion for optimal application.
6. Allow the first coat to dry completely before applying a second layer. This process may take a couple of hours based on the environmental conditions.
Remember, safety first. Wear comfortable clothes, gloves, and a mask during the process. Always spray paint outdoors where there’s adequate ventilation. These golden pumpkins, brimming with the richness of 24k gold, are sure to elevate any space with an upscale grandeur.
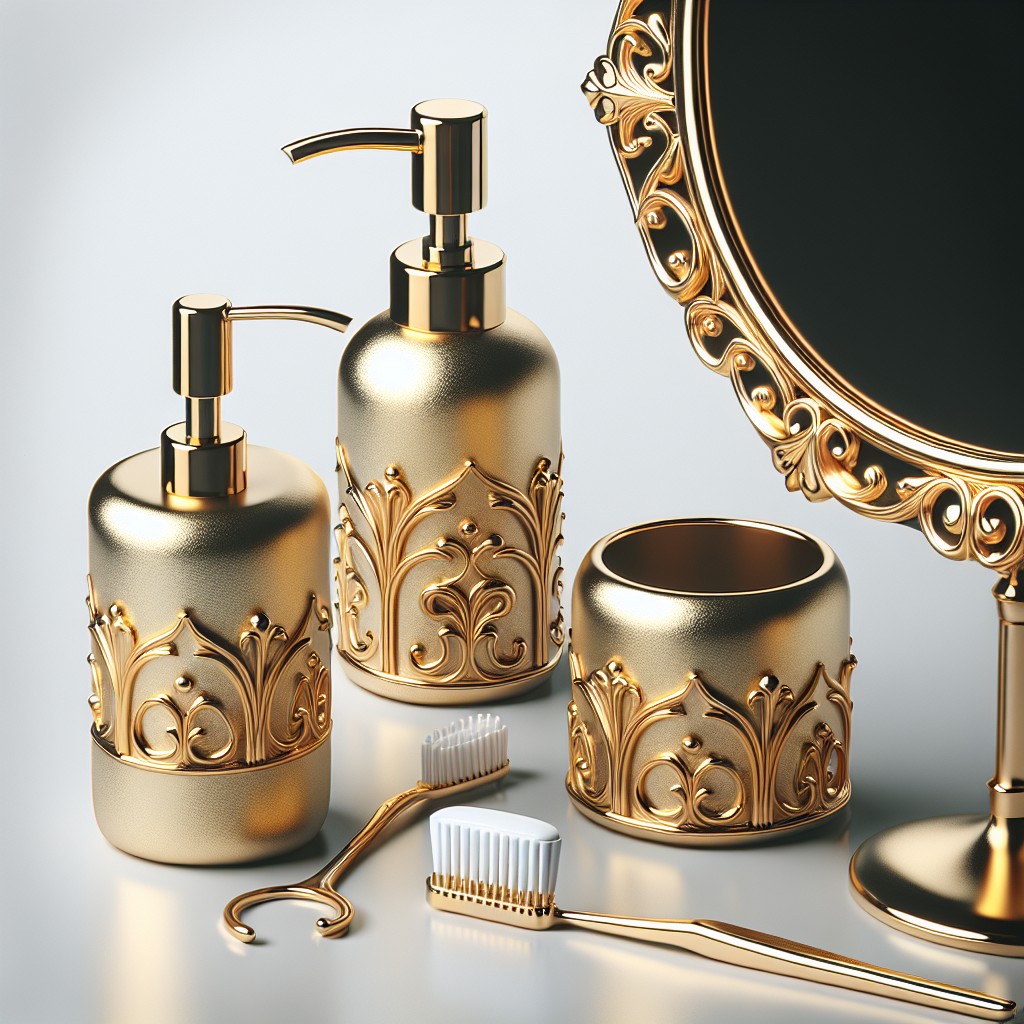
Use Gold Paint for Detailing On Bathroom Accessories
First and foremost, ensure the accessories are clean and dry. This step is crucial for the paint to adhere properly.
Next, use painter’s tape to cover those areas you don’t want to be painted. For smaller items, such as handles or knobs, you might need narrow tape.
When prepping for painting, it’s advisable to place the accessories on a covered surface in a well-ventilated area. Acrylic primer serves as an excellent base for spray paint. Apply the primer evenly to get a smoother finish with the gold paint. Allow the primer to dry fully before the next step.
Now comes the fun part – spraying the 24k gold paint. Keep a distance of about 10-12 inches from the surface to avoid paint runs. Always remember, several light coats are better than one heavy coat. Wait for the recommended drying time between each layer.
Once the final coat of gold spray paint fully dries off, seal the finish with a clear topcoat. This will enhance the durability of the paint and its resistance to moisture, particularly important in a bathroom setting.
Lastly, remember to allow the accessories ample time to dry completely before reinstalling them. Then stand back, admire your handiwork and enjoy the opulence of gold details in your bathroom.
Creating Shimmery Holiday Ornaments With Gold Spray Paint

To get started, gather ornaments of various shapes and sizes, alongside your 24k gold spray paint. The variety in ornaments would result in a more appealing and aesthetically pleasing tree. Ensure you work in a well-ventilated area, preferably outside or in an open garage to avoid inhalation of fumes.
Follow these steps:
- Clean the ornaments gently to ensure a smooth surface. This enhances the adherence of the paint.
- Use thumbtacks to stick the ornaments to a foam board or styrofoam block. This makes it easier to spray all sides evenly.
- Shake the can of gold spray paint as per the instructions, then apply the first coat. Let the ornament dry completely before applying the next coat.
- Apply additional coats if necessary to achieve the desired gold finish. Be sure to allow each coat to fully dry before the next application.
- Once all coats are dry, add ribbons for hanging.
Remember, subtlety is key. A few gold ornaments can make a significant impact, so don’t overdo it. Enjoy the magic of your shimmering holiday ornaments!
DIY Gold Spray Painted Mason Jars
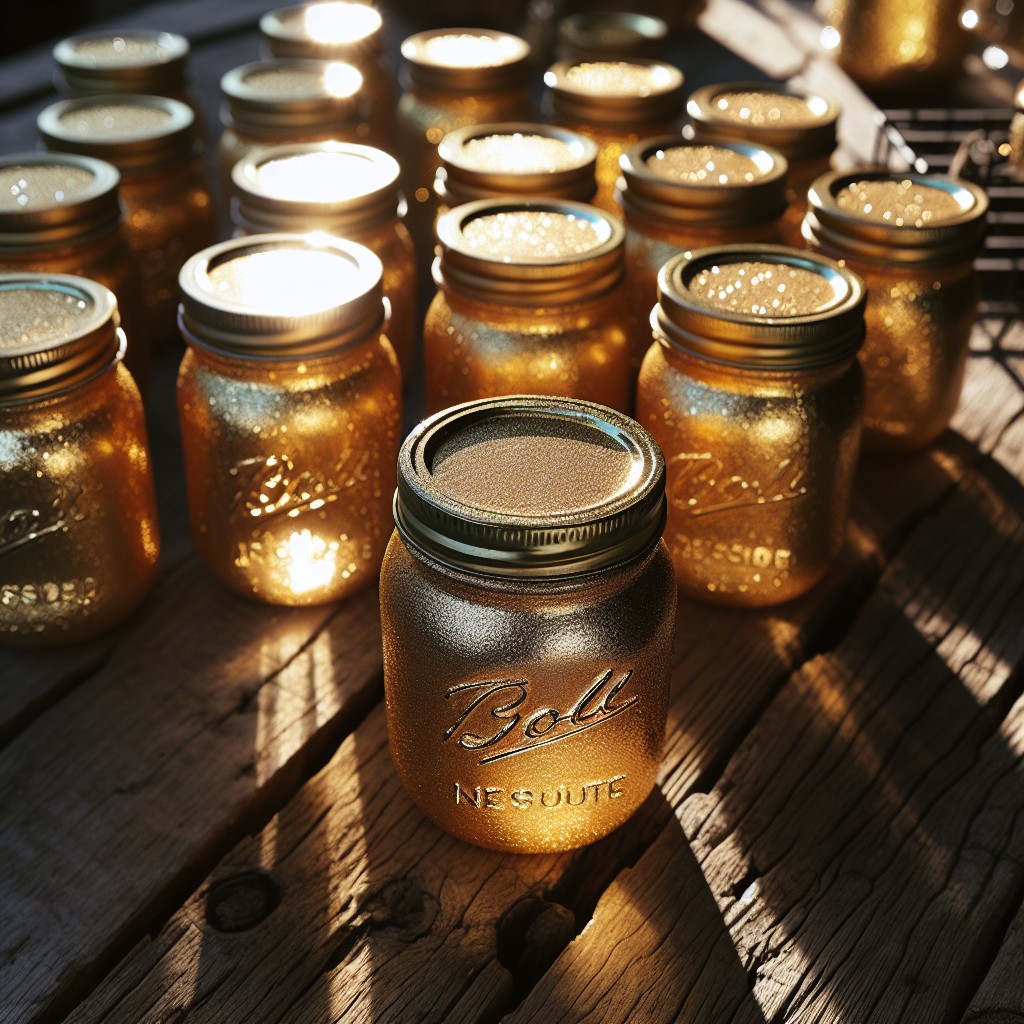
Embellishing mason jars with 24k gold spray paint is a simple and budget-friendly way to add splendor and shine to everyday decor.
Here’s how to do it:
1. Prep: Start by cleaning the jars thoroughly to remove any grime or residues.
2. Design: Decide whether you want a fully gold jar, or if you’d prefer to use tape to create interesting designs or negative spaces.
3. Spray: Use short, sweeping strokes to apply the paint evenly. Multiple light coats are preferable to a single heavy one.
4. Dry: Once complete, allow the jars sufficient time to dry.
5. Seal: If desired, a clear sealant can enhance the lifespan of your gold decor.
Remember to protect your workspace with newspapers or a drop cloth and wear protective clothing. Also, always use spray paint in a well-ventilated area.
These jars will make stunning centerpieces, stylish pencil holders, or even glamorous vases, adding that touch of elegance to any space.
Crafting with gold spray paint can reimagine the mundane into something splendid, rewarding not only in the process but also in the final product.
Gold Mirror Frame: A Luxury Addition to Interiors
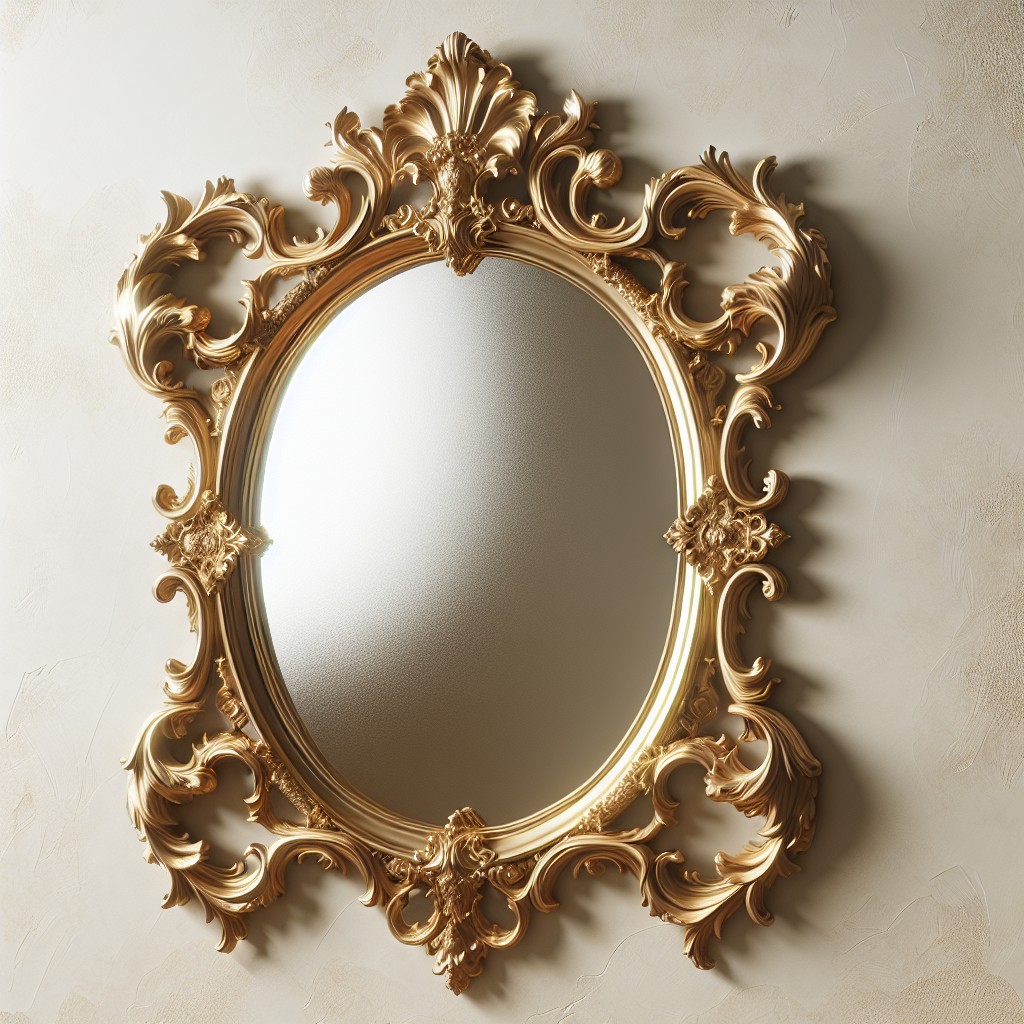
The process begins with choosing a piece boasting a suitable, high-quality shape and structure, as adding spray paint to a chipped or cracked mirror may not yield the desired outcome. Following the selection, clean the mirror thoroughly, paying close attention to the frame. A slightly damp microfiber cloth tends to be the tool of choice for removing any dust or residues that could mar the paint finish.
Next, cover the mirror surface with a painter’s tape to keep it free from spray mist. Some decorators might also find that placing old newspapers or a drop cloth underneath the chosen piece helps protect the surroundings from accidental over-spray.
Now comes the exciting phase! Shake your Design Master 24k Gold spray paint well before starting. Hold the can about 10-12 inches from the mirror frame and apply the paint in a sweeping motion, ensuring a thin, even coat. It may entail patience, but it’s better to apply multiple thin layers rather than one thick one.
Wait for each layer to dry thoroughly before applying the next. This step prevents drip marks and ensures an even, professional-looking finish. With a proper application of the gold spray paint, the frame transitions from ordinary to an opulent, enchanting gold – a perfect luxurious addition to your decor.
Lastly, remember to allow the final coat to dry thoroughly before rehanging the mirror. This time might range from a few hours to overnight, depending on the humidity and temperature conditions. The end product is a golden framed mirror, sure to be the focal point of your room, adding a generous dose of luxury to your interiors.
Boosting Curb Appeal With Gold Painted Door Accessories
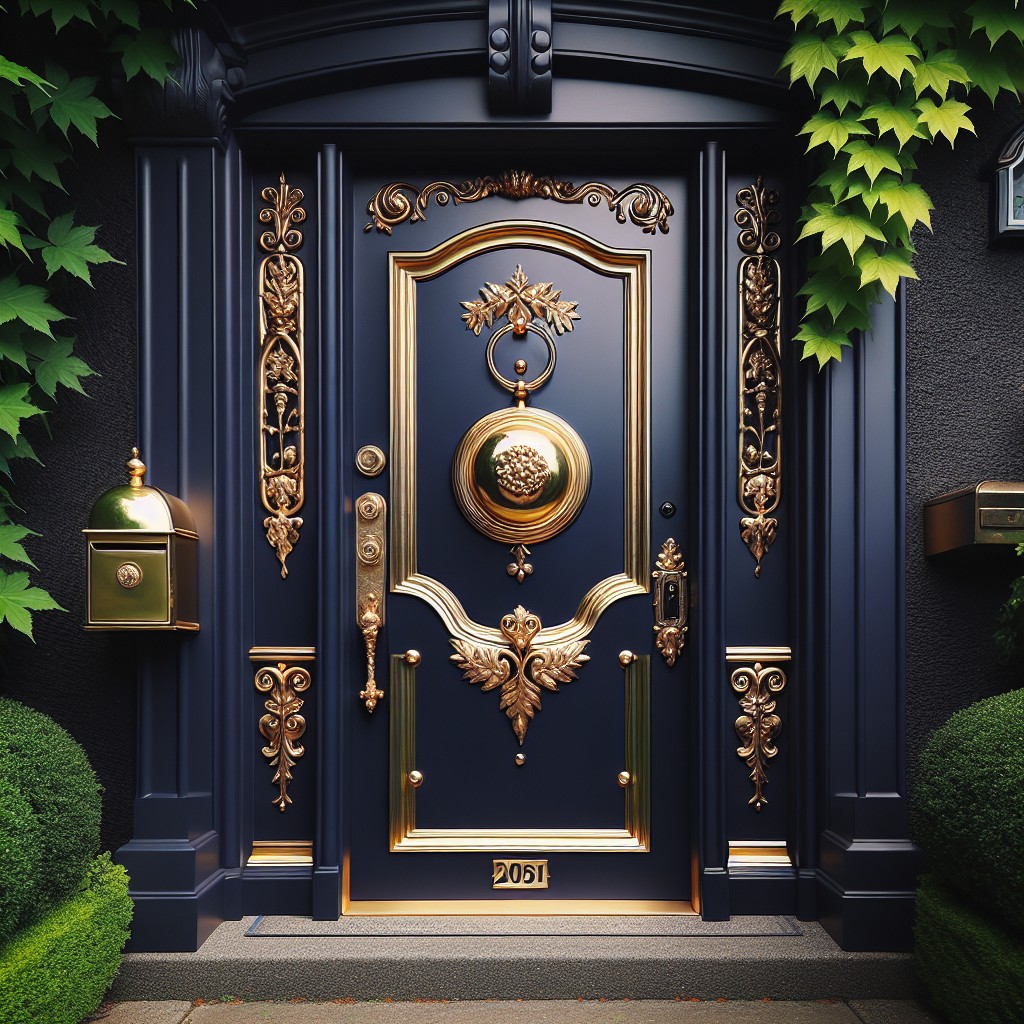
Sprucing up your front door hardware can intrigue visitors and even potential home buyers. 24k gold spray paint provides an affordable yet luxurious upgrade to those accessories which trigger the first impression.
1. Doorknob and Lock: A swift coat of gold paint can transform an ordinary doorknob and lock into a sparkling statement. Ensure the surface is clean and dry before applying the paint.
2. Mailbox: Elevate a simple mailbox into an accessory straight out of a high-end decor magazine. Remember, more than one coat might be necessary for a flawless finish.
3. Address Numbers: Enhance visibility and elegance by painting your house number plaques with 24k gold paint. Surfaces should be primed accordingly for metal, wood, or plastic numbers.
4. Door Knockers: Inviting guests in style begins with door knockers. A hint of gold on them can create a regal appeal.
Remember, less is more when it comes to gold painted accessories. Maintain a balance between gold and the color of your door to avoid an overwhelming effect.
Stunning Wall Art Ideas With 24k Gold Spray Paint
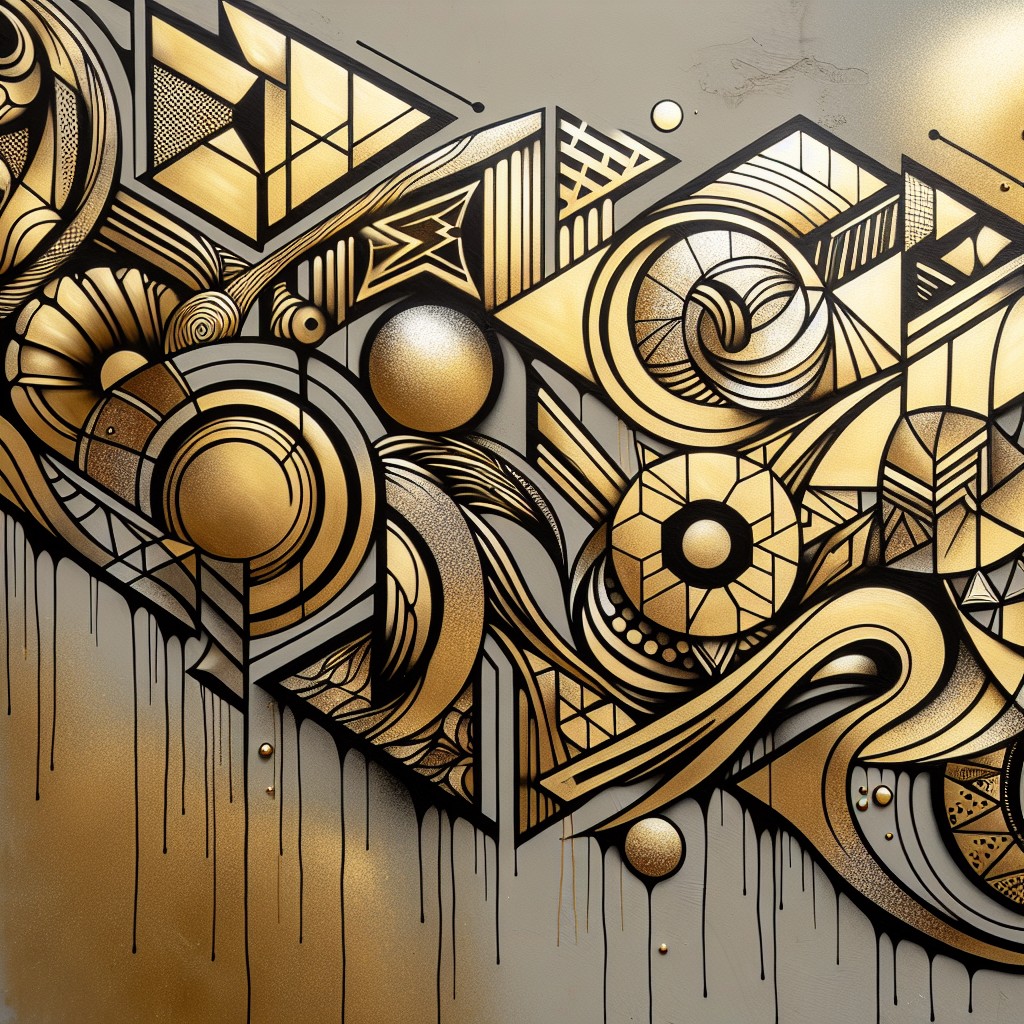
Creating wall art with 24k gold spray paint can breathe life into a dull space, all the while adding a luxurious vibe. Follow these straightforward steps:
1. Choose an Artwork Design: Opt for geometric patterns for a modern appeal, or go with abstract strokes for an artistic expression.
2. Prepare the Canvas: Start with a clean, preferably white canvas. The bright background contrasts well with the golden hue.
3. Mask Off: Use quality masking tape to create your design. It will serve as a stencil to achieve clear, sharp lines.
4. Apply the Paint: Shake your gold spray paint can well before use. Spray evenly from about 10-12 inches away, applying multiple light coats as opposed to one heavy coat to avoid drips.
5. Let it Dry: Making sure your creation is entirely dry before removing the masking tape is critical to maintaining clean lines.
Experiment with different designs, perhaps combine the gold paint with other colors to create depth or use it as an accent. The only limit is your creativity.
Adding Elegance to Event Decor With Gold Spray Paint
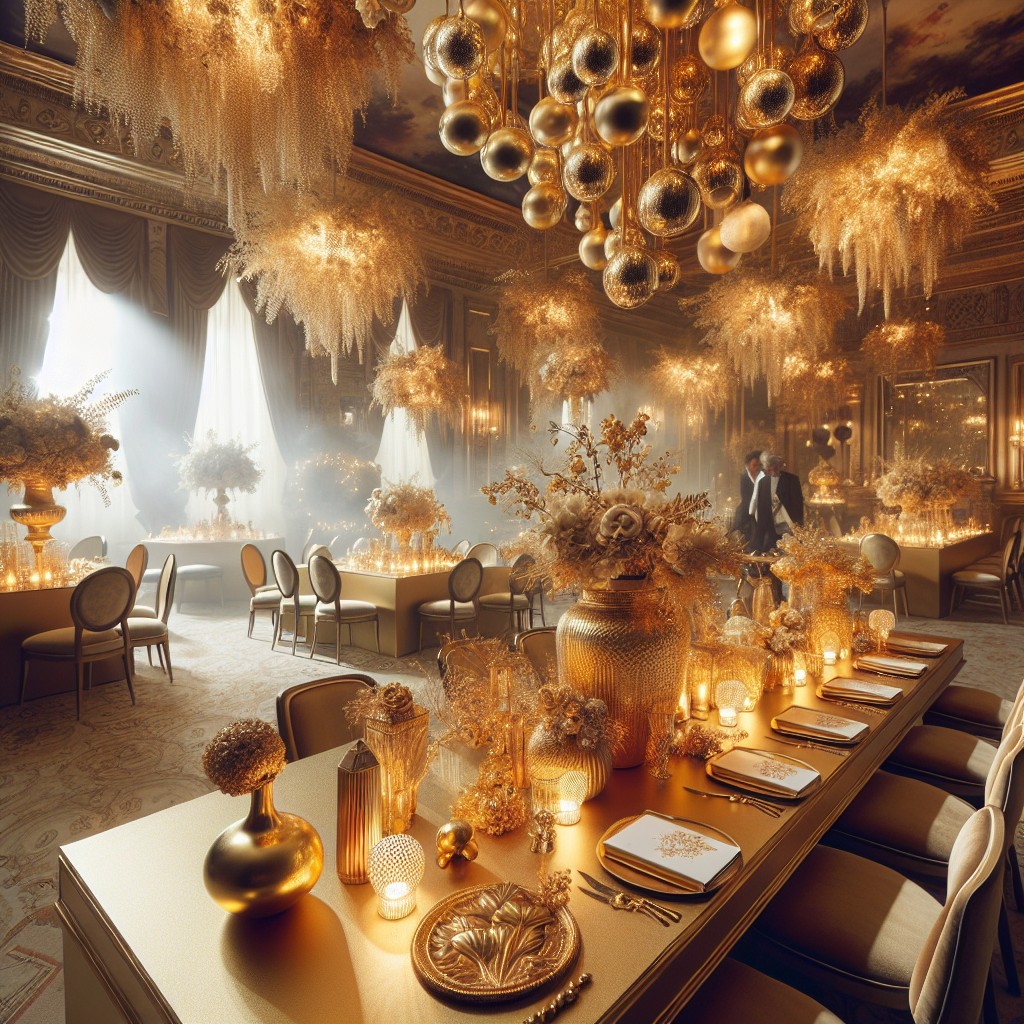
Gold spray paint is indeed a game-changer when it comes to adding a touch of elegance to any event décor. Here are some ideas to incorporate this luxe element:
1. Centerpieces: Take regular glass vases or bottles and give them a golden hue. Filling these with simple flowers or even fairy lights can exude sophistication.
2. Table Decorations: Spray painted gold pinecones, miniature pumpkins, or seashells make memorable and unique table arrangements.
3. Seating Plan: Use a large painted gold frame with seating arrangement noted for a classy first impression.
4. Cutlery: Gold spray painted plastic cutlery not only looks chic, but it’s also convenient, especially for large gatherings.
5. Candle Holders: Give simple candle holders or lanterns a metallic gold makeover for an inviting glow. Remember to apply heat-resistant varieties for items near flames.
Experimentation is key and thrifting items to make over will keep costs low. Gold accents can transform the simplest items into something extraordinary, making your event décor look luxurious and well-organized.
Upgrading Kitchen Cabinet Knobs With Gold Paint
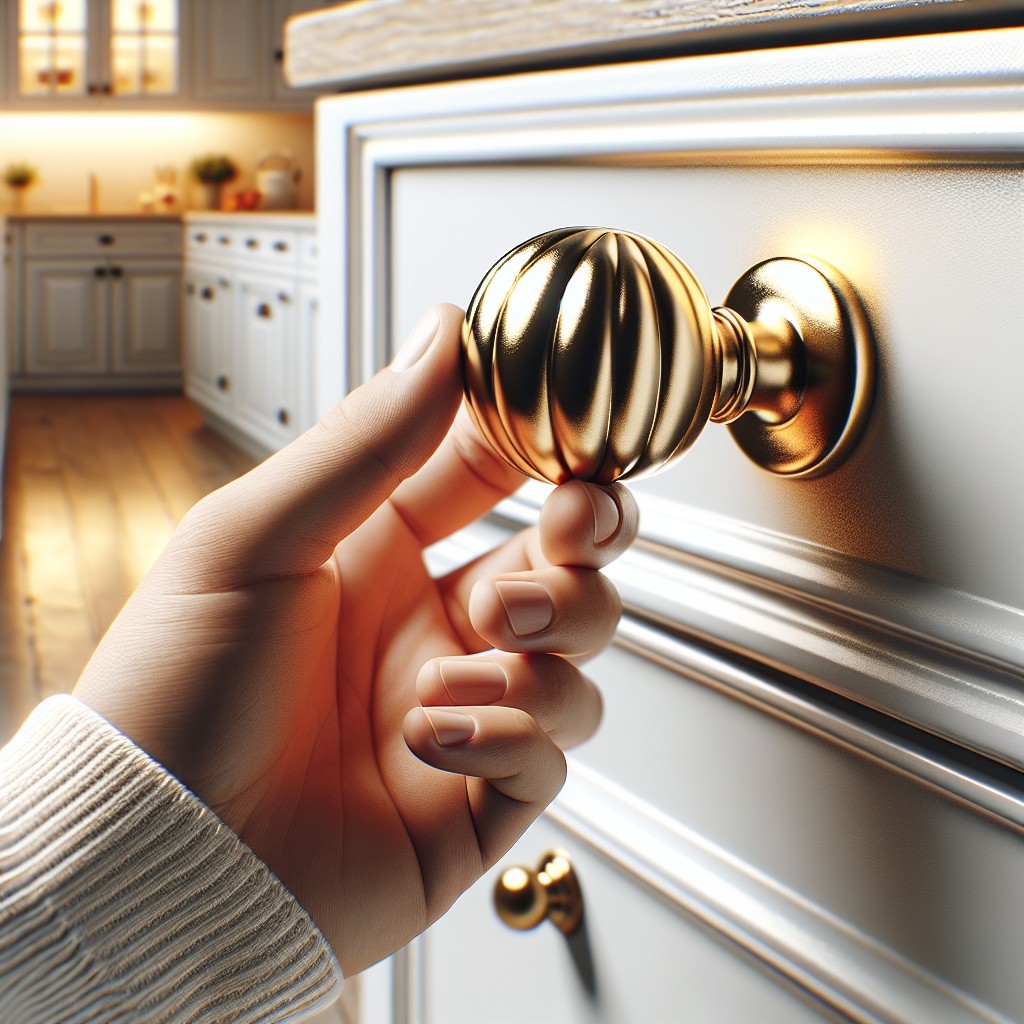
Begin by removing knobs from your kitchen cabinets for a clean, unhindered work area. With soap and warm water, remove any accumulated grime. The success of this project hinges on having a pristine base for the paint to adhere.
Pick a well-ventilated space; the paint’s fumes can be quite strong. Protect your workspace by laying down old newspaper or a drop cloth. Position the knobs on an elevated surface, such as a piece of foam or cardboard, to ensure all angles can be reached effortlessly.
Start the spraying process with a light touch to avoid drippage. Remember, it is more effective to build up with multiple thin layers of paint. Tolerance is key here; allow each layer to dry thoroughly before applying the next. The number of layers needed will vary based on the initial color of your knobs and the desired end look.
A clear topcoat is worth considering for a long-lasting finish resistive to wear and tear. Allow this to dry completely before reattaching the knobs to your cabinet. Be careful not to tighten screws excessively as it might chip the paint.
With time and patience, those once dull knobs will be metamorphosed into shiny, gold accents, increasing the luxury of your kitchen aesthetic at a fraction of the cost!
Metal Patio Set Revamps With 24k Gold Spray Paint
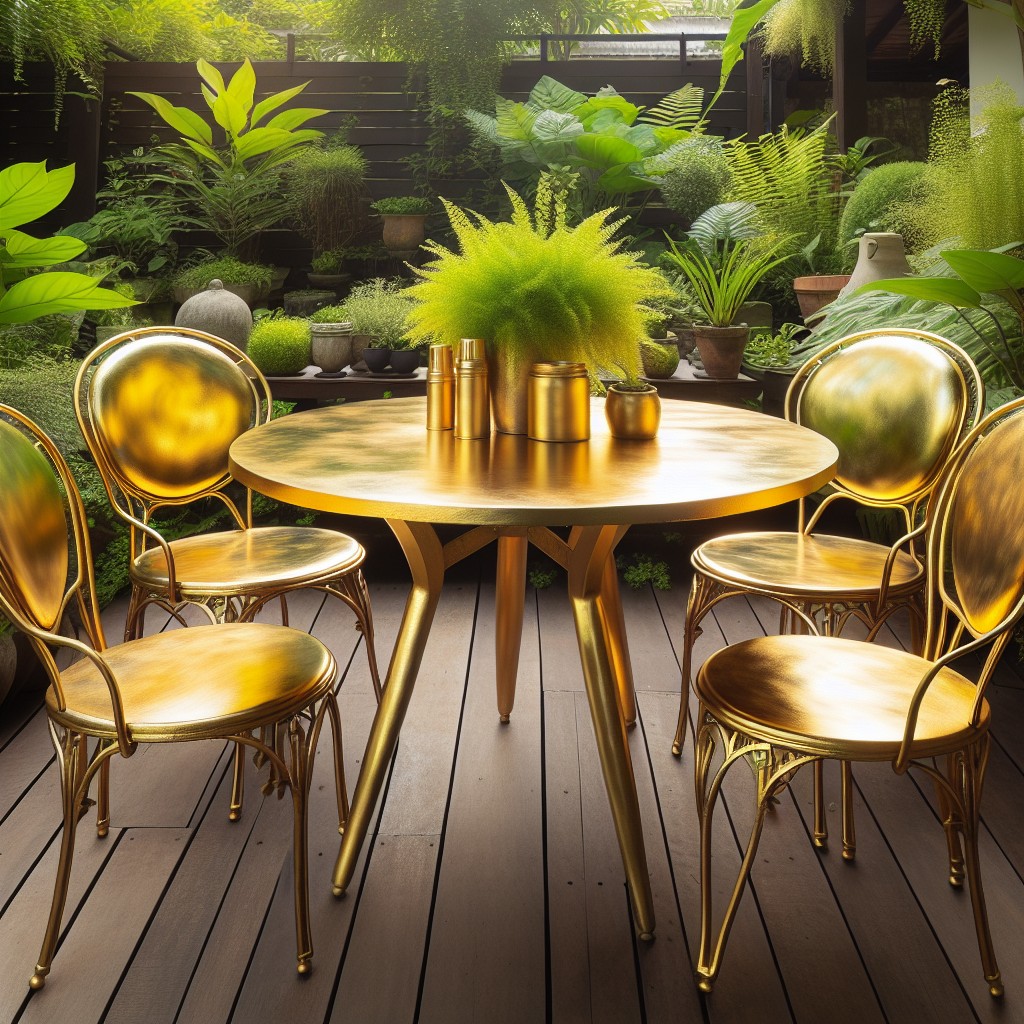
A rusted metal patio set need not be viewed as a discard but rather a project waiting for revival. Design Master 24k gold spray paint can help breathe new life into these pieces, offering a result that’s both chic and durable.
Here are a few steps to get you started:
- 1. Clean up: Use a wire brush to remove rust from the metal set, followed by a thorough washing with soap and water.
- 2. Priming: To ensure better adhesion and a longer-lasting finish, apply a metal primer as per the manufacturer’s instructions.
- 3. Applying Paint: Shake your 24k gold spray paint well before use. Hold about 12 inches away, moving in smooth, even strokes to provide a steady application of the paint.
- 4. Allow Drying: Multiple thin coats are preferable over a single thick one. Let each coat dry completely before adding the next.
- 5. Final sealing: To protect your beautifully transformed set from the elements, use a clear top coat sealant for an additional protective layer.
Remember, this isn’t just a makeover; it’s a way to reflect your personal style while also increasing the lifespan of your patio furniture. While painting, always work in a well-ventilated area and wear proper protective gear to ensure safety.
Creating Gilded Bookends With Gold Paint
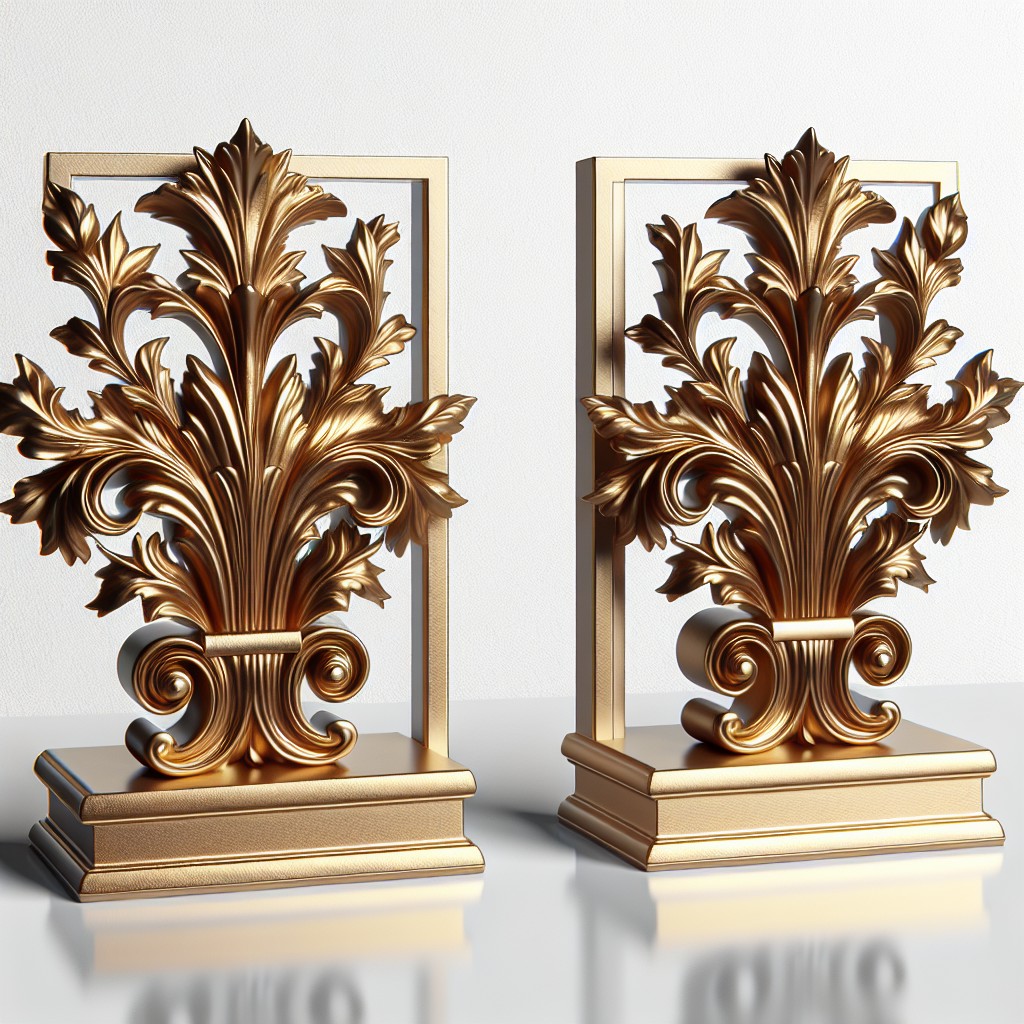
Kick off this transformation process by first ensuring your bookends are clean and dry. The presence of dust or moisture can interfere with the paint’s adhesion and overall finish. 24k gold spray paint does well on a variety of materials, from metal to wood. However, depending on the material, you might need to use a primer before applying the gold paint.
When it comes to the painting process, use slow, sweeping motions to cover your bookends completely. Keep your spray can about 10-12 inches away to prevent drips. It’s best to apply thin layers and let each coat dry before applying the next.
Remember, the overall look will depend on how many coats you apply. One coat often results in a brushed gold look while multiple can create a polished golden appearance. This choice depends on your personal preference and the desired aesthetic.
Protecting your newly painted bookends with a clear sealant is a great idea. It further extends their lifespan and keeps the gold color from fading or chipping. Be sure to pick a sealant compatible with your gold spray paint.
And there you have it, effortlessly lending a high-end aesthetic to your book collection with a touch of gold elegance. Now, your books won’t just be page-turners; they’ll be show-stoppers too!
Enhancing Party Decor With Gold Spray Painted Balloons
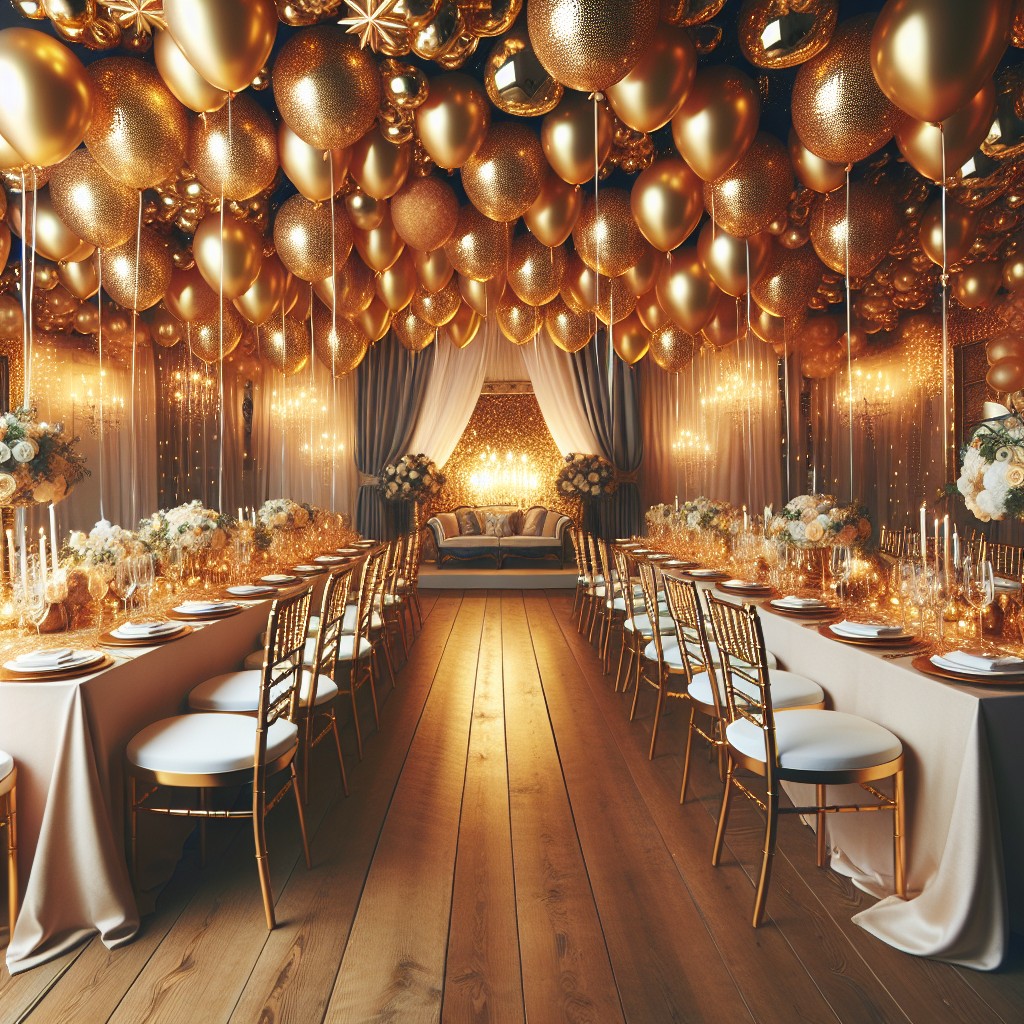
Balloons and party decor go hand-in-hand. A spray of 24k gold paint can transform ordinary balloons into striking focal points for your next gathering.
Here’s how:
1. Pick the Balloons: Opt for latex balloons, either in neutral shades for full coverage or transparent ones for a glamorous overlay effect.
2. Apply the Gold Paint: Lightly spray the balloons one side at a time. Cover the entire balloon or create a gradient effect.
3. Drying: Hang the balloons to dry, ensuring every side gets fair exposure to air. This results in a smoother finish.
4. Using the Balloons: Depending on your party theme, these gilded balloons can be scattered on the floor, suspended from the ceiling or used as centerpieces.
5. Experiment: Feel free to get creative. Try patterns or even stencils for a unique twist.
This method adds a sophisticated, festive touch while staying budget-friendly and easy — a new way to take your celebrations up a notch.
Giving a Luxurious Makeover to an Old Bicycle With Gold Paint
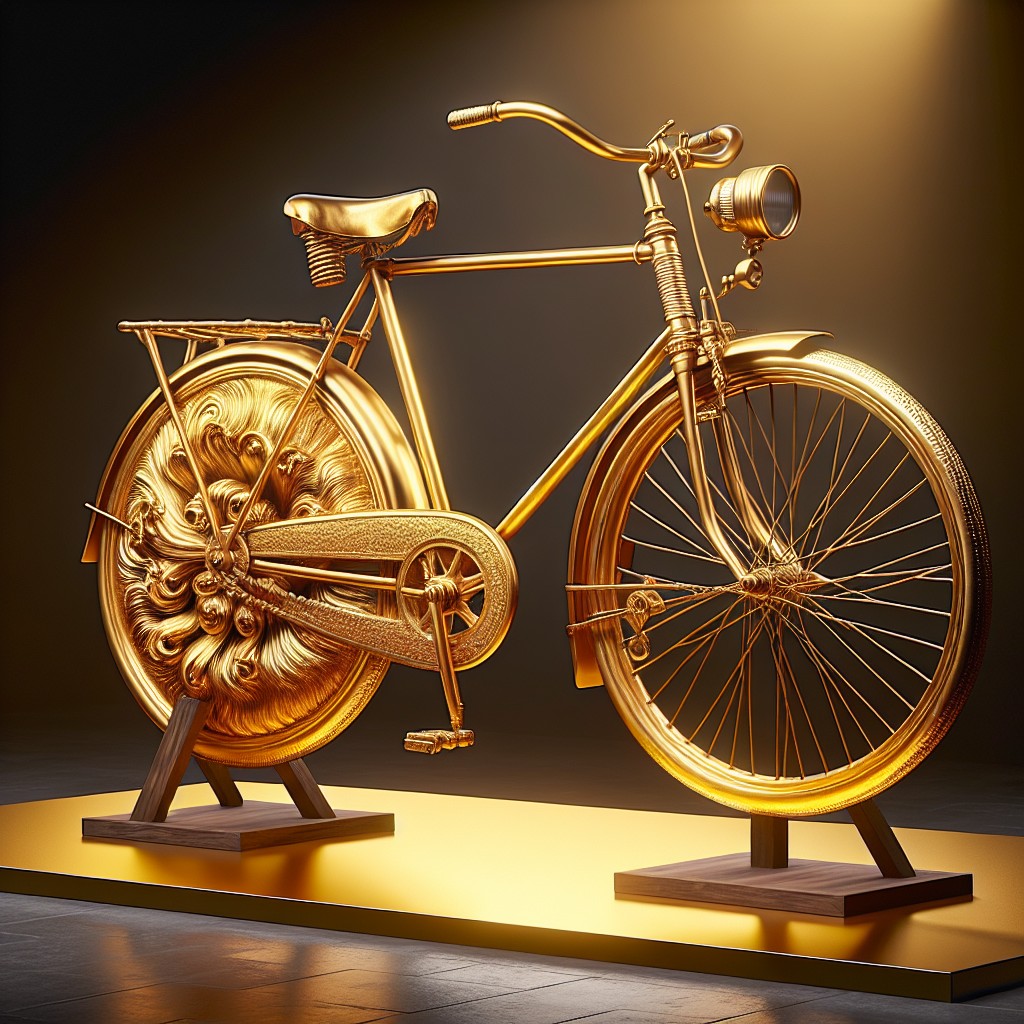
Begin with an old, even perhaps rusty, bicycle that could use a bit of love. Ensure to thoroughly clean and dry it before starting the transformation process, as dirt or moisture could affect the paint application.
Wear protective gear, like gloves and a mask, and apply with care, ensuring every nook and cranny is covered evenly with Design Master’s 24K Gold Spray Paint. This process may require multiple coats, so patience is key.
Consider adding a topcoat for extra shine and durability. The gold paint provides an extraordinary upgrade, converting your average bicycle into a unique, opulent masterpiece that grabs attention and stands out in a crowd.
Remember to let it dry completely before using to avoid smudges and to keep the luxurious finish intact. This transformed golden bicycle can now act as a statement piece in a garden, a unique porch decoration, or a glamorous mode of transport. By merely changing its color to gold, you’ve breathed new life into an old bike, showcasing both creativity and style.
Turning Ordinary Clay Pots Into Gold Painted Masterpieces
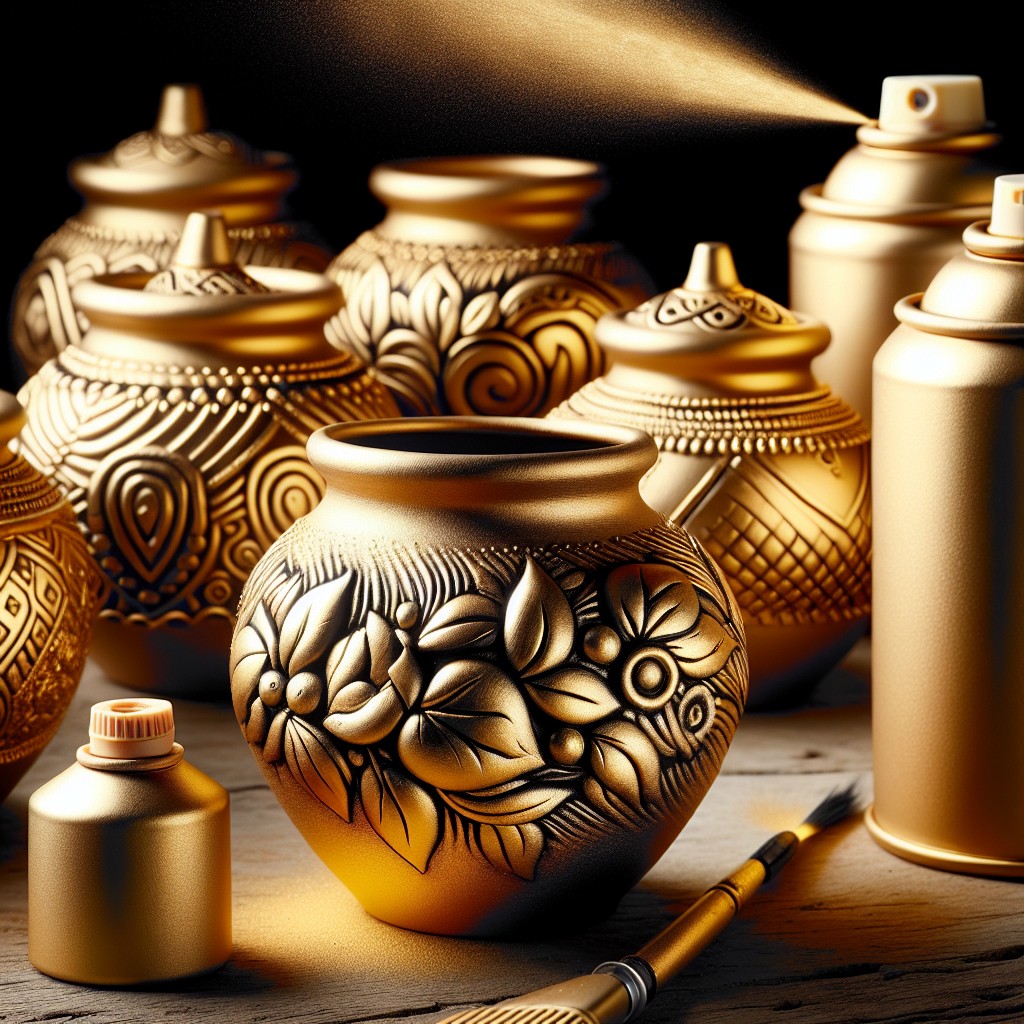
Starting with simple clay pots, a generous coat of 24k gold spray paint can transform them into beautiful, lustrous home decor. Ideal for indoors and outdoors, these gilded pots add a luxe aesthetic to any setting.
Here are the key concepts:
- Preparation: Begin with a clean, dry clay pot. A bit of sanding can help to make the surface as smooth as possible if any rough spots are present. Remember to always spray paint in a well-ventilated area or outdoors.
- Priming: Consider using a primer. While optional, a primer provides a stable base for the gold paint to adhere effectively. It ensures the durability of your project ensuring it shines for a longer time.
- Painting: Once your clay pot has been prepped, you get to the exciting part – painting! Shake the can well before use. Apply the 24k gold spray paint by using even strokes. Typically, it’s best to hold the spray can about 12 inches from the surface.
- Multiple Layers: Instead of one thick layer, apply a few thin layers of spray paint. This reduces the risk of drips or a patchy finish. Ensure each layer is dry before applying the next.
- Sealant application: After your final coat of gold paint, apply a clear sealant. This ensures your pot is protected from chipping or fading, especially if it’s going to be used outdoors.
Remember, the key to a beautiful gold-painted clay pot is patience. Allowing ample drying time between coats and after the final coat before using the pot ensures your masterpiece maintains its Golden touch.
Ideas Elsewhere
- https://www.blesserhouse.com/the-best-gold-spray-paint-ranked/
- https://flowermoxiesupply.com/products/24k-gold-design-master-colortool-floral-spray-paint
- https://www.anikasdiylife.com/best-gold-spray-paint/
- https://www.chrislovesjulia.com/answering-which-gold-spray-paint-is-best/
- https://dmcolor.com/explore/color-sprays/premium-metals/
- https://kastyles.co/best-gold-spray-paint/


