Last updated on
Your kitchen sink could be leaking due to a worn-out washer or seal, loose pipe connections, or damage to the sink drain or faucet.
Discovering the cause and solution for a leaking kitchen sink can be quite daunting. Often, the culprit is a faulty seal, a loose connection, or rust! This article aims to guide you through a step-by-step process to spot and fix these common issues.
By reading through to the end of this piece, you’ll gain key insights into the world of plumbing repairs, in a language that’s light and easy to understand. This informative journey will empower you with the knowledge to prevent future leaks, saving you both time and money down the line.
Stay with us as we dive into the nitty-gritty details of tackling that troublesome kitchen sink leak!
Key takeaways:
- Kitchen sink leaks can be caused by worn-out washers or seals, loose pipe connections, or damage to the sink drain or faucet.
- Corroded valve seat can cause leaks; regular cleaning can help prevent corrosion.
- Loose water supply connections can be tightened by hand or with a wrench.
- Damaged O-rings in the faucet can be replaced by disassembling the faucet and using a new O-ring.
- Clogged P-trap can be addressed by removing and cleaning it, then reassembling tightly.
What's Inside
Corroded Valve Seat
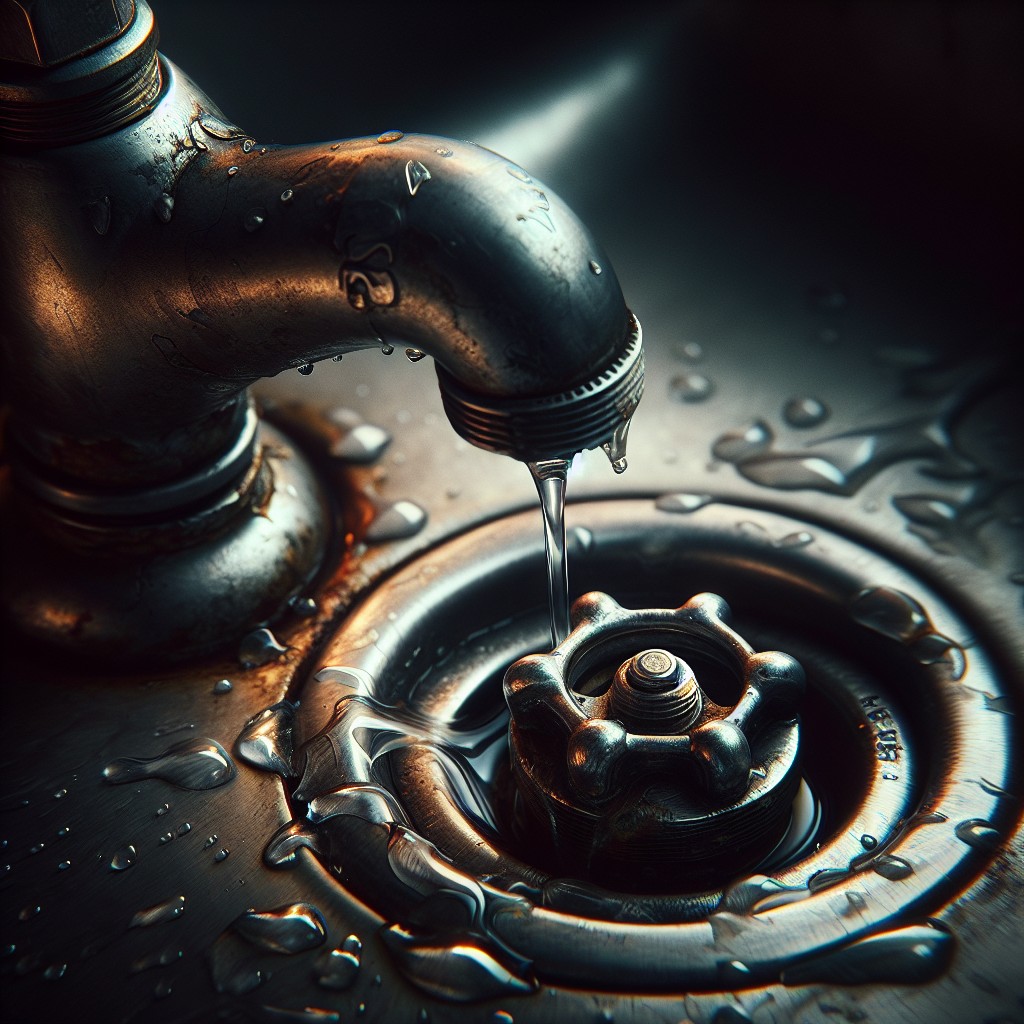
High exposure to water can sometimes cause wear and tear of the valve seat, referred as corrosion. The valve seat is the part connecting the tap and the spout. Sediments in the water often exacerbate the corrosion. This will result in a leak in your kitchen sink.
Proper maintenance and cleaning can help prevent the valve seat from corrosion. Regular cleaning reduces the accumulation of water sediments, thereby inhibiting corrosion.
However, if corrosion is already taking place, professional repair or a replacement might be necessary. Hence, in such a situation, hiring an experienced plumber would be a wise choice.
Recall, prevention is better than cure. Regular checks for early signs of corrosion can save you not only from sink leaks but also prolonged periods of water supply disruption in the kitchen.
Loose Water Supply Connection
Ensuring there aren’t any loose connections in your water supply is an imperative step to resolving troublesome leaks. Sometimes, connections to the water supply might loosen over time, causing unsightly puddles to form under your sink. These are typically found at the shut-off valve below the sink and can be tightened by hand or with a wrench if needed.
However, caution is advised when tightening these connections, as applying too much force may cause damage, leading to bigger problems. If tightened and the leak persists, consider replacing the tube connector as it might be defective or worn out.
Another thing to watch for is a frayed line, which can also lead to leakage. Always check the integrity of the line during this process. In case of extensive wear or damage, a plumber’s assistance could be invaluable.
Damaged O-Ring
An O-ring is a key component you’ll find in the stem of a sink faucet. It’s essentially a seal that stops water from seeping out. Over time, or due to poor installation, the O-ring might wear out or get damaged, leading to a pesky leak.
Several signs will help you identify a damaged O-ring as the culprit of your leak. You might notice water trickling down the base of your faucet when it’s turned on. Also, a loose or wobbly faucet handle can hint towards a compromised O-ring.
Fixing this issue involves disassembling the faucet to replace the faulty O-ring. First, turn off your sink’s water supply. Next, remove the faucet handle, exposing the stem where you’ll locate the O-ring. Afterward, simply remove the old, damaged O-ring, replace it with a new one, and reassemble the faucet.
It’s critical to match the size of the replacement O-ring with the original to achieve a proper seal. A poorly fitting O-ring might not fix the leak and could potentially cause further issues down the line.
Remember, if you’re uncomfortable performing a DIY fix like this, there’s no harm in calling a professional plumber. It can save you much grief and additional leak-related issues in the future.
Faucet Leak
When the faucet itself is the cause of the leak, faulty components are often to blame. There are several elements involved – valve seats, washers, seals, and O-rings. If any of these parts become worn-out or damaged, drips from the faucet can leave puddles at the base of the sink.
To fix a dripping faucet, first identify the type of faucet you have – either a ball faucet, disc faucet, or cartridge faucet. Each varies slightly in its internal mechanism but operates with the same basic principles. If you’re unsure of the type, your tap’s brand name can often help you determine it.
For quick and straightforward fixes, you can find instruction kits at any hardware store. These kits are specific to the type of faucet you have and contain clear guidelines on how to replace the damaged parts.
Don’t forget the golden rule of DIY plumbing – always switch off the main water supply before beginning repairs. If the faucet continues to drip after changing the components, seeking a professional’s help would be the most effective solution.
Clogged P-Trap
The curved portion of your drainpipe assembly, the P-trap, plays a crucial role. It traps a small amount of water which acts as a barrier to prevent sewer gases from entering your home. However, it can also become clogged with food scraps, grease, or other debris, which can result in a leak.
Here are three steps to address this issue:
- Preparation: You will need a plumber’s wrench, bucket, and gloves. Turn off the water supply and place the bucket under the P-trap.
- Removal and Cleaning: Use the plumber’s wrench to loosen the nuts on either end of the P-trap. Remove the trap and empty the water into the bucket. Cleanse the interior with a straightened wire hanger, removing as much debris as possible.
- Reassembly: Reattach the cleaned P-trap and ensure all connections are tight. Turn the water supply back on and run water through the drain to ensure the issue has been resolved.
Remember, regular maintenance of your P-trap is essential to prolong the lifespan of your plumbing system and keep your kitchen stench-free and tidier. Not to mention, it can save you from costly water damage repairs in the future!
Drain Leak
It’s not uncommon for drains to spring a leak, especially if they’re not routinely maintained. In most cases, these leaks occur due to a worn-out part within the sink assembly, such as a worn washer or a damaged seal.
Remember, the first step in fixing a leaking drain is identifying the source. If the leak is coming from the drain basket – the area where the sink basin and the drain meet – you may simply need to tighten the nuts. Be careful not to overtighten, as it can cause more damage.
If the nuts are secure and the leak continues, replacing the plumber’s putty under the drain basket will usually help eliminate any minor leaks. However, if the leak is due to a damaged pipe, it’s often best to replace it entirely. Note that it’s important to match the type and size of the pipe for a successful replacement.
Given that some of these repairs require expertise, don’t hesitate to contact a professional plumber when necessary. A small, ignored leak can quickly turn into a costly problem.
Worn Washers
Worn washers are indeed one of the most common culprits behind leaky kitchen sinks. When they start to deteriorate, usually due to normal wear and tear, the persistent drip-drip can begin, often unnoticed until it becomes a larger issue.
Here are some key points that can help you better understand this issue:
- 1. In your faucet, washers form a water-tight seal. Over time, the repeated action of turning the faucet on and off can wear them down.
- 2. If your sink is dripping directly from the faucet, there’s a good chance the washer is the culprit.
- 3. A good rule of thumb: the older the sink, the more likely the washer needs replacing.
- 4. Silicone-based or brass washers often hold up better than budget options. Investing in higher quality could save future headaches.
- 5. Replacing a worn-out washer might feel daunting, but with the right tools and a bit of time, it’s a fairly straight-forward DIY project.
Remember, ensuring the plumbing components in your kitchen are properly maintained will not only save you from a frustrating leak but also costly water damage down the line.
Excessive Water Pressure
Pressure in the home’s water supply is an often-overlooked culprit of a leaking kitchen sink. When it’s too high, it can result in leaks as well as potential damage to the pipes and other plumbing fixtures.
Typically, residential water pressure should be within the range of 40-60 psi. Anything above this might be excessive and lead to constant strain on your plumbing system.
There are a few telltale signs of having high water pressure; faucets and showers might deliver a powerful flow, you can hear pipes banging, or appliances like your washing machine and dishwasher might fail prematurely.
An easy way to measure water pressure is to use a pressure gauge. Simply connect it to a water outlet like an outdoor faucet or your washing machine outlet, and it will give a reading.
If you have determined that high water pressure is the issue, consider installing a pressure regulator on your main water line. This can help reduce the water pressure within safe limits, thus decreasing the chance of leaks in the future. Remember, a professional plumber can assist with this if you’re not comfortable doing it yourself.
Finding the Source of the Leak
Begin the leak-seeking mission by turning on the water to closely observe where the water first starts to leak – this is your starting point. If the sink basin itself is wet, it’s a clue that the problem could be with the faucet or the seal between the sink and the countertop.
Examine the water supply. This involves looking at both the hot and cold hose tap connections and the shut-off valves. Signs of dampness, puddles of water, or rusty valves indicate a potential problem.
Inspect beneath the sink – water may drip onto the items stored there. Clear out the under-sink area to better observe any drips or leaks.
Above all, use coloured water, such as that dyed with food coloring. The color allows for easy tracing of any leaking paths. But bear in mind, the source of the leak may not be the location of the water accumulation. Water, aided by gravity, tends to flow downwards and along paths of least resistance.
Conducting a Flow Test
Initiating a flow test requires minimal tools – just a bucket and a watch. Turn off all taps and water appliances in your home before you start.
First, locate your water meter; they are typically found in basements or outside the home. Take note of the meter reading.
Fill a bucket with a known quantity of water – 10 litres is ideal – and note the amount of time this takes in seconds.
Afterwards, check the meter reading again.
Determine the flow rate with the formula: (Volume of water / time it took to fill)*60. This result is your flow rate in litres per minute (LPM).
An average flow rate sits between 10-15 LPM. A significantly higher reading may indicate a leak.
To confirm, repeat the water meter test. Check the initial reading, wait two hours without water use, then check again. If the reading has noticeably increased despite water being off, there is likely a leak. In such instances, a professional plumber should be contacted to locate and repair the leak.
Conducting a Basin Test
To perform a basin test, first, ensure the stopper is securely in place, then fill your sink completely with water.
Monitor it closely, checking for any leaks underneath. If water starts dripping, your stopper could be malfunctioning.
Conversely, if there’s no leak from this test, the issue likely lies elsewhere.
This method helps in pinpointing the source of the problem, so necessary measures can be taken to fix it.
Remember, if you’re not comfortable performing these tasks yourself, consider hiring a professional.
Experimenting without the right knowledge might escalate the issue.
Fixing Faucet Leaks
To address this issue, first, turn off the water supply. Then, remove the decorative parts of the faucet handle using a flat-head screwdriver. After discovering the screw securing the handle to the faucet, unscrew it and remove the handle.
Next, pinpoint the problem. Often it’s a worn-out washer. Using a crescent wrench, loosen the packing nut, extract the old washer and replace it with a new one of the same size.
For a ceramic-disc or ball-type faucets which don’t use washers, purchase a replacement kit that contains all the parts needed.
In the case of a cartridge faucet, you’ll require a special cartridge puller. After extracting the worn-out one, install a new one following the manufacturer’s instructions. Make sure the parts are arranged in a right way during reassembly, or the handle movement could be hampered.
Keep in mind personal safety during this process: wearing gloves and safety glasses could prevent any potential injury.
Addressing Leaks in the Drain Seal
Make sure to turn off the water source prior to addressing a drain seal leak. Use a wrench to loosen and unscrew the pipe’s lock nut. Once undone, pull out the pipe and inspect the rubber seal (also known as a gasket) found within. If it’s warped, cracked, or has lost elasticity, it’s time for a replacement.
To replace the gasket, visit a local plumbing store with the old one to ensure a perfect match. Install the new gasket and reassemble the pipe. Tighten the lock nut with the wrench, but be careful not to over-tighten as it may cause another leak or pipe damage. Test by running water through the drain, observing for any signs of continued leakage.
Detecting and addressing leaks promptly can save expensive repairs and possible water damage to the home. An annual review of common leakage points is an effective preventative measure.
Preventing Future Leaks
Regular maintenance is key in thwarting potential future leaks. Scheduling bi-annual inspections with a professional can ensure that your plumbing stays in top shape.
Always keep an eye on the age of your fittings. With years of use, components such as washers or seals wear down. Replacing them before they’re entirely worn out can save a great deal of hassle.
Remember to avoid over-tightening the connections when installing new faucets or pipes since this might cause unnecessary strain, leading to leaks over time.
Lastly, investing in good quality compatible parts is crucial. Skimping on cheap pieces might lead to more regular breakages and consequent leaks.
By sticking to these guidelines, the chances of encountering future leaks should significantly decrease.
Addressing Water Damage From Leaks
When dealing with water damage, the first step is prompt removal of any standing water. Ensuring that all water is thoroughly dried out prevents further damage and limits the risk of mold or mildew. Use towels, fans, or dehumidifiers to expedite this process.
For visible water stains, a mild detergent can be effective in cleaning, while tougher stains may require a mixture of bleach and water. Always wear gloves and a mask when dealing with possible mold.
Examine cupboards and cabinetry for damage. Particleboard, commonly used in kitchen construction, can get soggy and lose its structure. If this is the case, consider replacing it.
Lastly, checking the integrity of electrical systems can prevent costly repairs later on. Enlist a professional if you notice rust around outlets or wiring. Remember, acting quickly could save you from more serious long-term damage.
Leak From Drain Under Sink
Drips or puddles beneath the plumbing might indicate a problem with the drainpipe. In most cases, the issue could be a loose connection or a defect in the pipe itself. Here’s how you explore this further:
1. Firstly, wipe the pipe and connections dry, then place a bucket underneath.
2. Next, run the water in the sink and watch for fresh drips – they’ll reveal the location of the leak.
3. If it’s a loose connection, tighten it up with a suitable wrench. Be careful not to over tighten, as this could strip the threads.
4. If the leak continues, there may be a crack in the pipe, meaning a replacement is necessary. Remember, a plumber should be contacted for complex issues or if you have any doubts.
Attending to such leaks promptly can save you from larger issues down the line, like mold growth or structural damage.
Leak From Hot Water Supply Under Sink
Identifying a leak originating from the hot water supply might lead you to a faulty supply line or worn-out valves. These are typically constructed from solid metal or flexible, braided materials and provide the route for hot water to reach your tap. Due to regular wear and tear, these parts can deteriorate over time.
To confirm a leak here, look for dripping water when the hot water tap is on and also off. If confirmed, tighten the valve gently with a wrench. However, don’t over-tighten as this might cause additional problems.
In case the leak persists, you might need to replace the line or valve. For replacement, always shut off the water source. Once the new part is firmly installed, turn the water back on and check for leaks.
The hot water supply, and its respective components, should ideally be replaced every 5-8 years, regardless of visible leaks, as a preventive measure.
Leak From Cold Water Supply Under Sink
Typically, visible moisture or a small pool of water beneath the sink indicates a leak in the cold water supply. This issue can be a result of loose connections, wear and tear, or even gaps in the water supply line. The initial step in addressing this involves identifying the exact point of leakage.
For a quick-fix, gently tighten the connection at the source of leakage using a wrench. If the problem persists suspect a cracked or damaged pipe, which should be replaced immediately to prevent further water damage. Remember to turn off the water supply before starting any repairs.
To properly replace the faulty pipe, measure and note down the size and type of the existing pipe. When purchasing a new one, ensure it matches the noted specifications.
Indeed, accurately evaluating and addressing the situation promptly can save you from more significant issues down the line and secure the efficient functioning of your kitchen amenities.
Leak From Sink Overflow
An overflow is designed as a safety feature that prevents water from spilling over. If you notice a leak here, it’s often due to a blockage in the overflow tube which causes water to leak out instead of being diverted back to the drain.
To address this, first clear any visible debris. A small brush or flexible cleaning tool can help remove obstructions. If the overflow is still leaking after clearing, it suggests an issue deeper within the system.
For such cases, try a plumber’s snake or a chemical drain cleaner, but remember to use it cautiously as per the manufacturer’s instructions. Severe blockages or structural damage to the overflow may require a professional plumber to resolve.
Regularly checking and cleaning the overflow tube can prevent debris build-up and future leaks, ensuring the system works efficiently. Always remember: prevention is key to maintaining a leak-free sink.
FAQ
How do I stop my kitchen sink from leaking?
To stop your kitchen sink from leaking, either tighten the nuts at the junction of the pipes if they’re loose, or apply plumber’s putty if the issue is blockage or corrosion.
Why is my sink leaking from the bottom?
Your sink is likely leaking from the bottom due to fractures in the plumbing lines caused by shifting plumbing lines, worn-out connections, or pipe corrosion that leads to slow and steady leaks.
Why is there water on the floor in front of my kitchen sink?
Water on your kitchen floor can be due to either a leaking pipe under your sink or a damaged pipe within a nearby wall seeping water onto your floor.
What causes a kitchen sink to drip?
The primary causes for a kitchen sink to drip are damaged or worn out O-rings, washers, and valve seats; corrosion; and sediment buildup.
What steps should I follow to fix a leaky kitchen faucet?
To fix a leaky kitchen faucet, identify the type of faucet, turn off the water supply, remove the handle, replace the faulty part, then reassemble the faucet.
How can I identify the source of my kitchen sink leak?
To identify the source of your kitchen sink leak, inspect the faucet, the sink drain, and the pipes underneath for dampness or dripping water.
What are the common tools required for a kitchen sink leak repair?
For a kitchen sink leak repair, common tools that are often required include a wrench, plumber’s tape, bucket, replacement parts if needed, and a plumber’s putty.
