Last updated on
Discover the transformative power of a fresh coat of paint as we guide you step-by-step through changing your kitchen cabinet color to rejuvenate your cooking space.
Are you tired of the outdated look of your kitchen cabinets? Do you dream of a fresh, new color that will breathe life into your space? Well, you’re in luck! In this article, we will guide you through the process of changing the color of your kitchen cabinets. Say goodbye to dull and hello to fabulous as we explore various options and provide expert tips to help you achieve the kitchen makeover of your dreams.
So grab a cup of coffee and get ready to be inspired!
What's Inside
Identifying the Need for Color Change
As you stand in your kitchen, sipping your coffee and taking in the surroundings, you can’t help but feel a sense of dissatisfaction. The cabinets that once seemed charming and cozy now appear tired and lackluster.
It’s time for a change.
Identifying the need for a color change is the first step towards transforming your kitchen into an inviting space that reflects your personal style. Take a moment to evaluate how you feel when you enter this room – does it inspire creativity or drain energy? Do the colors uplift or dampen your mood?
Consider factors such as outdated trends, worn-out finishes, or simply wanting to breathe new life into an otherwise functional space. Perhaps there has been a shift in interior design preferences since these cabinets were installed.
By recognizing these signs of discontentment with the current cabinet color, you have taken an important step towards creating positive change within your kitchen environment.
Evaluating Your Current Kitchen Cabinets
Take a moment to closely examine their condition and consider the overall style of your kitchen.
Begin by assessing the quality of the cabinets themselves. Are they structurally sound? Look for any signs of damage such as cracks, warping, or loose hinges.
If there are major issues with the cabinets’ integrity, it may be necessary to address those before proceeding with a color change.
Next, consider the material and finish of your existing cabinets. Are they made from solid wood or a composite material? Is there currently paint or stain on them? Understanding these details will help determine how much preparation work is needed before applying a new color.
Take note of any design elements that you love about your current cabinets as well as aspects that you’d like to improve upon. Consider factors such as hardware (handles and knobs), trim details, and overall layout.
This evaluation will guide you in making decisions later on when selecting colors and finishes for an updated look.
Remember that changing cabinet colors can dramatically transform not only their appearance but also the entire ambiance of your kitchen space. So take this opportunity during evaluation phase to envision how different shades might complement other elements in your kitchen like countertops, backsplash tiles or flooring materials.
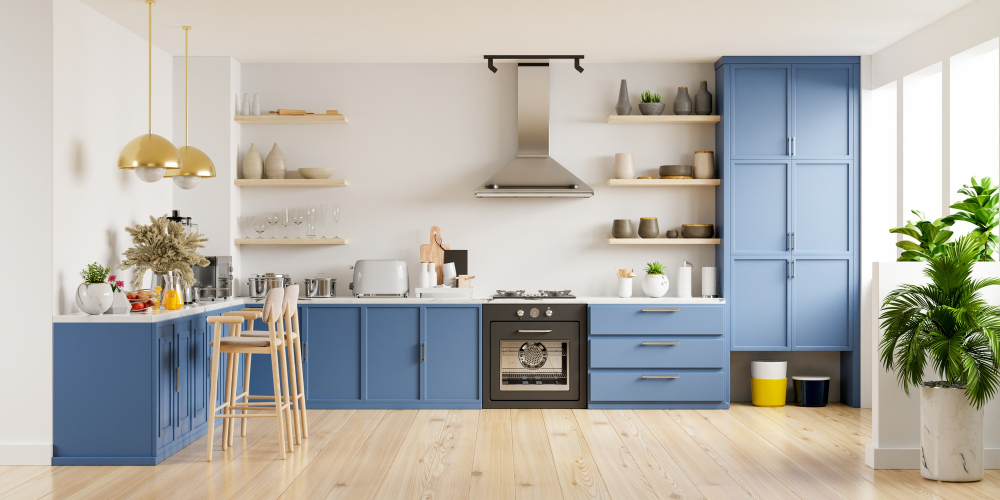
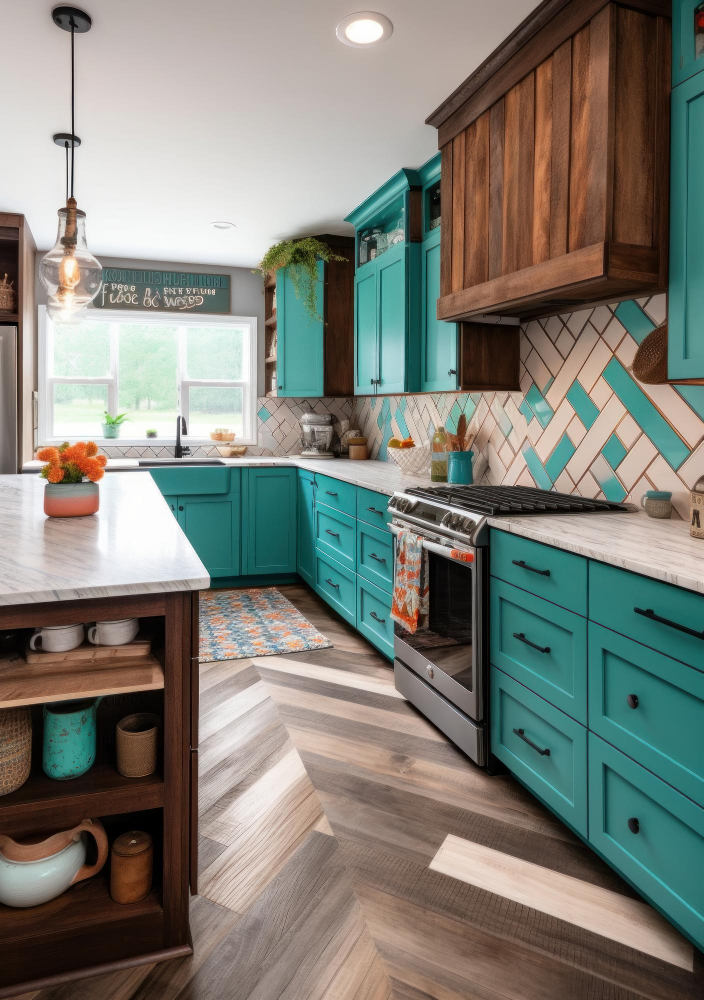
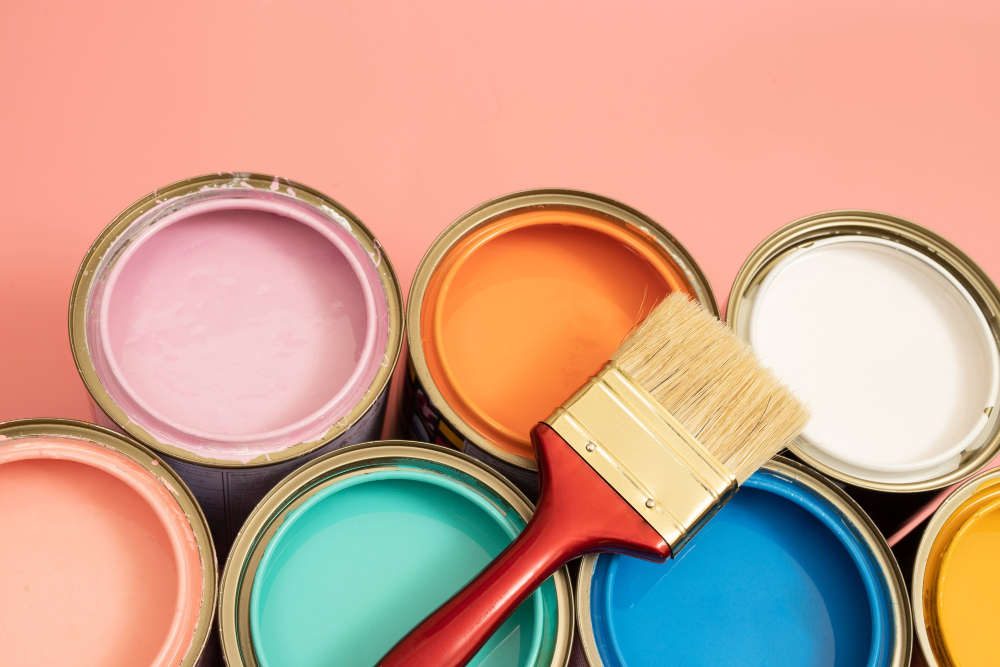
Understanding Various Color Options
The right cabinet color can completely transform your kitchen and set the tone for your entire space.
When considering different colors, think about what kind of atmosphere you want to create in your kitchen. Are you looking for a bright and airy feel? Or perhaps a cozy and warm ambiance is more appealing to you.
Understanding how different colors can affect mood and perception will help guide your decision-making process.
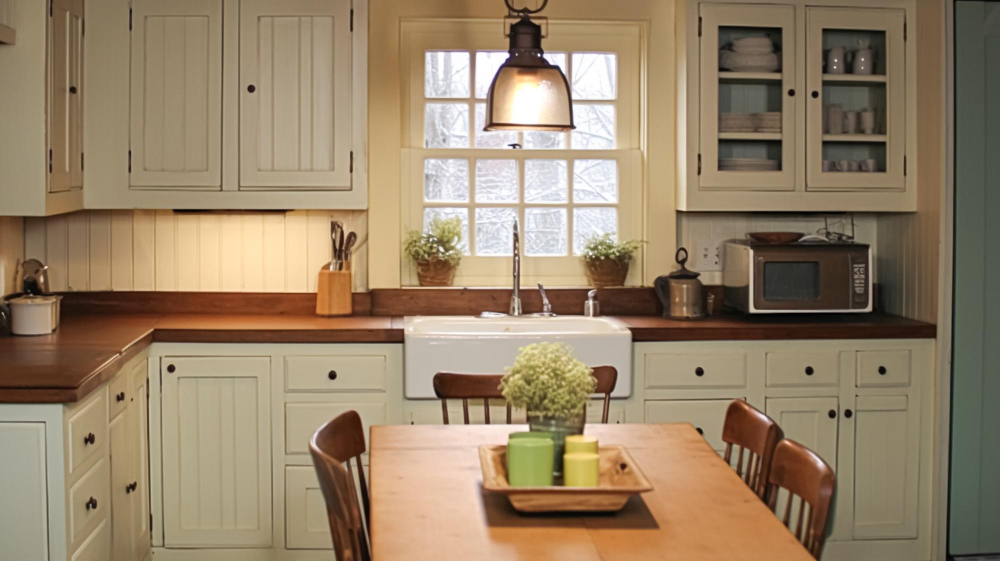
Neutral tones such as white, beige, or gray are timeless choices that provide a clean and versatile backdrop for any style of kitchen decor. These shades also have the added benefit of making smaller kitchens appear larger.
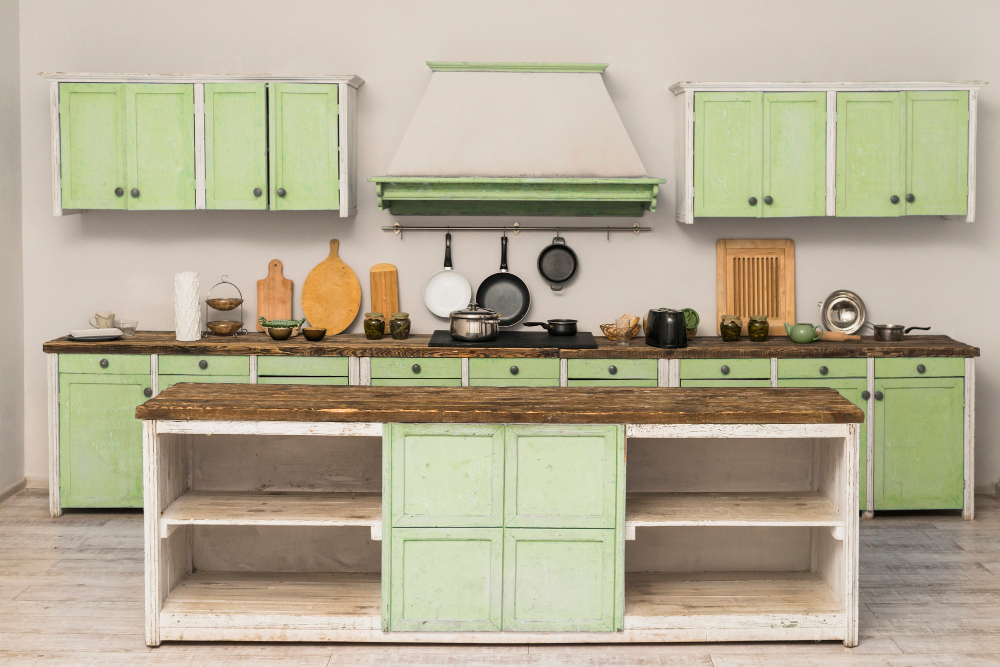
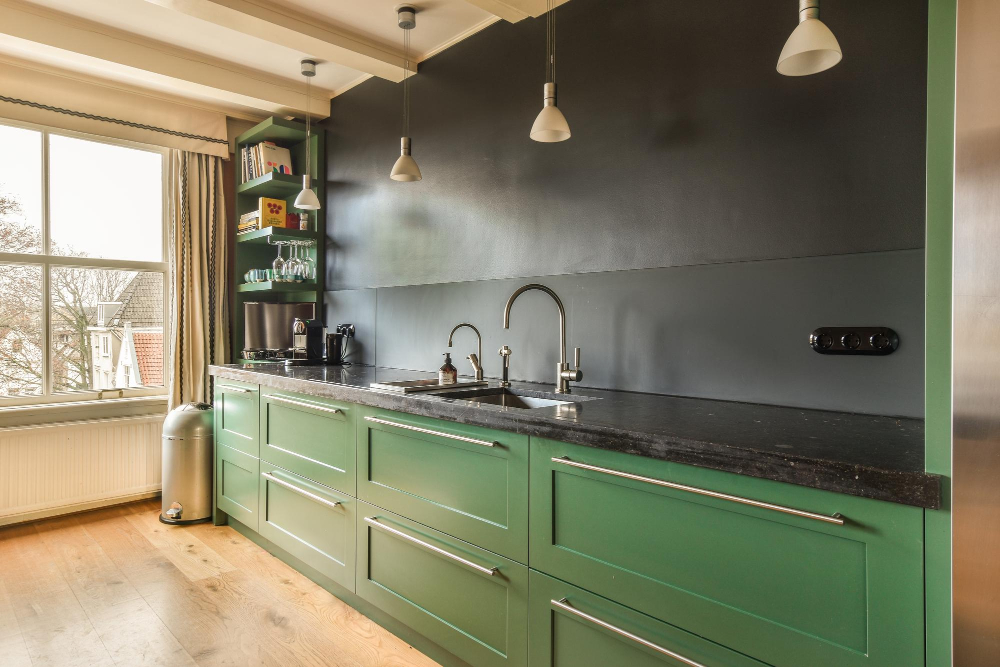
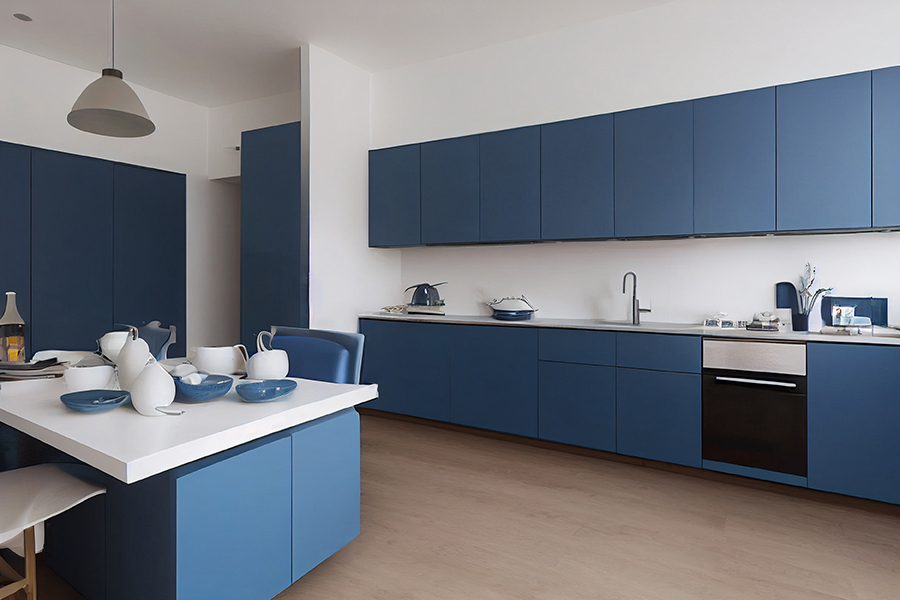
If you’re feeling bold and adventurous, consider opting for vibrant hues like blue or green that inject personality into your space while still maintaining an inviting atmosphere. These colors work particularly well in modern or eclectic kitchens where they can serve as statement pieces.
For those who prefer a classic look with a touch of elegance, rich wood stains like cherry or mahogany offer warmth and sophistication that never goes out of style. Wood stains allow the natural grain patterns to shine through while adding depth to cabinetry.
Remember that lighting plays an essential role in how colors appear within a room; what looks stunning under natural light may not have quite the same effect under artificial lighting conditions. It’s always recommended to test paint samples on small areas before committing fully so that you can see how they interact with both natural daylighting as well as artificial sources commonly found in kitchens (such as overhead fixtures).
Choosing the Right Color for Your Cabinets
The right color can completely transform the look and feel of your kitchen, so it’s important to consider a few key factors before making a decision.
Firstly, think about the overall style and ambiance you want to create in your kitchen. Are you aiming for a cozy and rustic feel? Or perhaps a sleek and modern aesthetic? Different colors evoke different emotions and set distinct moods.
For example, warm earth tones like beige or olive green can create an inviting atmosphere, while bold shades like navy blue or deep gray add drama.
Next, take into account any existing elements in your kitchen that will influence your color choice. Consider factors such as flooring material/coloring, countertop materials/colors (if not planning on changing them), backsplash design/coloring (if applicable), as well as any other fixed features in the space.
You’ll want to choose a cabinet color that complements these elements rather than clashes with them.
Another crucial consideration is lighting conditions within your kitchen area. Natural light versus artificial light can significantly impact how colors appear in space.
If you have ample natural light streaming through large windows during most parts of the day, lighter shades may work well by enhancing brightness further; however if there is limited natural light available darker hues might be more suitable for creating depth.
Lastly but importantly – trust yourself! Your personal taste plays an essential role when selecting cabinet colors since this is ultimately YOUR dream kitchen makeover project! Don’t be afraid to experiment with bolder choices if they resonate with you – after all painting cabinets offers flexibility compared replacing them entirely!
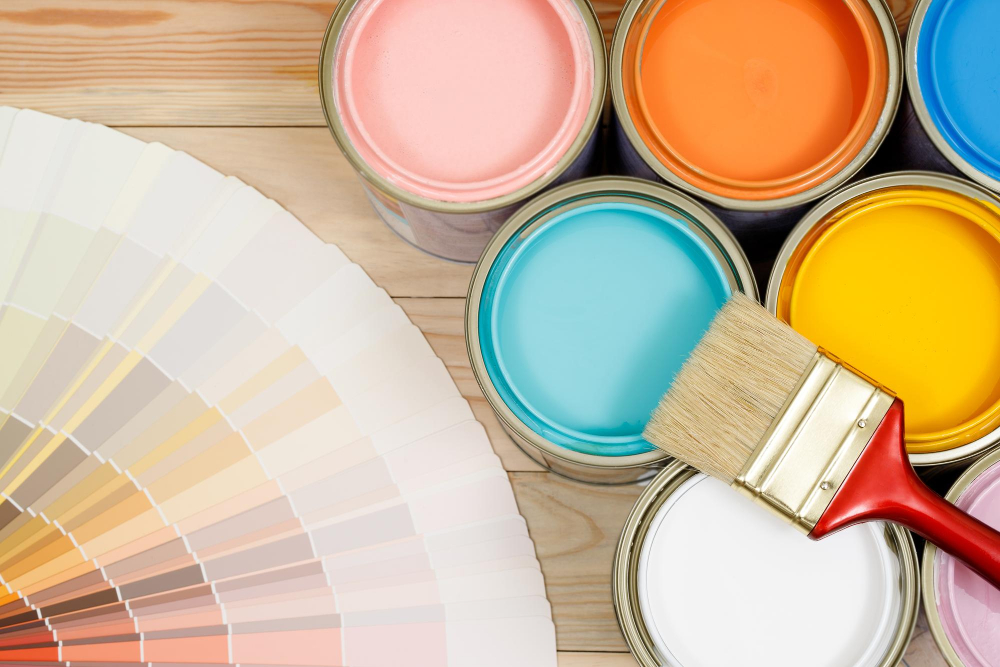
With these considerations at hand – style goals defined; existing elements taken into account; lighting conditions evaluated; personal preferences acknowledged – now comes time for some fun: exploring various paint swatches or samples online/in-store! Take advantage of resources like color charts, online visualizers, or even consult with a professional to help you narrow down your options and find the perfect color that will bring your kitchen vision to life.
So go ahead and let your creativity flow as you embark on this exciting journey of choosing the right color for your cabinets.
Selecting the Right Shade for Your Kitchen
The color you choose will set the tone and ambiance of your space, so it’s essential to consider a few factors before making a decision.
Firstly, think about the overall style and theme you want to achieve in your kitchen. Are you aiming for a modern look with sleek lines and minimalist design? Or perhaps a cozy farmhouse feel with rustic elements? Different colors can help enhance these styles.
For example, crisp whites or cool grays work well in contemporary kitchens, while warm neutrals like beige or cream create an inviting atmosphere in farmhouse-inspired spaces.
Next, take into account any existing elements in your kitchen that may influence color selection. Consider countertops, backsplashes, flooring materials – do they have dominant hues or patterns? You’ll want to choose cabinet colors that complement these existing features rather than clash with them.
Lighting is another crucial factor when choosing cabinet shades. Natural light can vary throughout different times of day and seasons; therefore certain colors may appear differently under various lighting conditions.
If possible try obtaining paint samples and observe how they look during different times of day before committing to one shade.
Lastly but importantly trust yourself! Your personal preferences play an integral role here as well since ultimately this is YOUR dream kitchen makeover! Don’t be afraid to experiment with bold choices if it aligns with what makes YOU happy!
By considering these factors – style/theme goals, existing elements, lighting conditions, and personal taste – you’ll be able to select the perfect shade that will bring out the best in your new-looked cabinets.
Preparing the Cabinets for Painting
This step is essential in ensuring a smooth and long-lasting finish that will make your kitchen cabinets truly shine.
To begin, remove all items from the cabinets and clear the surrounding area. This will give you ample space to work without any obstructions.
Next, take off any hardware such as knobs or handles using a screwdriver or drill.
Once the hardware is removed, thoroughly clean the surfaces of your cabinets with warm soapy water or a mild detergent solution. Be sure to remove any grease, grime, or residue that may have accumulated over time.
A clean surface ensures better adhesion of paint and prevents peeling later on.
After cleaning, lightly sand down the cabinet surfaces using fine-grit sandpaper (around 120-150 grit). Sanding helps create a rough texture for better paint adherence and also smooths out any imperfections like scratches or dents.
Remember to wear protective goggles and gloves while sanding to avoid getting dust particles in your eyes or irritating your skin with splinters from woodwork.
Once sanded down evenly across all areas of each cabinet piece including doors and drawers wipe away excess dust with a damp cloth before moving onto priming them for painting which we’ll cover in our next section.
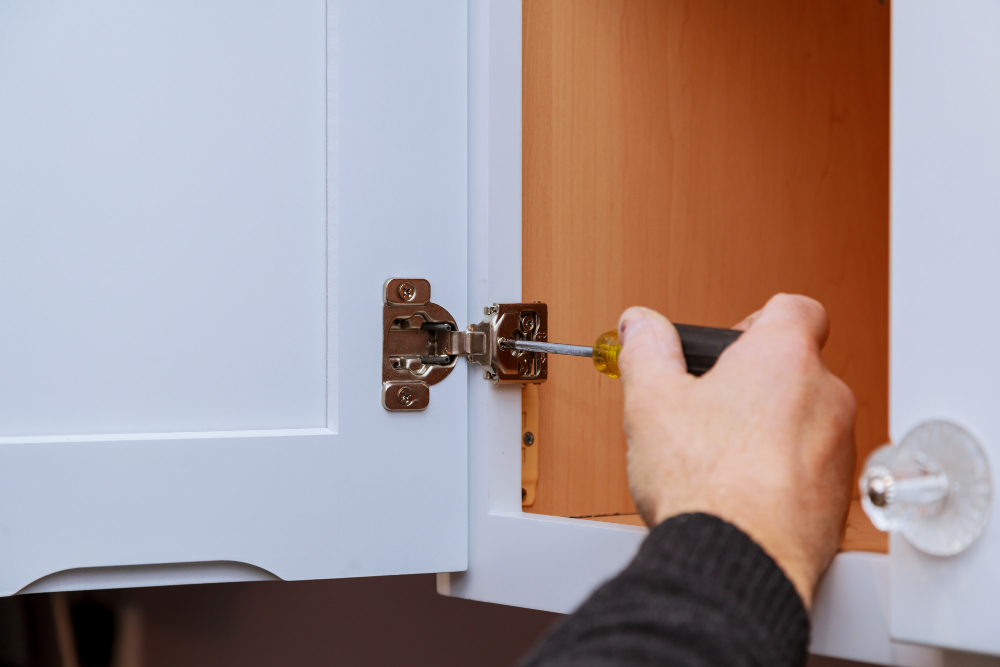
Removing Cabinet Doors and Drawers
One of the first steps in this process is removing the cabinet doors and drawers. This may seem like a daunting task, but don’t worry – we’re here to guide you through it.
Removing cabinet doors and drawers is essential as it allows for easier access when painting or staining them. Plus, working on individual components makes achieving a smooth finish much simpler.
To begin, gather some basic tools such as a screwdriver or drill with appropriate bits. Start by opening all cabinet doors fully to gain better visibility and accessibility.
Next, locate the hinges attaching each door to its corresponding cabinet frame.
Using your screwdriver or drill (depending on what type of screws are used), carefully remove these screws from both sides of each hinge until all hinges are detached from both door and frame.
Once all hinges have been removed, gently lift each door away from its position while ensuring not to damage any surrounding surfaces or hardware during this process. For drawer removals: start by pulling out one drawer at a time completely until it stops moving forward naturally; then look underneath where there should be two small levers located near either side towards front edge – push down firmly using fingers/thumb pressure applied simultaneously against these levers while continuing pulling outwardly until resistance ceases entirely before lifting upwards slightly so that entire drawer can be safely lifted free without causing undue strain upon yourself physically nor risking accidental breakage due excessive force being exerted inadvertently instead!
Cleaning and Sanding the Cabinets
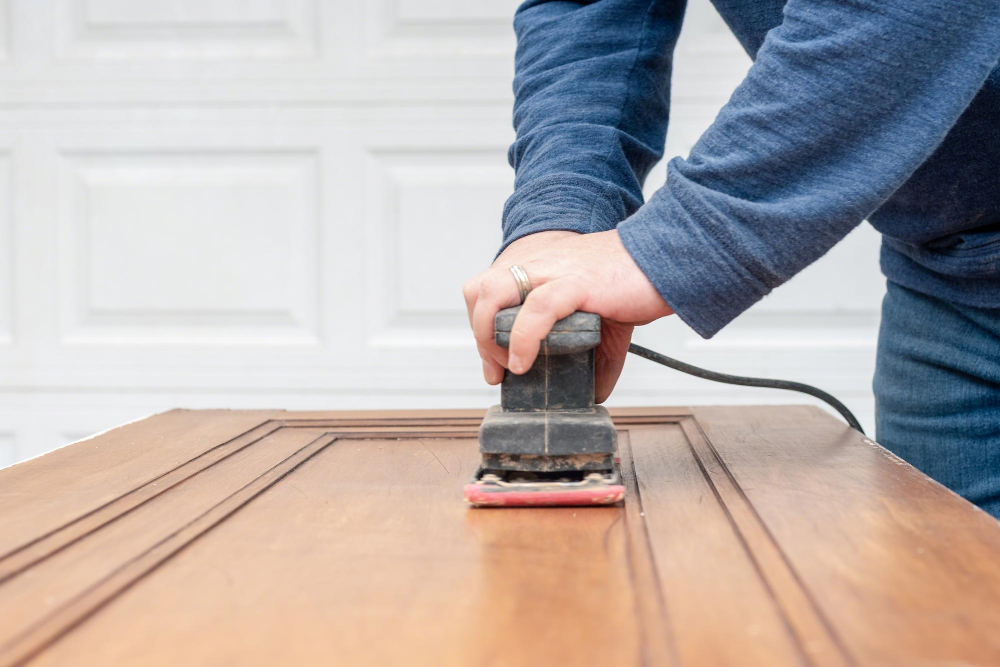
Cleaning and sanding are crucial steps in ensuring a smooth and long-lasting finish.
Before diving into the cleaning process, remove all cabinet hardware such as handles and knobs. This will make it easier to clean every nook and cranny of your cabinets.
Start by wiping down the surfaces with a mild detergent or degreaser solution to remove any built-up grime or grease that may have accumulated over time.
Next comes sanding, which helps create an ideal surface for paint adhesion. Use medium-grit sandpaper (around 120-150 grit) to gently roughen up the existing finish on your cabinets.
Sand in even strokes along the grain of the wood until you achieve a slightly rough texture all over.
Remember, be careful not to oversand or apply too much pressure as this can damage your cabinets’ surface. The goal is simply to create enough texture for better paint adherence without removing too much material.
After completing both cleaning and sanding processes thoroughly, wipe away any dust using a tack cloth or damp cloth before moving on to priming and painting stages.
Applying Primer to Your Cabinets
Primer acts as a base coat that helps the paint adhere better to the surface and provides a smooth and even finish. It also helps to block any stains or discoloration on your cabinets, ensuring that your chosen color appears vibrant and true.
To apply primer to your cabinets, start by gathering all necessary materials such as a high-quality brush or roller specifically designed for priming purposes. Make sure you choose a primer suitable for use on wood surfaces.
Begin by removing any hardware from the cabinet doors and drawers, including handles or knobs. This will allow you easier access when applying the primer evenly across all surfaces.
Before starting with actual application, it’s essential to clean off any dust or debris from sanding using a tack cloth or damp cloth. This ensures that there are no particles trapped under the layer of primer which could affect its adhesion.
Next comes time for application! Dip your brush into the can of primer (or pour some onto a tray if using rollers) and start with long strokes in one direction along each cabinet surface—whether it be doors, drawer fronts, sides—or anything else requiring priming attention!
Remember not to overload too much paint onto each stroke; instead aim for thin coats initially since multiple layers may be needed depending on how well-covered they appear after drying time has passed between applications (follow manufacturer instructions).
Allow sufficient drying time between coats as recommended by product instructions before moving forward with additional layers of paint if desired—or proceed directly towards painting once satisfied coverage achieved through proper priming process!
Choosing Between Stains and Paints
Both options have their own unique advantages and considerations, so let’s dive in and explore which one might be the best fit for your kitchen transformation.
Stains offer a more natural look by enhancing the grain of the wood. They come in a variety of shades that can add warmth and depth to your cabinets.
If you love showcasing the natural beauty of wood, stains are an excellent choice. However, keep in mind that stains may not completely cover imperfections or discolorations on your existing cabinets.
On the other hand, paints provide endless possibilities for color customization. Whether you prefer classic white cabinetry or bold pops of vibrant hues, paint allows you to achieve any desired look with ease.
Painting over existing finishes can help conceal any flaws or blemishes on your cabinets.
Consider factors such as personal style preferences and overall aesthetic goals when deciding between stains and paints for cabinet color change project. Remember that both options require proper preparation before application – cleaning surfaces thoroughly is crucial regardless if using stain or paint.
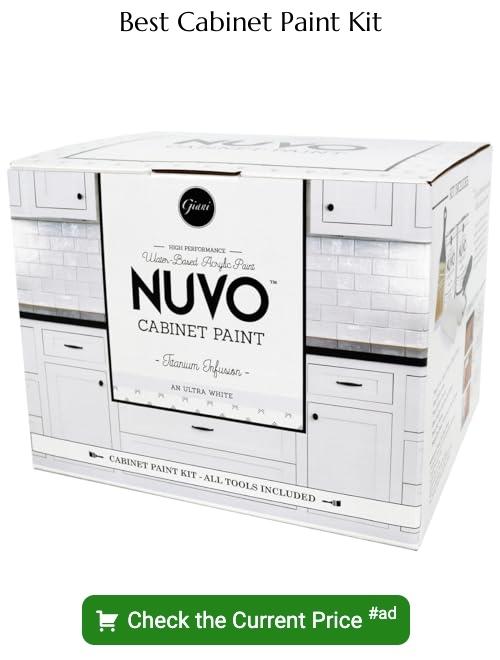
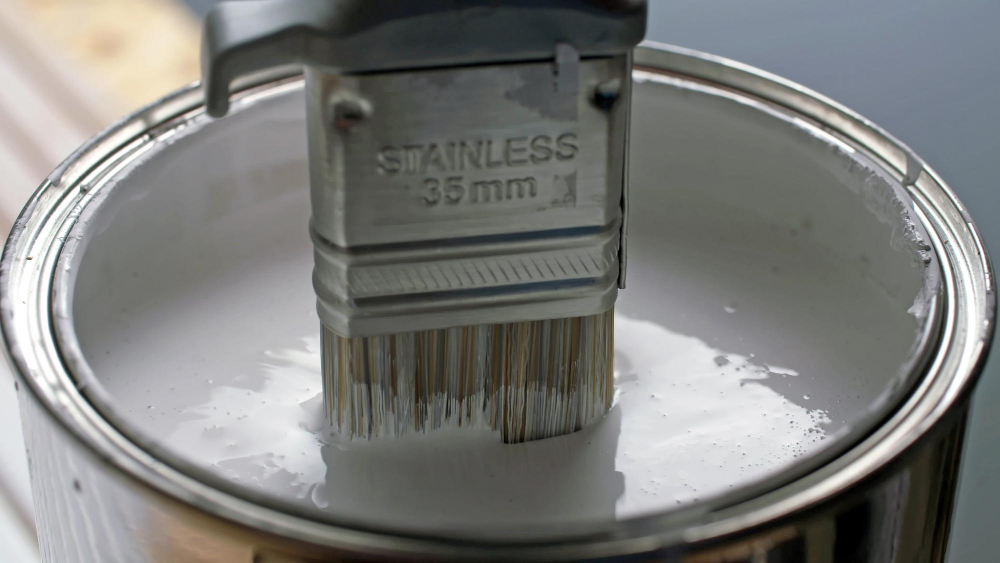
Choosing the Right Paint for Kitchen Cabinets
The type of paint you select will greatly impact the overall look and durability of your cabinets.
Firstly, decide whether you want an oil-based or water-based paint. Oil-based paints offer a smooth finish and excellent durability but can take longer to dry and have a strong odor during application.
On the other hand, water-based paints are easier to clean up, have less odor, and dry faster.
Next, consider the sheen or finish of the paint. High-gloss finishes provide a shiny appearance that reflects light well but may highlight imperfections on your cabinets’ surface more prominently than other finishes would.
Satin or semi-gloss finishes strike a balance between shine and hiding minor flaws while still being easy to clean.
Be mindful of selecting quality cabinet-specific paints that are designed for high-traffic areas like kitchens where surfaces need extra protection against moisture and frequent cleaning.
Remember that color is also an essential aspect when choosing cabinet paint; opt for shades that complement your kitchen’s overall aesthetic while considering trends if desired.
Understanding Different Paint Finishes
The paint finish plays a crucial role in determining the overall look and durability of your cabinets. Let’s explore some common paint finishes and their characteristics to help you make an informed decision.
1. Matte Finish: A matte or flat finish has a non-reflective surface, giving your cabinets a smooth and velvety appearance.
This low-sheen option is great for hiding imperfections on older cabinet surfaces but may require more frequent cleaning as it tends to show fingerprints easily.
2. Satin Finish: If you’re looking for something between matte and glossy, satin is an excellent choice.
It offers a subtle sheen that adds depth without being too shiny or overwhelming in smaller kitchens.
3. Semi-Gloss Finish: For those seeking durability combined with easy maintenance, semi-gloss is worth considering.
This popular choice provides moderate shine while offering resistance against moisture, stains, and mildew growth – making it ideal for busy kitchens prone to splatters.
4.Glossy Finish: If you want high-shine cabinetry that exudes elegance and sophistication, then go all-in with a glossy finish! Reflecting light beautifully throughout your kitchen space can create an illusion of spaciousness; however be aware that this type of finish tends to highlight any flaws or unevenness on the cabinet surface.
When choosing among these different finishes remember not only aesthetics but also practicality – consider factors such as ease of cleaning (especially important if there are young children around), desired level of reflection from natural/artificial light sources within your kitchen area etc. By understanding these various paint finishes available at hand ,you will be able choose one best suited both visually appealing & functional aspects ensuring long-lasting beauty in addition rejuvenating effect brought by changing colors!
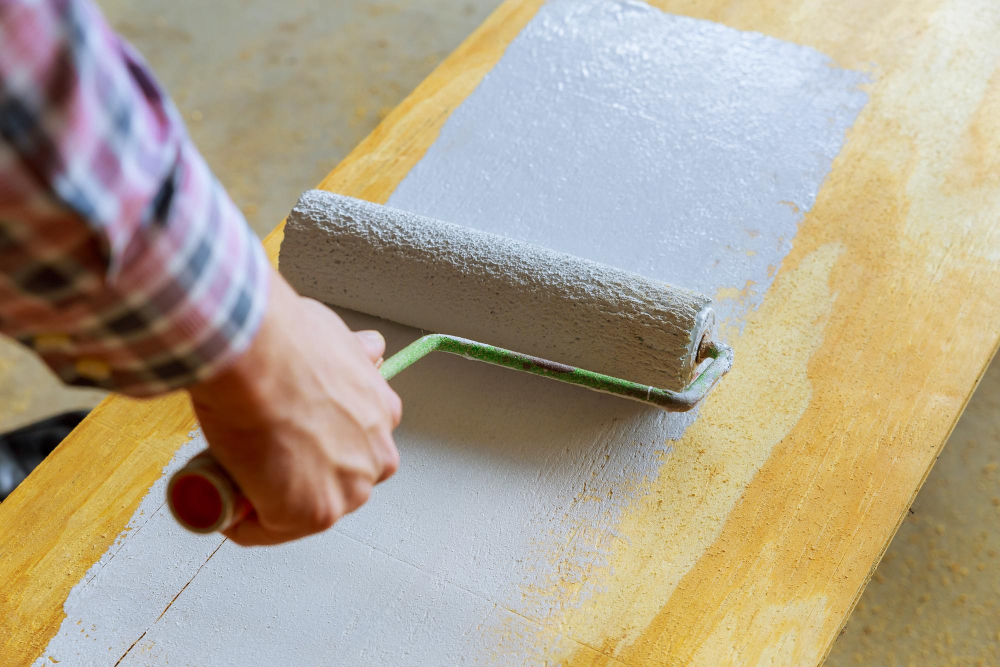
Techniques for Painting Cabinets
Before you grab that paintbrush, let’s explore some techniques that will help ensure a smooth and professional-looking finish.
Firstly, preparation is key. Make sure to clean your cabinets thoroughly and remove any grease or grime that may interfere with adhesion.
Sanding is also crucial as it helps create a rough surface for the paint to adhere to.
Next, consider using a primer before applying your chosen paint color. A primer not only provides better coverage but also helps seal any imperfections on the cabinet surface.
When it comes to actually painting your cabinets, there are two main techniques: brushing and spraying. Brushing involves using a high-quality brush specifically designed for smooth finishes on cabinetry.
This technique allows for more control over application but may result in visible brush strokes if not done carefully.
On the other hand, spraying offers an even and flawless finish when done correctly but requires specialized equipment such as an HVLP (high-volume low-pressure) sprayer or airless sprayer. If you opt for this method, make sure to practice proper technique by maintaining consistent distance from the cabinet surfaces while spraying in steady back-and-forth motions.
Regardless of which technique you choose – brushing or spraying – always remember thin coats are better than thick ones! Applying multiple thin coats allows each layer of paint enough time to dry properly without forming drips or uneven patches.
Lastly, be patient during drying times between coats as rushing can lead to smudging or damage all your hard work so far!
Applying The First Layer of Paint
This step is crucial as it sets the foundation for achieving a smooth and even finish.
Before diving in, make sure you have chosen a high-quality paint specifically formulated for cabinets. Using a brush or roller, start by applying the paint to the cabinet frames and sides using long, even strokes.
Work from top to bottom and be mindful of any drips or excess paint.
Next, move on to painting the cabinet doors and drawers. If possible, remove them beforehand for easier access and better control over your brushstrokes.
When applying paint to doors or drawers with raised panels or intricate details, begin by painting these areas first before moving on to larger flat surfaces. This technique helps ensure that no areas are missed while maintaining an overall consistent look.
Remember that less is often more when it comes to applying paint layers – aim for thin coats rather than thick ones which can lead to drips and uneven drying patterns.
Allow sufficient drying time between each coat as recommended by the manufacturer (usually 24 hours). Patience during this process will pay off with a professional-looking result!
Applying Additional Coats of Paint
Applying multiple coats of paint is essential for achieving a rich and even color that will withstand daily wear and tear.
Before starting with the second coat, make sure that the first coat is completely dry. This usually takes around 24 hours, but check the drying time mentioned on your chosen paint can just to be sure.
Patience is key here as rushing this step can lead to smudges or uneven coverage.
When applying additional coats of paint, use smooth brush strokes or a foam roller in long even motions. Start from one side of each cabinet surface and work your way across systematically until all areas are covered evenly.
Remember not to overload your brush or roller with too much paint as this can result in drips and an uneven application. It’s better to apply thin layers gradually rather than trying to achieve full coverage in one go.
Allow each subsequent coat ample drying time before moving on – typically another 24 hours between each layer should suffice. This waiting period ensures proper adhesion between layers and helps prevent any peeling or chipping down the line.
Depending on factors such as desired opacity, type of wood used for cabinets, and quality of initial primer/sealer applied (if any), you may need anywhere from two up-to-four coats for optimal results. By taking care during this process by allowing sufficient drying times between applications while maintaining consistent strokes throughout painting sessions; you’ll ensure that every inch receives an equal amount attention resulting in beautifully painted kitchen cabinets ready showcase their new color!
Drying and Curing Cabinet Paint

Drying and curing are crucial steps in achieving a professional-looking finish that will withstand daily wear and tear.
After applying the last layer of paint, be patient and resist the temptation to touch or use your cabinets for at least 24 hours. This waiting period allows the paint to dry completely without any disturbances that could potentially ruin all your hard work.
Keep in mind that drying times can vary depending on factors such as humidity levels, temperature, type of paint used, and ventilation in your kitchen. It’s always best to consult the manufacturer’s instructions on drying times specific to the product you’ve chosen.
While waiting for your cabinets’ surface layers of paint to dry is essential, it is equally important not only for aesthetics but also durability purposes – allowing sufficient time for curing. Curing refers specifically to how long it takes for a painted surface like cabinet doors or drawers’ interior surfaces (if applicable) before they reach their maximum hardness level.
Typically speaking though again this may vary based on different paints used; most experts recommend giving painted cabinetry at least one week before reattaching hardware or placing items back inside them fully—this ensures optimal adhesion between layers while minimizing potential damage caused by premature handling during this critical stage.
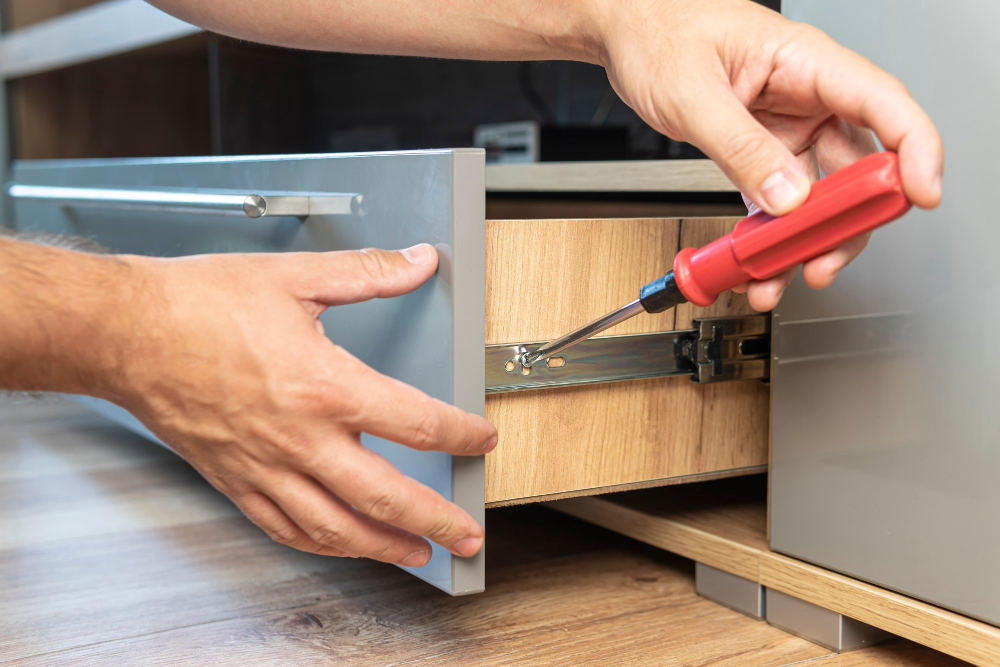
Reattaching Cabinet Doors and Drawers
This final step will bring your kitchen transformation full circle, giving it a polished and finished look.
To begin, gather all the necessary tools such as a screwdriver or drill with appropriate bits. Carefully align each door with its corresponding cabinet frame hinge holes.
Insert the screws provided into these holes while holding the door in place. Use caution not to overtighten as this can strip or damage the wood.
For drawers, ensure that they are properly aligned within their designated slots before attaching them back onto their glides or runners. Most drawer systems use either side-mounted slides or under-mounted slides; refer to your specific hardware instructions for guidance on proper installation.
Take extra care when handling glass-fronted doors during reattachment by using soft cloth gloves or towels for added protection against fingerprints and smudges.
As you go through this process of reattaching cabinet doors and drawers, take a moment to admire how far your kitchen has come since embarking on this color-changing journey! The fresh coat of paint has breathed new life into every nook and cranny of your cooking space – from dullness to vibrancy!
With everything securely in place once again, step back and revel in the beauty of your newly transformed kitchen cabinets. Admire how seamlessly they blend with other elements in the room like countertops, backsplash tiles, flooring – creating an overall cohesive aesthetic that reflects both style preferences & personality!
Tips for Keeping Painted Cabinets Looking New
Here are some valuable tips to help you keep your newly painted cabinets looking new for years to come.
1. Regular Cleaning: Make it a habit to wipe down your cabinets regularly with a soft cloth or sponge dampened with mild soap and water.
This will remove any dirt, grease, or spills that may accumulate over time.
2. Avoid Harsh Cleaners: Stay away from abrasive cleaners or harsh chemicals as they can damage the paint finish on your cabinets.
Stick to gentle cleaning solutions specifically designed for painted surfaces.
3. Handle Cabinets with Care: Be mindful when opening and closing cabinet doors and drawers by using proper handles or knobs instead of pulling on the edges of the paintwork directly.
4. Prevent Moisture Damage: Excessive moisture can cause paint peeling or warping in wooden cabinets over time.
To prevent this, ensure good ventilation in your kitchen while cooking and avoid placing wet items directly onto cabinet surfaces.
- Protect Against Heat Damage: Hot pots, pans, and appliances can potentially damage the paint finish on your cabinets if placed directly onto them without protection such as trivets or heat-resistant mats.
- Touch-Up Paint as Needed: Keep some extra touch-up paint handy so that you can quickly address any minor scratches or chips that may occur during everyday use.
- By following these simple tips for maintaining painted kitchen cabinetry’s pristine appearance,
- you’ll be able to enjoy their beauty long after completing their color transformation journey
Hiring Professionals Vs. DIY for Cabinet Color Change

While DIY can be a rewarding and cost-effective option, it’s essential to consider the level of expertise required for this task.
If you have experience with painting and feel confident in your skills, taking on the cabinet color change as a DIY project can be an exciting challenge. It allows you complete control over every aspect of the process – from selecting colors and finishes to executing each brushstroke.
Plus, by doing it yourself, you may save money that would otherwise go towards hiring professionals.
However, keep in mind that painting kitchen cabinets requires meticulous preparation and attention to detail. If not done correctly, it could result in an uneven finish or paint peeling over time.
If there are any structural issues with your cabinets or if they require extensive repairs before painting (such as fixing loose hinges or replacing damaged wood), professional help might be necessary.
Hiring professionals for cabinet color changes ensures that experienced hands will handle every step of the process efficiently and effectively. They possess specialized knowledge about surface preparation techniques specific to cabinetry materials like wood or laminate surfaces—ensuring a smooth application without any visible brushstrokes.
Moreover.
FAQ
Is it possible to change the color of kitchen cabinets?
Yes, it is possible to change the color of kitchen cabinets by restaining and refinishing them in a new tint, tone, or shade.
What is the cheapest way to change kitchen cabinet color?
The cheapest way to change kitchen cabinet color is to reface them which involves stripping the stain or paint from the existing cabinets and adding new stain, varnish or paint, or refinishing the cabinets with a stick-on veneer.
Is it expensive to change cabinet color?
The cost to change cabinet color is generally between $30 and $60 per linear foot of cabinetry, indicating for a kitchen with 20 linear feet of cabinets, the price could range from $600 to $1,200.
How can I change the color of my wood cabinets?
To change the color of your wood cabinets, apply stain with a cloth or medium-sized paintbrush, allow it to penetrate, wipe off excess, dry completely, and then lightly sand between coats using fine-grit sandpaper.
What is the process for painting kitchen cabinets to change their color?
Process to change color of kitchen cabinets involves removing the doors and hardware, cleaning the surfaces, sanding, priming, and then painting with the chosen color.
Can kitchen cabinet color be changed without sanding?
Yes, kitchen cabinet color can be changed without sanding by using a high-quality primer that adheres well to the original finish.
What types of paint are best for changing kitchen cabinet color?
Acrylic and alkyd are the best types of paint for changing kitchen cabinet color.


